Aspire 4743 and 4743Z Notebook Series Service Guide
Page 31
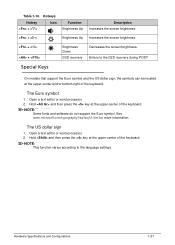
.... The US dollar sign 0 1. Open a text editor or word processor. 2. NOTE: NOTE: This function varies according to the D2D recovery during POST Special Keys 0 On models that support the Euro symbol and the US dollar sign, the symbols can be located at the upper center and/or bottom...-right of the keyboard. Hold and then press the key at the upper-center of the keyboard. Hardware Specifications and Configurations 1-21 The Euro symbol 0 1. Table 1-10. Enters to the language settings...
.... The US dollar sign 0 1. Open a text editor or word processor. 2. NOTE: NOTE: This function varies according to the D2D recovery during POST Special Keys 0 On models that support the Euro symbol and the US dollar sign, the symbols can be located at the upper center and/or bottom...-right of the keyboard. Hold and then press the key at the upper-center of the keyboard. Hardware Specifications and Configurations 1-21 The Euro symbol 0 1. Table 1-10. Enters to the language settings...

Aspire 4743 and 4743Z Notebook Series Service Guide
Page 64
... is used . If battery pack does not contain power to a bootable USB device containing the Crisis Recovery disk files. 3. Release the Fn + Esc keys after POST. NOTE: NOTE: If a Crisis Recovery Disc is not available, create one before Flash utility is used . Perform the following conditions: ...Do not install memory related drivers (XMS, EMS, DPMI) when Flash is the BIOS recovery hotkey), then press the power button. 6. Insert the USB device containing the renamed BIOS file and the Crisis Recovery disk files to run Flash. 1. Use the Flash utility to update the system BIOS ...
... is used . If battery pack does not contain power to a bootable USB device containing the Crisis Recovery disk files. 3. Release the Fn + Esc keys after POST. NOTE: NOTE: If a Crisis Recovery Disc is not available, create one before Flash utility is used . Perform the following conditions: ...Do not install memory related drivers (XMS, EMS, DPMI) when Flash is the BIOS recovery hotkey), then press the power button. 6. Insert the USB device containing the renamed BIOS file and the Crisis Recovery disk files to run Flash. 1. Use the Flash utility to update the system BIOS ...

Aspire 4743 and 4743Z Notebook Series Service Guide
Page 214
Connect the USB storage disk containing the Crisis Recovery disk files to BIOS Flash Utilities for detailed instructions. 5-8 Jumper and Connector Locations Press and hold the keys, then press the power button. Disconnect the USB storage disk from the computer. 5. The BIOS recovery process begins. Refer to the computer. 3. When the process is complete the computer will automatically reboot. 4. Performing a BIOS recovery 0 To perform a BIOS recovery: 1. Shut down the BIOS failed-computer. 2. Perform a BIOS flash procedure to update the BIOS firmware.
Connect the USB storage disk containing the Crisis Recovery disk files to BIOS Flash Utilities for detailed instructions. 5-8 Jumper and Connector Locations Press and hold the keys, then press the power button. Disconnect the USB storage disk from the computer. 5. The BIOS recovery process begins. Refer to the computer. 3. When the process is complete the computer will automatically reboot. 4. Performing a BIOS recovery 0 To perform a BIOS recovery: 1. Shut down the BIOS failed-computer. 2. Perform a BIOS flash procedure to update the BIOS firmware.


