
Acer Aspire 4336 Notebook Series Service Guide
Page 9
... Troubleshooting 139 Common Problems 139 Power On Issue 140 No Display Issue 141 Random Loss of BIOS Settings 142 LCD Failure ...157 Memory 157 BDS & Specific action 158 Each PEIM entry point used in 80_PORT 159 Each Driver entry point used in 80_PORT 159 Each SmmDriver entry point used in 80_PORT 162 Jumper and Connector... (Field Replaceable Unit) List 167 Aspire 4736G/4736Z Series Exploded Diagrams 168 Main Module 168 Aspire 4736G/4736Z Series FRU List 169 Screw List 175 Model Definition and Configuration 176 Aspire 4736G/4736Z Series 176 Test Compatible Components 177 ...
... Troubleshooting 139 Common Problems 139 Power On Issue 140 No Display Issue 141 Random Loss of BIOS Settings 142 LCD Failure ...157 Memory 157 BDS & Specific action 158 Each PEIM entry point used in 80_PORT 159 Each Driver entry point used in 80_PORT 159 Each SmmDriver entry point used in 80_PORT 162 Jumper and Connector... (Field Replaceable Unit) List 167 Aspire 4736G/4736Z Series Exploded Diagrams 168 Main Module 168 Aspire 4736G/4736Z Series FRU List 169 Screw List 175 Model Definition and Configuration 176 Aspire 4736G/4736Z Series 176 Test Compatible Components 177 ...
Acer Aspire 4336 Notebook Series Service Guide
Page 152
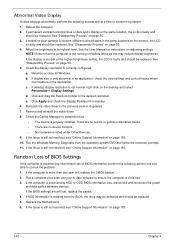
...8226; The device is still not resolved, see "Online Support Information" on page 183. 10. Click Apply and check the display. Roll back the video driver to its highest level. If the Issue is properly installed. See "Disassembly Process" on the desktop and select Personalize´...adjusting settings. See the User Manual for instructions on page 50. 4. If display size is virus free. 3. d. Click and drag the Resolution slider to correct the problem. 1. Remove and reinstall the video driver. 8. If the computer is missing from the operating system DVD and follow...
...8226; The device is still not resolved, see "Online Support Information" on page 183. 10. Click Apply and check the display. Roll back the video driver to its highest level. If the Issue is properly installed. See "Disassembly Process" on the desktop and select Personalize´...adjusting settings. See the User Manual for instructions on page 50. 4. If display size is virus free. 3. d. Click and drag the Resolution slider to correct the problem. 1. Remove and reinstall the video driver. 8. If the computer is missing from the operating system DVD and follow...

Acer Aspire 4336 Notebook Series Service Guide
Page 157
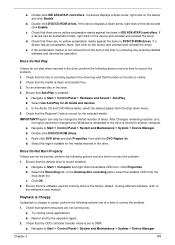
... all external devices. 2. When prompted, press any recently added hardware and associated software. 8. Click Next. The System Recovery Options screen displays. Select the appropriate operating system, and click Next. Restart the computer and press F2 to resolve the problem. 4. Run Windows Check .... insert the Windows Vista Operating System DVD in the ODD and restart the computer. b. c. Click Next. f. NOTE: Click Load Drivers if controller drives are set as the first boot device on page 50. i. Run the Windows Disk Defragmenter. For more information see ...
... all external devices. 2. When prompted, press any recently added hardware and associated software. 8. Click Next. The System Recovery Options screen displays. Select the appropriate operating system, and click Next. Restart the computer and press F2 to resolve the problem. 4. Run Windows Check .... insert the Windows Vista Operating System DVD in the ODD and restart the computer. b. c. Click Next. f. NOTE: Click Load Drivers if controller drives are set as the first boot device on page 50. i. Run the Windows Disk Defragmenter. For more information see ...
Acer Aspire 4336 Notebook Series Service Guide
Page 159
... Maintenance´ System´ Device Manager. b. If a device has an exclamation mark, right-click on the device and uninstall and reinstall the driver. If the exclamation marker is record enabled: a. Check that the media is visible. 2. Check that the disc is correctly seated in the drive... ODD controller transfer mode is enabled: a. Try closing some applications. Chapter 4 149 a. If a device displays a down arrow, right-click on the device and click Enable. If the device displays a down arrow, right-click on the disc is clean and scratch free. 3. Select the region suitable ...
... Maintenance´ System´ Device Manager. b. If a device has an exclamation mark, right-click on the device and uninstall and reinstall the driver. If the exclamation marker is record enabled: a. Check that the media is visible. 2. Check that the disc is correctly seated in the drive... ODD controller transfer mode is enabled: a. Try closing some applications. Chapter 4 149 a. If a device displays a down arrow, right-click on the device and click Enable. If the device displays a down arrow, right-click on the disc is clean and scratch free. 3. Select the region suitable ...


