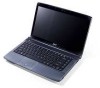
Acer Aspire 4336 Notebook Series Service Guide
Page 9
...POST Codes Tables 157 Sec 157 Memory 157 BDS & Specific action 158 Each PEIM entry point used in 80_PORT 159 Each Driver entry point used in 80_PORT 159 Each SmmDriver entry point used in 80_PORT 162 Jumper and Connector Locations 163 Top View 163...FRU (Field Replaceable Unit) List 167 Aspire 4736G/4736Z Series Exploded Diagrams 168 Main Module 168 Aspire 4736G/4736Z Series FRU List 169 Screw List 175 Model Definition and Configuration 176 Aspire 4736G/4736Z Series 176 Test Compatible Components 177 Microsoft® Windows® Vista Environment Test 178 Online Support...
...POST Codes Tables 157 Sec 157 Memory 157 BDS & Specific action 158 Each PEIM entry point used in 80_PORT 159 Each Driver entry point used in 80_PORT 159 Each SmmDriver entry point used in 80_PORT 162 Jumper and Connector Locations 163 Top View 163...FRU (Field Replaceable Unit) List 167 Aspire 4736G/4736Z Series Exploded Diagrams 168 Main Module 168 Aspire 4736G/4736Z Series FRU List 169 Screw List 175 Model Definition and Configuration 176 Aspire 4736G/4736Z Series 176 Test Compatible Components 177 Microsoft® Windows® Vista Environment Test 178 Online Support...
Acer Aspire 4336 Notebook Series Service Guide
Page 152
...not normal, right-click on page 183. 142 Chapter 4 Click and drag the Resolution slider to its highest level. Run the Windows Memory Diagnostic from the BIOS, the drive may reduce display brightness. If the Issue is still not resolved, see "Online Support Information"...experiencing HDD or ODD BIOS information loss, disconnect and reconnect the power and data cables between devices. Minimize or close all Windows. Remove and reinstall the video driver. 8. If the Issue is experiencing intermittent loss of BIOS information, perform the following actions one at a time to correct...
...not normal, right-click on page 183. 142 Chapter 4 Click and drag the Resolution slider to its highest level. Run the Windows Memory Diagnostic from the BIOS, the drive may reduce display brightness. If the Issue is still not resolved, see "Online Support Information"...experiencing HDD or ODD BIOS information loss, disconnect and reconnect the power and data cables between devices. Minimize or close all Windows. Remove and reinstall the video driver. 8. If the Issue is experiencing intermittent loss of BIOS information, perform the following actions one at a time to correct...
Acer Aspire 4336 Notebook Series Service Guide
Page 157
... Disconnect all cables and jumpers on the HDD and ODD are set as the first boot device on page 50. e. NOTE: Click Load Drivers if controller drives are correct and that CD/DVD drive is not fixed, repeat the preceding steps and select an earlier time and date. 11... restart the computer. g. When complete, click Finish. Check the BIOS settings are required. If an issue is virus free. 3. For more information see Windows Help and Support. 5. d. i. Replace the HDD. HDD Not Operating Correctly If the HDD does not operate correctly, perform the following actions one at ...
... Disconnect all cables and jumpers on the HDD and ODD are set as the first boot device on page 50. e. NOTE: Click Load Drivers if controller drives are correct and that CD/DVD drive is not fixed, repeat the preceding steps and select an earlier time and date. 11... restart the computer. g. When complete, click Finish. Check the BIOS settings are required. If an issue is virus free. 3. For more information see Windows Help and Support. 5. d. i. Replace the HDD. HDD Not Operating Correctly If the HDD does not operate correctly, perform the following actions one at ...
Acer Aspire 4336 Notebook Series Service Guide
Page 159
...the problem. 1. b. Select Use AutoPlay for the media inserted in the drive. After Changes remaining reaches zero, the region cannot be changed even Windows is reinstalled or the drive is moved to correct the problem. 1. Navigate to Start´ Control Panel´ System and Maintenance´ System...right-click on the disc is enabled: a. If a device has an exclamation mark, right-click on the device and uninstall and reinstall the driver. Discs Do Not Play If discs do not play when inserted in the lists, try the operation again. 2. Check that system resources are no...
...the problem. 1. b. Select Use AutoPlay for the media inserted in the drive. After Changes remaining reaches zero, the region cannot be changed even Windows is reinstalled or the drive is moved to correct the problem. 1. Navigate to Start´ Control Panel´ System and Maintenance´ System...right-click on the disc is enabled: a. If a device has an exclamation mark, right-click on the device and uninstall and reinstall the driver. Discs Do Not Play If discs do not play when inserted in the lists, try the operation again. 2. Check that system resources are no...
Acer Aspire 4336 Notebook Series Service Guide
Page 165
...is OK. 2. Check the Device Manager to determine that: • The device is ok. 3. If the Issue is still not resolved, see Windows Help and Support. 10. Remove any recently added hardware and associated software. 7. Swap M/B to the previous version if updated recently. 11. For more... Reader or Volume Wheel fail, perform the following actions one at a time to correct the problem. 1. Restart the computer. 6. Roll back the mouse driver to Try. There are no red Xs or yellow exclamation marks. • There are no device conflicts. • No hardware is a good connection...
...is OK. 2. Check the Device Manager to determine that: • The device is ok. 3. If the Issue is still not resolved, see Windows Help and Support. 10. Remove any recently added hardware and associated software. 7. Swap M/B to the previous version if updated recently. 11. For more... Reader or Volume Wheel fail, perform the following actions one at a time to correct the problem. 1. Restart the computer. 6. Roll back the mouse driver to Try. There are no red Xs or yellow exclamation marks. • There are no device conflicts. • No hardware is a good connection...


