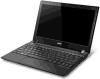
AO756 Right Click - Acer
AO756 Right Click
Related Manual Pages


Similar Questions

Acer Laptop Model Q1vzc Instruction Manual
How do you right click using the mouse on this computer. I have not seen it but a family elderly fri...
How do you right click using the mouse on this computer. I have not seen it but a family elderly fri...
(Posted by lwheeler031163 9 years ago)

Wifi Switch
where can i find the switch to the wifi, it's not working
where can i find the switch to the wifi, it's not working
(Posted by vegasandra 12 years ago)

Keyboard Removal Procedure
Need to replace 1G ram card with new 2G card - existing 1G card and hinged hold down bracket is abou...
Need to replace 1G ram card with new 2G card - existing 1G card and hinged hold down bracket is abou...
(Posted by jackaho 12 years ago)
Related Terms
The following terms were also used when searching for AO756 Right Click - Acer:- acer ao 756
- acer ao756
- acer ao756 4890
- acer ao756 4gb
- acer ao756 6-cell battery
- acer ao756 battery
- acer ao756 battery charger
- acer ao756 best buy
- acer ao756 bios
- acer ao756 bios secure boot
- acer ao756 bios update
- acer ao756 blinking power button
- acer ao756 bluetooth
- acer ao756 bluetooth driver
- acer ao756 camera not found
- acer ao756 celeron 877
- acer ao756 cpu upgrade
- acer ao756 driver
- acer ao756 driver download
- acer ao756 drivers
- acer ao756 drivers windows 7
- acer ao756 ethernet controller driver
- acer ao756 feather blue
- acer ao756 forum
- acer ao756 linux
- acer ao756 manual
- acer ao756 memory
- acer ao756 memory upgrade
- acer ao756 motherboard
- acer ao756 notebook
- acer ao756 parts
- acer ao756 price
- acer ao756 processor upgrade
- acer ao756 ram
- acer ao756 ram upgrade
- acer ao756 recovery
- acer ao756 recovery disk
- acer ao756 review
- acer ao756 reviews
- acer ao756 right click
- acer ao756 spec
- acer ao756 specification
- acer ao756 specs
- acer ao756 ssd
- acer ao756 support
- acer ao756 support sdhc
- acer ao756 target
- acer ao756 touchpad
- acer ao756 touchpad driver
- acer ao756 which touchpad driver
- acer ao756 wifi drivers
- acer ao756 windows 10
- acer ao756 windows 7
- acer ao756 wireless driver
- acer ao756-2641
- acer ao756-4890
- acer ao756-877
- acer aspire one ao756
- ao756 4890
- ao756 6 cell battery
- ao756 6-cell battery
- ao756 877
- ao756 acer
- ao756 acer aspire driver webcam
- ao756 acer driver
- ao756 acer specs
- ao756 battery
- ao756 battery 6 cell
- ao756 battery charger
- ao756 battery life
- ao756 best buy
- ao756 bios
- ao756 bios secure boot
- ao756 bios update
- ao756 blinking power button
- ao756 bluetooth
- ao756 bluetooth driver
- ao756 camera driver
- ao756 camera not found
- ao756 celeron 877
- ao756 cpu upgrade
- ao756 driver
- ao756 driver download
- ao756 drivers
- ao756 drivers windows 7
- ao756 ethernet controller driver
- ao756 feather blue
- ao756 forum
- ao756 linux
- ao756 manual
- ao756 memory
- ao756 memory upgrade
- ao756 motherboard
- ao756 notebook
- ao756 parts
- ao756 price
- ao756 processor upgrade
- ao756 ram
- ao756 ram upgrade
- ao756 recovery
- ao756 recovery disk
- ao756 review
- ao756 reviews
- ao756 right click
- ao756 screen replacement
- ao756 service manual
- ao756 spec
- ao756 specification
- ao756 specs
- ao756 ssd
- ao756 support
- ao756 support sdhc
- ao756 target
- ao756 touchpad
- ao756 touchpad driver
- ao756 which touchpad driver
- ao756 wifi drivers
- ao756 windows 10
- ao756 windows 7
- ao756 wireless driver
- ao756-2641
- ao756-4890