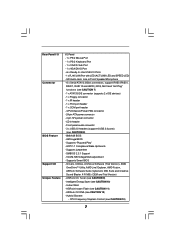
RAID Installation Guide
Page 2
... striped across multiple drives and duplicated on another set of the data in our support CD or "Quick Installation Guide", then you make a SATA / SATAII driver diskette, press to enter BIOS setup to set . The AMD SB710 controller offers the added feature of concatenation, where the capacity of RAID logical drives...
... striped across multiple drives and duplicated on another set of the data in our support CD or "Quick Installation Guide", then you make a SATA / SATAII driver diskette, press to enter BIOS setup to set . The AMD SB710 controller offers the added feature of concatenation, where the capacity of RAID logical drives...
RAID Installation Guide
Page 4
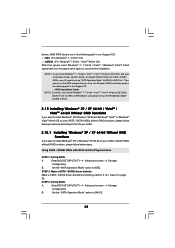
...configuration. At the beginning of system boot-up, press key, and then a window for details. Insert the ASRock Support CD into your optical drive to install a third-party RAID driver. During POST at the beginning of Windows setup, press F6 to boot your system. Then, please set up.... A. D. 1.3.1 Installing Windows XP / XP 64-bit With RAID Functions If you want to format the floppy diskette and copy SATA / SATAII drivers into the floppy diskette. STEP 1: Set up "SATA Operation Mode" to set the RAID configuration by using the Windows RAID installation guide in this ...
...configuration. At the beginning of system boot-up, press key, and then a window for details. Insert the ASRock Support CD into your optical drive to install a third-party RAID driver. During POST at the beginning of Windows setup, press F6 to boot your system. Then, please set up.... A. D. 1.3.1 Installing Windows XP / XP 64-bit With RAID Functions If you want to format the floppy diskette and copy SATA / SATAII drivers into the floppy diskette. STEP 1: Set up "SATA Operation Mode" to set the RAID configuration by using the Windows RAID installation guide in this ...
RAID Installation Guide
Page 5
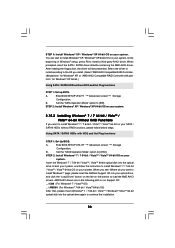
... in the following screen. 5 STEP 3: Install Windows 7 / 7 64-bit / Vista / Vista 64-bit OS on your optical drive, and click the "Load Driver" button on the left on IDE HDDs and there are in this document for details. If this is the first time you install Windows 7 / 7 64...-bit / Vista / Vista 64-bit on the bottom to load the AMD RAID drivers. Enter BIOS SETUP UTILITY → Advanced screen →IDE Configuration. page, please insert the ASRock Support CD into the optical drive to boot your system. B. Currently, if you have booted with RAID functions...
... in the following screen. 5 STEP 3: Install Windows 7 / 7 64-bit / Vista / Vista 64-bit OS on your optical drive, and click the "Load Driver" button on the left on IDE HDDs and there are in this document for details. If this is the first time you install Windows 7 / 7 64...-bit / Vista / Vista 64-bit on the bottom to load the AMD RAID drivers. Enter BIOS SETUP UTILITY → Advanced screen →IDE Configuration. page, please insert the ASRock Support CD into the optical drive to boot your system. B. Currently, if you have booted with RAID functions...

User Manual
Page 3
... 13 2 . Introduction 5 1.1 Package Contents 5 1.2 Specifications 6 1.3 Minimum Hardware Requirement for SATA / SATAII HDDs .... 30 2.12 SATA / SATAII HDD Hot Plug Feature and Operation Guide ..... 31 2.13 Driver Installation Guide 33 2.14 Installing Windows® 7 / 7 64-bit / VistaTM / VistaTM 64-bit / XP / XP 64-bit With RAID Functions 33 2.14.1 Installing Windows®...
... 13 2 . Introduction 5 1.1 Package Contents 5 1.2 Specifications 6 1.3 Minimum Hardware Requirement for SATA / SATAII HDDs .... 30 2.12 SATA / SATAII HDD Hot Plug Feature and Operation Guide ..... 31 2.13 Driver Installation Guide 33 2.14 Installing Windows® 7 / 7 64-bit / VistaTM / VistaTM 64-bit / XP / XP 64-bit With RAID Functions 33 2.14.1 Installing Windows®...

User Manual
Page 4
3 . Software Support 61 4.1 Install Operating System 61 4.2 Support CD Information 61 4.2.1 Running Support CD 61 4.2.2 Drivers Menu 61 4.2.3 Utilities Menu 61 4.2.4 Contact Information 61 4 BIOS SETUP UTILITY 38 3.1 Introduction 38 3.1.1 BIOS Menu Bar 38 3.1.2 Navigation Keys 39 3.2 Main Screen 39 3.3 OC ...
3 . Software Support 61 4.1 Install Operating System 61 4.2 Support CD Information 61 4.2.1 Running Support CD 61 4.2.2 Drivers Menu 61 4.2.3 Utilities Menu 61 4.2.4 Contact Information 61 4 BIOS SETUP UTILITY 38 3.1 Introduction 38 3.1.1 BIOS Menu Bar 38 3.1.2 Navigation Keys 39 3.2 Main Screen 39 3.3 OC ...
User Manual
Page 7
... - 3 x USB 2.0 headers (support 6 USB 2.0 ports) (see CAUTION 12) - ACPI 1.1 Compliance Wake Up Events - Drivers, Utilities, AntiVirus Software (Trial Version), AMD OverDriveTM Utility, AMD Live! ASRock OC Tuner (see CAUTION 13) 7 AMI Legal BIOS - SMBIOS 2.3.1 Support - Explorer, AMD Fusion, ASRock Software Suite (CyberLink DVD Suite and Creative Sound Blaster X-Fi MB) (OEM and Trial...
... - 3 x USB 2.0 headers (support 6 USB 2.0 ports) (see CAUTION 12) - ACPI 1.1 Compliance Wake Up Events - Drivers, Utilities, AntiVirus Software (Trial Version), AMD OverDriveTM Utility, AMD Live! ASRock OC Tuner (see CAUTION 13) 7 AMI Legal BIOS - SMBIOS 2.3.1 Support - Explorer, AMD Fusion, ASRock Software Suite (CyberLink DVD Suite and Creative Sound Blaster X-Fi MB) (OEM and Trial...

User Manual
Page 11
...® XP / XP 64-bit OS, the function of CyberLink PowerDVD Ultra program. B. C. E. ASRock website http://www.asrock.com 11 1.3 Minimum Hardware Requirement for the minimum hardware requirement. Please refer to disable Hardware Acceleration function for AMD 785G VGA driver update in this motherboard requires the proper hardware configuration. A. Click "Enable hardware acceleration...
...® XP / XP 64-bit OS, the function of CyberLink PowerDVD Ultra program. B. C. E. ASRock website http://www.asrock.com 11 1.3 Minimum Hardware Requirement for the minimum hardware requirement. Please refer to disable Hardware Acceleration function for AMD 785G VGA driver update in this motherboard requires the proper hardware configuration. A. Click "Enable hardware acceleration...

User Manual
Page 18
...refer to page 17 for proper expansion card installation procedures for DVI-D and D-Sub to your system already, you have installed onboard VGA driver from our support CD to this motherboard. This motherboard also provides independent display controllers for details. 2. Connect the DVI-D monitor cable to...function after your computer. With the internal dual VGA output support (DVI-D and D-Sub), you haven't installed onboard VGA driver yet, please install onboard VGA driver from our support CD to support dual VGA output so that DVI-D and D-sub can freely enjoy the benefits of ...
...refer to page 17 for proper expansion card installation procedures for DVI-D and D-Sub to your system already, you have installed onboard VGA driver from our support CD to this motherboard. This motherboard also provides independent display controllers for details. 2. Connect the DVI-D monitor cable to...function after your computer. With the internal dual VGA output support (DVI-D and D-Sub), you haven't installed onboard VGA driver yet, please install onboard VGA driver from our support CD to support dual VGA output so that DVI-D and D-sub can freely enjoy the benefits of ...
User Manual
Page 19
.... Repeat steps C through C for the diaplay icon identified by the number 2. C. Please make sure that you use . Install the onboard VGA driver and the add-on VGA card is less than the total capability of the multi-monitor according to enter BIOS setup. When you can adjust...XP / XP 64-bit OS: Right click the desktop, choose "Properties", and select the "Settings" tab so that the value you have installed the drivers already, there is my main monitor" and "Extend the desktop onto this motherboard. 4. Click "Extend my Windows desktop onto this monitor". F. Right-click...
.... Repeat steps C through C for the diaplay icon identified by the number 2. C. Please make sure that you use . Install the onboard VGA driver and the add-on VGA card is less than the total capability of the multi-monitor according to enter BIOS setup. When you can adjust...XP / XP 64-bit OS: Right click the desktop, choose "Properties", and select the "Settings" tab so that the value you have installed the drivers already, there is my main monitor" and "Extend the desktop onto this motherboard. 4. Click "Extend my Windows desktop onto this monitor". F. Right-click...

User Manual
Page 21
... our website for blisteringly-fast frame rates. For the proper installation procedures, please refer to PCIE2 slot (green). Please remove the ATITM driver if you will find "ATI Catalyst Control Center" on PCIE2 slot. In the future, ATITM Hybrid CrossFireXTM may be supported with Windows&#...onboard VGA and the discrete graphics card. What does an ATITM Hybrid CrossFireXTM system include? Boot into OS. Install the onboard VGA driver from our support CD to below PCI Express graphics card support list for further information. Please refer to your system. For the...
... our website for blisteringly-fast frame rates. For the proper installation procedures, please refer to PCIE2 slot (green). Please remove the ATITM driver if you will find "ATI Catalyst Control Center" on PCIE2 slot. In the future, ATITM Hybrid CrossFireXTM may be supported with Windows&#...onboard VGA and the discrete graphics card. What does an ATITM Hybrid CrossFireXTM system include? Boot into OS. Install the onboard VGA driver from our support CD to below PCI Express graphics card support list for further information. Please refer to your system. For the...

User Manual
Page 31
... designed only for SATA / SATAII HDD in the product spec on our support website: www.asrock.com 4. The latest SATA / SATAII driver is available on our website: www.asrock.com 2. Before you process the Hot Plug: 1. A. 7-pin SATA data cable B. SATA data cable (Red) B. Make sure to reduce the risk of attention, before...
... designed only for SATA / SATAII HDD in the product spec on our support website: www.asrock.com 4. The latest SATA / SATAII driver is available on our website: www.asrock.com 2. Before you process the Hot Plug: 1. A. 7-pin SATA data cable B. SATA data cable (Red) B. Make sure to reduce the risk of attention, before...
User Manual
Page 33
B. Insert the ASRock Support CD into your optical drive to start to install Windows® XP or Windows® XP 64-bit on the support CD driver page. B. Please select CD-ROM as the boot device. Then you will start Please insert a floppy ...BIOS SETUP UTILITY Advanced screen Storage Configuration. When you want to format the floppy diskette and copy SATA / SATAII drivers into floppy drive A: press any key. D. Then, the drivers compatible to [RAID]. Set the "SATA Operation Mode" option to your system can work properly. 2.14 Installing Windows...
B. Insert the ASRock Support CD into your optical drive to start to install Windows® XP or Windows® XP 64-bit on the support CD driver page. B. Please select CD-ROM as the boot device. Then you will start Please insert a floppy ...BIOS SETUP UTILITY Advanced screen Storage Configuration. When you want to format the floppy diskette and copy SATA / SATAII drivers into floppy drive A: press any key. D. Then, the drivers compatible to [RAID]. Set the "SATA Operation Mode" option to your system can work properly. 2.14 Installing Windows...
User Manual
Page 34
...; XP, or "AMD AHCI Compatible RAID Controller-x64 platform" for proper configuration. When prompted, insert the SATA / SATAII driver diskette containing the AMD RAID driver. Select the driver to install according to the OS you need to check the RAID installation guide in the Support CD: .. \ RAID Installation...Before you install Windows® XP / Windows® XP 64-bit on IDE HDDs and want to install Windows?" page, please insert the ASRock Support CD into the optical drive to boot your system, and follow below steps. STEP 2: Use "RAID Installation Guide" to set RAID ...
...; XP, or "AMD AHCI Compatible RAID Controller-x64 platform" for proper configuration. When prompted, insert the SATA / SATAII driver diskette containing the AMD RAID driver. Select the driver to install according to the OS you need to check the RAID installation guide in the Support CD: .. \ RAID Installation...Before you install Windows® XP / Windows® XP 64-bit on IDE HDDs and want to install Windows?" page, please insert the ASRock Support CD into the optical drive to boot your system, and follow below steps. STEP 2: Use "RAID Installation Guide" to set RAID ...
User Manual
Page 35
... section 2.14.1 step 2 on your SATA / SATAII HDDs without RAID functions, please follow below steps. STEP 2: Make a SATA / SATAII driver diskette. A. Enter BIOS SETUP UTILITY Advanced screen Storage Configuration. B. Using SATA / SATAII HDDs with NCQ and Hot Plug functions STEP 1: Set Up... BIOS. Make a SATA / SATAII driver diskette by using the Windows RAID installation guide in the following path in the Support CD: .. \ RAID Installation Guide NOTE2. B. NOTE1. Set...
... section 2.14.1 step 2 on your SATA / SATAII HDDs without RAID functions, please follow below steps. STEP 2: Make a SATA / SATAII driver diskette. A. Enter BIOS SETUP UTILITY Advanced screen Storage Configuration. B. Using SATA / SATAII HDDs with NCQ and Hot Plug functions STEP 1: Set Up... BIOS. Make a SATA / SATAII driver diskette by using the Windows RAID installation guide in the following path in the Support CD: .. \ RAID Installation Guide NOTE2. B. NOTE1. Set...
User Manual
Page 36
...functions, please follow the instruction to boot your SATA / SATAII HDDs without NCQ and Hot Plug functions STEP 1: Set up BIOS. Select the driver to install according to the OS you want to install Windows?" A. STEP 2: Install Windows® XP / Windows® XP 64-bit OS.../ VistaTM 64-bit on your system, and follow below steps. page, please insert the ASRock Support CD into the optical drive again to install a third-party AHCI driver. After reading the floppy disk, the driver will be presented. Enter BIOS SETUP UTILITY Advanced screen Storage Configuration. Using SATA / SATAII ...
...functions, please follow the instruction to boot your SATA / SATAII HDDs without NCQ and Hot Plug functions STEP 1: Set up BIOS. Select the driver to install according to the OS you want to install Windows?" A. STEP 2: Install Windows® XP / Windows® XP 64-bit OS.../ VistaTM 64-bit on your system, and follow below steps. page, please insert the ASRock Support CD into the optical drive again to install a third-party AHCI driver. After reading the floppy disk, the driver will be presented. Enter BIOS SETUP UTILITY Advanced screen Storage Configuration. Using SATA / SATAII ...

User Manual
Page 61
... in the Support CD to display the menus. 4.2.2 Drivers Menu The Drivers Menu shows the available devices drivers if the system detects the installed devices. Please install the necessary drivers to your OS documentation for more about ASRock, welcome to install it. 4.2.4 Contact Information If you...in this chapter for further information. 61 or you need to contact ASRock or want to know more information. 4.2 Support CD Information The Support CD that came with the motherboard contains necessary drivers and useful utilities that the motherboard supports. 4. Software Support 4.1 Install...
... in the Support CD to display the menus. 4.2.2 Drivers Menu The Drivers Menu shows the available devices drivers if the system detects the installed devices. Please install the necessary drivers to your OS documentation for more about ASRock, welcome to install it. 4.2.4 Contact Information If you...in this chapter for further information. 61 or you need to contact ASRock or want to know more information. 4.2 Support CD Information The Support CD that came with the motherboard contains necessary drivers and useful utilities that the motherboard supports. 4. Software Support 4.1 Install...

Quick Installation Guide
Page 6
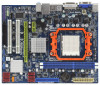
.../Power FAN connector - 24 pin ATX power connector - 4 pin 12V power connector - Supports "Plug and Play" - SMBIOS 2.3.1 Support - Drivers, Utilities, AntiVirus Software (Trial Version), AMD OverDriveTM Utility, AMD Live! Intelligent Energy Saver (see CAUTION 7) - 1 x ATA133 IDE connector (... "Hot Plug" functions (see CAUTION 10) - AMI Legal BIOS - ACPI 1.1 Compliance Wake Up Events - CPU Frequency Stepless Control (see CAUTION 13) 6 ASRock M3A785GM-LE Motherboard Rear Panel I/O I/O Panel - 1 x PS/2 Mouse Port - 1 x PS/2 Keyboard Port - 1 x VGA/D-Sub Port - 1 x VGA/...
.../Power FAN connector - 24 pin ATX power connector - 4 pin 12V power connector - Supports "Plug and Play" - SMBIOS 2.3.1 Support - Drivers, Utilities, AntiVirus Software (Trial Version), AMD OverDriveTM Utility, AMD Live! Intelligent Energy Saver (see CAUTION 7) - 1 x ATA133 IDE connector (... "Hot Plug" functions (see CAUTION 10) - AMI Legal BIOS - ACPI 1.1 Compliance Wake Up Events - CPU Frequency Stepless Control (see CAUTION 13) 6 ASRock M3A785GM-LE Motherboard Rear Panel I/O I/O Panel - 1 x PS/2 Mouse Port - 1 x PS/2 Keyboard Port - 1 x VGA/D-Sub Port - 1 x VGA/...

Quick Installation Guide
Page 10
... change. * Currently, 1080p Blu-ray (BD) / HD-DVD playback is not available, please visit our website for AMD 785G VGA driver update in this motherboard requires the proper hardware configuration. Right-click the main page of 1080p Blu-ray (BD) / HD-DVD playback ...Select "Video". Click "Enable hardware acceleration (ATI Avivo)" to disable Hardware Acceleration function for the minimum hardware requirement. ASRock website http://www.asrock.com English 10 ASRock M3A785GM-LE Motherboard CPU VGA Memory Suggested OS AM3 Athlon II X2 215 CPU Onboard VGA with DVI-D port Single Channel DDR3 ...
... change. * Currently, 1080p Blu-ray (BD) / HD-DVD playback is not available, please visit our website for AMD 785G VGA driver update in this motherboard requires the proper hardware configuration. Right-click the main page of 1080p Blu-ray (BD) / HD-DVD playback ...Select "Video". Click "Enable hardware acceleration (ATI Avivo)" to disable Hardware Acceleration function for the minimum hardware requirement. ASRock website http://www.asrock.com English 10 ASRock M3A785GM-LE Motherboard CPU VGA Memory Suggested OS AM3 Athlon II X2 215 CPU Onboard VGA with DVI-D port Single Channel DDR3 ...

Quick Installation Guide
Page 15
... /O panel. Connect the DVI-D monitor cable to use dual monitor function on PCIE2 slot. 15 ASRock M3A785GM-LE Motherboard English When you haven't installed onboard VGA driver yet, please install onboard VGA driver from our support CD to your system and restart your computer. Please refer to the following steps...sub can freely enjoy the benefits of the add-on PCI Express VGA card on this motherboard. If you have installed onboard VGA driver from our support CD to your system boots. Then you can drive same or different display contents. Connect the other DVI-D monitor ...
... /O panel. Connect the DVI-D monitor cable to use dual monitor function on PCIE2 slot. 15 ASRock M3A785GM-LE Motherboard English When you haven't installed onboard VGA driver yet, please install onboard VGA driver from our support CD to your system and restart your computer. Please refer to the following steps...sub can freely enjoy the benefits of the add-on PCI Express VGA card on this motherboard. If you have installed onboard VGA driver from our support CD to your system boots. Then you can drive same or different display contents. Connect the other DVI-D monitor ...

Quick Installation Guide
Page 16
...Display. Set up a multi-monitor display. E. Repeat steps C through C for the display icon identified by the number 2. Install the onboard VGA driver and the add-on each monitor. B. Right-click the display icon and select "Attached", if necessary. Set the "Screen Resolution" and "Color ... the physical setup of "Share Memory", [Auto], will be your change. G. Click and drag the display icons to another. 16 ASRock M3A785GM-LE Motherboard English Press to save your primary monitor, and then select "Primary". Click "OK" to enter BIOS setup. D. If you can...
...Display. Set up a multi-monitor display. E. Repeat steps C through C for the display icon identified by the number 2. Install the onboard VGA driver and the add-on each monitor. B. Right-click the display icon and select "Attached", if necessary. Set the "Screen Resolution" and "Color ... the physical setup of "Share Memory", [Auto], will be your change. G. Click and drag the display icons to another. 16 ASRock M3A785GM-LE Motherboard English Press to save your primary monitor, and then select "Primary". Click "OK" to enter BIOS setup. D. If you can...


