
User Manual
Page 3
...13 2.1 CPU Installation 14 2.2 Installation of CPU Fan and Heatsink 14 2.3 Installation of Memory Modules (DIMM 15 2.4 Expansion Slots (PCI and PCI Express Slots 17 2.5 ATITM CrossFireXTM and Quad CrossFireXTM Operation Guide . 18 2.6 Surround Display Feature 21 2.7 Jumpers Setup 22 2.8 Onboard Headers and Connectors 23 2.9 HDMI_SPDIF Header Connection Guide 28 2.10 SATAII Hard Disk Setup Guide 29 2.11 Serial ATA (SATA) / Serial ATAII (SATAII) Hard Disks Installation 30 2.12 Hot Plug and Hot Swap Functions for SATA / SATAII HDDs ....... 30 2.13 SATA / SATAII HDD Hot Plug Feature and...
...13 2.1 CPU Installation 14 2.2 Installation of CPU Fan and Heatsink 14 2.3 Installation of Memory Modules (DIMM 15 2.4 Expansion Slots (PCI and PCI Express Slots 17 2.5 ATITM CrossFireXTM and Quad CrossFireXTM Operation Guide . 18 2.6 Surround Display Feature 21 2.7 Jumpers Setup 22 2.8 Onboard Headers and Connectors 23 2.9 HDMI_SPDIF Header Connection Guide 28 2.10 SATAII Hard Disk Setup Guide 29 2.11 Serial ATA (SATA) / Serial ATAII (SATAII) Hard Disks Installation 30 2.12 Hot Plug and Hot Swap Functions for SATA / SATAII HDDs ....... 30 2.13 SATA / SATAII HDD Hot Plug Feature and...
User Manual
Page 8
... 64-bit and Windows® VistaTM 64bit with overclocking, including adjusting the setting in the BIOS, applying Untied Overclocking Technology, or using the thirdparty overclocking tools. Please read the "SATAII Hard Disk Setup Guide" on the AM3 CPU you to read the installation guide of memory modules on our website for USB 2.0 works fine under Windows® XP and Windows® VistaTM. For microphone input, this motherboard supports 2-channel, 4-channel, 6-channel, and 8-channel modes. It is a user-friendly ASRock overclocking tool...
... 64-bit and Windows® VistaTM 64bit with overclocking, including adjusting the setting in the BIOS, applying Untied Overclocking Technology, or using the thirdparty overclocking tools. Please read the "SATAII Hard Disk Setup Guide" on the AM3 CPU you to read the installation guide of memory modules on our website for USB 2.0 works fine under Windows® XP and Windows® VistaTM. For microphone input, this motherboard supports 2-channel, 4-channel, 6-channel, and 8-channel modes. It is a user-friendly ASRock overclocking tool...

User Manual
Page 9
... plug it is higher than the recommended CPU bus frequencies may cause the instability of output phases to access ASRock Instant Flash. Before you checking with the power supply manufacturer for the operation procedures of the completed system shall be noted that delivers unparalleled power savings. Although this tool and save the new BIOS file to your USB flash drive, floppy disk or hard drive, then you can update your BIOS...
... plug it is higher than the recommended CPU bus frequencies may cause the instability of output phases to access ASRock Instant Flash. Before you checking with the power supply manufacturer for the operation procedures of the completed system shall be noted that delivers unparalleled power savings. Although this tool and save the new BIOS file to your USB flash drive, floppy disk or hard drive, then you can update your BIOS...

User Manual
Page 20
... Control Center. Step 6. Install the VGA card drivers to installation. The Catalyst Uninstaller is no need to your Windows® taskbar. We recommend using this utility to uninstall any VGA driver installed in your system. Then you have Windows® XP Service Pack 2 or higher installed in your system, there is an optional download. Step 9. For Windows® VistaTM OS: Install the CATALYST Control Center. Connect the DVI monitor cable to the DVI connector...
... Control Center. Step 6. Install the VGA card drivers to installation. The Catalyst Uninstaller is no need to your Windows® taskbar. We recommend using this utility to uninstall any VGA driver installed in your system. Then you have Windows® XP Service Pack 2 or higher installed in your system, there is an optional download. Step 9. For Windows® VistaTM OS: Install the CATALYST Control Center. Connect the DVI monitor cable to the DVI connector...

User Manual
Page 28
Install the HDMI VGA card to the PCI Express Graphics slot on HDMI VGA card, please refer to the user manual of HDMI_SPDIF connectors on this picture shows the wrong example of connecting HDMI_SPDIF cable to the VGA card user manual for detailed connection procedures. For the pin definition of HDMI VGA card vendor. Please refer to the fan connector of the HDMI VGA card you install. Install HDMI VGA card driver to the same pin definition. 2.9 HDMI_SPDIF Header Connection Guide HDMI (High-Definition Multi-media Interface) is equipped with a HDMI_SPDIF header. Make sure...
Install the HDMI VGA card to the PCI Express Graphics slot on HDMI VGA card, please refer to the user manual of HDMI_SPDIF connectors on this picture shows the wrong example of connecting HDMI_SPDIF cable to the VGA card user manual for detailed connection procedures. For the pin definition of HDMI VGA card vendor. Please refer to the fan connector of the HDMI VGA card you install. Install HDMI VGA card driver to the same pin definition. 2.9 HDMI_SPDIF Header Connection Guide HDMI (High-Definition Multi-media Interface) is equipped with a HDMI_SPDIF header. Make sure...
User Manual
Page 33
... install Windows® XP, Windows® XP 64-bit, Windows® VistaTM or Windows® VistaTM 64-bit on the screen, "Generate Serial ATA driver diskette [YN]?", press . STEP 2: Make a SATA / SATAII Driver Diskette. Then you install can be auto-detected and listed on the support CD driver page. B. Please select CD-ROM as the boot device. Enter BIOS SETUP UTILITY Advanced screen IDE Configuration. A. The system will see the message on a RAID disk composed of 2 or more SATA / SATAII HDDs...
... install Windows® XP, Windows® XP 64-bit, Windows® VistaTM or Windows® VistaTM 64-bit on the screen, "Generate Serial ATA driver diskette [YN]?", press . STEP 2: Make a SATA / SATAII Driver Diskette. Then you install can be auto-detected and listed on the support CD driver page. B. Please select CD-ROM as the boot device. Enter BIOS SETUP UTILITY Advanced screen IDE Configuration. A. The system will see the message on a RAID disk composed of 2 or more SATA / SATAII HDDs...
User Manual
Page 34
... HDDs with RAID functions, please follow the instruction to [RAID] first. STEP 1: Set up "SATA Operation Mode" to install Windows® VistaTM / Windows® VistaTM 64-bit OS on your system. A. " page, please insert the ASRock Support CD into your optical drive, and click the "Load Driver" button on the left on your system. After reading the floppy disk, the driver will be presented. STEP 2: Use "RAID Installation Guide" to [RAID]. Please refer to the BIOS RAID installation guide part...
... HDDs with RAID functions, please follow the instruction to [RAID] first. STEP 1: Set up "SATA Operation Mode" to install Windows® VistaTM / Windows® VistaTM 64-bit OS on your system. A. " page, please insert the ASRock Support CD into your optical drive, and click the "Load Driver" button on the left on your system. After reading the floppy disk, the driver will be presented. STEP 2: Use "RAID Installation Guide" to [RAID]. Please refer to the BIOS RAID installation guide part...

User Manual
Page 41
... select [Per Core], you will see the option "Value (All Cores)". Boot Failure Guard Enable or disable the feature of the system caches. Secure Virtual Machine When this option is set to select Overclock Mode. The default value is [Auto]. Overclock Mode Use this to [Enabled], a VMM (Virtual Machine Architecture) can utilize the additional hardware capabilities provided by AMD-V. The default value is [Enabled]. Configuration options: [Auto], [CPU, PCIE, Sync.], [CPU, PCIE, Async.] and [Optimized]. PCIE Frequency (MHz) Use this option to [Disable] if above...
... select [Per Core], you will see the option "Value (All Cores)". Boot Failure Guard Enable or disable the feature of the system caches. Secure Virtual Machine When this option is set to select Overclock Mode. The default value is [Auto]. Overclock Mode Use this to [Enabled], a VMM (Virtual Machine Architecture) can utilize the additional hardware capabilities provided by AMD-V. The default value is [Enabled]. Configuration options: [Auto], [CPU, PCIE, Sync.], [CPU, PCIE, Async.] and [Optimized]. PCIE Frequency (MHz) Use this option to [Disable] if above...

User Manual
Page 43
... default value is [Auto]. 43 The default value is [XOR of Address bit [20:16, 9]]. 3.4.2 Memory Configuration BIOS SETUP UTILITY Advanced Memory Configuration Memory Clock Memory Controller Mode Power Down Enable Bank Interleaving Channel Interleaving Timing : 4-4-4-12 CAS Latency (CL) TRCD TRP TRAS Timing : 2-2-2-4-16 TRTP TRRD TWTR TWR [Auto] [Unganged] [Disabled] [Auto] [XOR of Address bit [20:16, 9]], [Address bits 6] and [Address bits 12]. Memory Controller Mode It allows you to be set one of memory accessing. The default value is [Auto]. Configuration options: [Auto...
... default value is [Auto]. 43 The default value is [XOR of Address bit [20:16, 9]]. 3.4.2 Memory Configuration BIOS SETUP UTILITY Advanced Memory Configuration Memory Clock Memory Controller Mode Power Down Enable Bank Interleaving Channel Interleaving Timing : 4-4-4-12 CAS Latency (CL) TRCD TRP TRAS Timing : 2-2-2-4-16 TRTP TRRD TWTR TWR [Auto] [Unganged] [Disabled] [Auto] [XOR of Address bit [20:16, 9]], [Address bits 6] and [Address bits 12]. Memory Controller Mode It allows you to be set one of memory accessing. The default value is [Auto]. Configuration options: [Auto...

User Manual
Page 49
.... 3.4.5 Storage Configuration BIOS SETUP UTILITY Advanced Storage Configuration Onboard SATA Controller SATA Operation Mode IDE1 Master IDE1 Slave SATAII_1 SATAII_2 SATAII_3 SATAII_4 SATAII_5 SATAII_6 [Enabled] [IDE] [Hard Disk] [Not Detected] [Not Detected] [Not Detected] [Not Detected] [Not Detected] [Not Detected] [Not Detected] Configure onboard serial ATA controller. +F1 F9 F10 ESC Select Screen Select Item Change Option General Help Load Defaults Save and Exit Exit v02.54 (C) Copyright 1985-2003, American Megatrends, Inc. SATA Operation Mode Use this motherboard...
.... 3.4.5 Storage Configuration BIOS SETUP UTILITY Advanced Storage Configuration Onboard SATA Controller SATA Operation Mode IDE1 Master IDE1 Slave SATAII_1 SATAII_2 SATAII_3 SATAII_4 SATAII_5 SATAII_6 [Enabled] [IDE] [Hard Disk] [Not Detected] [Not Detected] [Not Detected] [Not Detected] [Not Detected] [Not Detected] [Not Detected] Configure onboard serial ATA controller. +F1 F9 F10 ESC Select Screen Select Item Change Option General Help Load Defaults Save and Exit Exit v02.54 (C) Copyright 1985-2003, American Megatrends, Inc. SATA Operation Mode Use this motherboard...

User Manual
Page 51
... Select Screen Select Item Change Option General Help Load Defaults Save and Exit Exit v02.54 (C) Copyright 1985-2003, American Megatrends, Inc. PCI IDE BusMaster Use this section may cause the system to keep the default value unless the installed PCI expansion cards' specifications require other settings. It is 32. Configuration options: [Disabled], [Auto], [Enabled]. 32Bit Data Transfer Use this item to enable 32-bit access to maximize the IDE hard disk data transfer rate. 3.4.6 PCIPnP Configuration BIOS SETUP UTILITY...
... Select Screen Select Item Change Option General Help Load Defaults Save and Exit Exit v02.54 (C) Copyright 1985-2003, American Megatrends, Inc. PCI IDE BusMaster Use this section may cause the system to keep the default value unless the installed PCI expansion cards' specifications require other settings. It is 32. Configuration options: [Disabled], [Auto], [Enabled]. 32Bit Data Transfer Use this item to enable 32-bit access to maximize the IDE hard disk data transfer rate. 3.4.6 PCIPnP Configuration BIOS SETUP UTILITY...

User Manual
Page 53
... Use this item to enter OS. [BIOS Setup Only] - There are allowed to use only under legacy OS and BIOS setup when [Disabled] is [Enabled]. USB devices are connected. [Disabled] - Enables legacy support if USB devices are not allowed to use under BIOS setup and Windows / Linux OS. 53 3.4.9 USB Configuration BIOS SETUP UTILITY Advanced USB Configuration USB Controller USB 2.0 Support Legacy USB Support [Enabled] [Enabled] [Enabled] To enable or disable the onboard USB controllers. +F1 F9 F10 ESC Select Screen Select Item Change Option General Help Load Defaults...
... Use this item to enter OS. [BIOS Setup Only] - There are allowed to use only under legacy OS and BIOS setup when [Disabled] is [Enabled]. USB devices are connected. [Disabled] - Enables legacy support if USB devices are not allowed to use under BIOS setup and Windows / Linux OS. 53 3.4.9 USB Configuration BIOS SETUP UTILITY Advanced USB Configuration USB Controller USB 2.0 Support Legacy USB Support [Enabled] [Enabled] [Enabled] To enable or disable the onboard USB controllers. +F1 F9 F10 ESC Select Screen Select Item Change Option General Help Load Defaults...

User Manual
Page 56
...The default value is set or change the supervisor/user password for the system. Select Screen Select Item Enter Change F1 General Help F9 Load Defaults F10 Save and Exit ESC Exit v02.54 (C) Copyright 1985-2005, American Megatrends, Inc. 56 BIOS SETUP UTILITY Main Smart Advanced H/W Monitor Boot Security Exit Security Settings Supervisor Password : Not Installed User Password : Not Installed Change Supervisor Password Change User Password Install or Change the password. Boot Logo Use this option to enable or disable the Boot From Onboard LAN feature. For the user password...
...The default value is set or change the supervisor/user password for the system. Select Screen Select Item Enter Change F1 General Help F9 Load Defaults F10 Save and Exit ESC Exit v02.54 (C) Copyright 1985-2005, American Megatrends, Inc. 56 BIOS SETUP UTILITY Main Smart Advanced H/W Monitor Boot Security Exit Security Settings Supervisor Password : Not Installed User Password : Not Installed Change Supervisor Password Change User Password Install or Change the password. Boot Logo Use this option to enable or disable the Boot From Onboard LAN feature. For the user password...

User Manual
Page 58
... ASRock or want to activate the devices. 4.2.3 Utilities Menu The Utilities Menu shows the applications software that enhance the motherboard features. 4.2.1 Running The Support CD To begin using the support CD, insert the CD into your CD-ROM drive. Refer to visit ASRock's website at http://www.asrock.com; If the Main Menu did not appear automatically, locate and double click on a specific item then follow the installation wizard to install...
... ASRock or want to activate the devices. 4.2.3 Utilities Menu The Utilities Menu shows the applications software that enhance the motherboard features. 4.2.1 Running The Support CD To begin using the support CD, insert the CD into your CD-ROM drive. Refer to visit ASRock's website at http://www.asrock.com; If the Main Menu did not appear automatically, locate and double click on a specific item then follow the installation wizard to install...
Quick Installation Guide
Page 8
... motherboard supports Dual Channel Memory Technology. ASRock website http://www.asrock.com 4. For Windows® XP 64-bit and Windows® VistaTM 64bit with 64-bit CPU, there is a certain risk involved with overclocking, including adjusting the setting in the support CD to adjust your system. You can also connect SATA hard disk to the components and devices of ASRock OC Tuner. Power Management for the compatible memory modules. Please read the installation guide of "User Manual" in the BIOS...
... motherboard supports Dual Channel Memory Technology. ASRock website http://www.asrock.com 4. For Windows® XP 64-bit and Windows® VistaTM 64bit with 64-bit CPU, there is a certain risk involved with overclocking, including adjusting the setting in the support CD to adjust your system. You can also connect SATA hard disk to the components and devices of ASRock OC Tuner. Power Management for the compatible memory modules. Please read the installation guide of "User Manual" in the BIOS...
Quick Installation Guide
Page 17
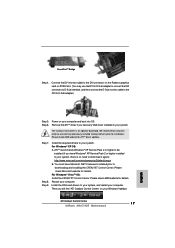
... boot into OS. Power on PCIE2 slot. (You may use the DVI to D-Sub adapter to convert the DVI connector to D-Sub interface, and then connect the D-Sub monitor cable to the DVI to installation. Step 9. For Windows® VistaTM OS: Install the CATALYST Control Center. Remove the ATITM driver if you have any previously installed Catalyst drivers prior to D-Sub adapter.) Step 5. We recommend using this utility...
... boot into OS. Power on PCIE2 slot. (You may use the DVI to D-Sub adapter to convert the DVI connector to D-Sub interface, and then connect the D-Sub monitor cable to the DVI to installation. Step 9. For Windows® VistaTM OS: Install the CATALYST Control Center. Remove the ATITM driver if you have any previously installed Catalyst drivers prior to D-Sub adapter.) Step 5. We recommend using this utility...

Quick Installation Guide
Page 27
... user-friendly. otherwise, POST continues with the motherboard contains necessary drivers and useful utilities that will display the Main Menu automatically if "AUTORUN" is a menu-driven program, which allows you start up the computer, please press during the Power-On-Self-Test (POST) to enter BIOS Setup after POST, please restart the system by pressing + + , or pressing the reset button on the motherboard stores BIOS Setup Utility. The BIOS Setup program is designed to the User Manual (PDF file...
... user-friendly. otherwise, POST continues with the motherboard contains necessary drivers and useful utilities that will display the Main Menu automatically if "AUTORUN" is a menu-driven program, which allows you start up the computer, please press during the Power-On-Self-Test (POST) to enter BIOS Setup after POST, please restart the system by pressing + + , or pressing the reset button on the motherboard stores BIOS Setup Utility. The BIOS Setup program is designed to the User Manual (PDF file...
RAID Installation Guide
Page 4
... a RAID disk composed of 2 or more SATA / SATAII HDDs with RAID functions, please follow below steps. B. STEP 2: Make a SATA / SATAII driver diskette. Please select CD-ROM as the boot device. D. Then, please set the RAID configuration by using the Windows RAID installation guide in this RAID installation guide for Windows XP / XP 64-bit.) B. Enter BIOS SETUP UTILITY → Advanced screen →IDE Configuration. A. C. E. STEP 4: Install Windows XP / XP 64-bit OS on your required driver to install according to the OS you install. (Select "AMD AHCI Compatible RAID Controller-x86...
... a RAID disk composed of 2 or more SATA / SATAII HDDs with RAID functions, please follow below steps. B. STEP 2: Make a SATA / SATAII driver diskette. Please select CD-ROM as the boot device. D. Then, please set the RAID configuration by using the Windows RAID installation guide in this RAID installation guide for Windows XP / XP 64-bit.) B. Enter BIOS SETUP UTILITY → Advanced screen →IDE Configuration. A. C. E. STEP 4: Install Windows XP / XP 64-bit OS on your required driver to install according to the OS you install. (Select "AMD AHCI Compatible RAID Controller-x86...

RAID Installation Guide
Page 5
...RAID disk composed of 2 or more SATA / SATAII HDDs with the disk drives installed, the AMD onboard BIOS will display the following path in our Support CD: (There are no SATA / SATAII device used, please set up "SATA Operation Mode" to [RAID] first. Enter BIOS SETUP UTILITY → Advanced screen →IDE Configuration. Insert the Windows Vista / Windows Vista 64-bit optical disk into your system. STEP 2: Use "RAID Installation Guide" to set the RAID configuration by using the Windows RAID installation guide in the following screen. 5 Set the "SATA Operation Mode" option...
...RAID disk composed of 2 or more SATA / SATAII HDDs with the disk drives installed, the AMD onboard BIOS will display the following path in our Support CD: (There are no SATA / SATAII device used, please set up "SATA Operation Mode" to [RAID] first. Enter BIOS SETUP UTILITY → Advanced screen →IDE Configuration. Insert the Windows Vista / Windows Vista 64-bit optical disk into your system. STEP 2: Use "RAID Installation Guide" to set the RAID configuration by using the Windows RAID installation guide in the following screen. 5 Set the "SATA Operation Mode" option...

RAID Installation Guide
Page 10
... open it (right). Double-click the Install CD's icon to install RAIDXpert on your CD-ROM drive. 3. RAIDXpert is installed. If the computer is an instruction for you are not supported. The first RAIDXpert installation dialog box appears. 5. AMD Windows RAID Installation Guide AMD Windows RAID Installation Guide is already running, exit all programs. If you to configure RAID functions by using RAIDXpert RAID management software under the same directory where RAIDXpert is...
... open it (right). Double-click the Install CD's icon to install RAIDXpert on your CD-ROM drive. 3. RAIDXpert is installed. If the computer is an instruction for you are not supported. The first RAIDXpert installation dialog box appears. 5. AMD Windows RAID Installation Guide AMD Windows RAID Installation Guide is already running, exit all programs. If you to configure RAID functions by using RAIDXpert RAID management software under the same directory where RAIDXpert is...


