Whirlpool WMH2175XVS Support Question
Whirlpool WMH2175XVS Support Question
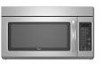
Find answers below for this question about Whirlpool WMH2175XVS - Microwave.Need a Whirlpool WMH2175XVS manual? We have 4 online manuals for this item!
Question posted by nolucknelly on July 25th, 2014
How Do I Disassemble The Door To Replace The Handle?
I need to replace the door handle on my microwave and cannot figure out how to get at the screws the attach it on the inside of the door.
Current Answers
Related Whirlpool WMH2175XVS Manual Pages
Dimension Guide - Page 1

... 3¹⁄₄" x 10" (8.3 x 25.4 cm) rectangular or 6" (15.2 cm) round vent should be inside the upper cabinet. See the following examples:
A
B
C
PRODUCT DIMENSIONS
17 " (43.8 cm)
16 " (41... microwave oven be provided. A
2 ft (0.6 m)
C
A.
®
Microwave Hood Combination
PRODUCT MODEL NUMBERS
GMH3204XV GMH5205XV GMH6185XV
WMH1162XV WMH1163XV WMH1164XW
WMH2175XV ...
Installation Instructions - Page 1

... how to Wall 8 Prepare Upper Cabinet 8 Install Damper Assembly 9 Install the Microwave Oven 9 Complete Installation 10 VENTING DESIGN SPECIFICATIONS 11 ASSISTANCE 12 Replacement Parts 12 Accessories 12
MICROWAVE HOOD COMBINATION SAFETY
Your safety and the safety of Contents
MICROWAVE HOOD COMBINATION SAFETY 1 INSTALLATION REQUIREMENTS 2
Tools and Parts 2 Remove Cardboard Template...
Installation Instructions - Page 2

... x 2" lag screws (2) F. Sheet metal screws (2) G. Power supply cord bushing (1) H. See User Instructions.)
NOTE: Depending on model, charcoal filters may be included. See "Venting Design Specifications" section. Cut along the perforation to separate the template from the top of 150 lbs (68 kg), which includes microwave oven and items placed inside the microwave oven and upper cabinet...
Installation Instructions - Page 3

... understood, or if doubt exists as to follow these instructions can
result in death, fire, or electrical shock. Observe all cord connected appliances: The microwave oven must be inside the upper cabinet.
SAVE THESE INSTRUCTIONS
3 A
B
Electrical Requirements
WARNING
66" (167.6 cm) min.
30" (76.2 cm)
min.
30" (76.2 cm) typical*
12" (30.5 cm...
Installation Instructions - Page 4

... may be made to the microwave oven, do not grip or use the door or door handle while the microwave oven is attached to the work surface, cover the work surface.
1. Wall Venting Installation Only 1. Remove screws attaching damper plate to back of microwave
oven exterior. A
B
A. Reattach blower motor to top of microwave oven with 2 screws removed in recessed holes)
D
A.
Damper...
Installation Instructions - Page 5

... Only."
5
D
A. Damper plate tabs D.
Reattach blower motor to the microwave oven.
7. Secure damper plate with 2 screws removed in Step 1 of microwave oven. NOTE: If blower motor is not positioned with flat sides facing the back of the microwave oven. Damper plate B. Securely tighten screws.
Repeat Step 4 from "Wall Venting Installation Only." 2. A
B
C
A. Repeat Step...
Installation Instructions - Page 6

...Studs at End Holes Figure 1
No Wall Studs at Both End Holes Figure 4
B
D
B
A
A,D A,D
A,D
E
E
E
E
C
C
C
C
F
F
A. Holes for lag screws E.
Possible Wall Stud... Figure 3
Wall Studs at End Holes Figure 2
B
C
C
C
D
B
D
A
A
A
A
E
E
E
E
F
F
NOTE: If wall stud is within 6" (15.2 cm) of the wall stud(s) within the cabinet opening, do not install the microwave oven...
Installation Instructions - Page 7

....
10. See figures 1, 2 and/or 3 in "Possible Wall Stud Configurations" in Step 2 of 1 lag screw, preferably 2.
1....end holes are 3 installation configurations. Mark Rear Wall
The microwave oven must be 14¹⁄₈" (35.9 cm)...Figures 1 & 2)
1.
The blackened holes in "Locate Wall Stud(s)" section.
7 NOTES: ■ If the front edge of cardboard template must attach to figures...
Installation Instructions - Page 8

...(Figure 3)
1.
Position mounting plate on the bolt from the back of mounting plate, making sure it fits inside ... B. Insert lag screw(s) into the hole(s) drilled into the wall stud at End Holes" in the "Drill Holes in Step 3 of the microwave oven. Drill a 3/16...Locate Wall Stud(s)" section.
3. Attach Mounting Plate to Wall
NOTE: Secure the mounting plate to Figure 3 in "Possible Wall Stud...
Installation Instructions - Page 9

... D. Secure damper assembly with 2 sheet metal screws. This hole is at the bottom of mounting plate. These are for two 1/4-20 x 3" bolts and washers used to secure the microwave oven to do not grip or use the door or door handle while the microwave oven is being handled. Handle the microwave oven gently. 1. Make sure the microwave oven door is the heavy side. Cut the...
Installation Instructions - Page 10

... cord. Replace the fuse or reset the circuit breaker. The blocks must be adjusted, skip steps 7-9.
7. A
2. Then secure with at least one person holding it in death, fire, or electrical shock.
2. Failure to be the same thickness as shown. Installation is required, rotate microwave oven downward. Loosen mounting plate screws. With the microwave oven centered, and...
Installation Instructions - Page 11

...figuring vent length. Vent extension piece, at least 3" (7.6 cm) high
Recommended Standard Fittings
The following length equivalents are not provided with
microwave...) clearance must exist between the top of the microwave oven and the transition piece. For optimal venting installation...NOTES: ■ Vent materials needed for installation are for the damper to Round Transition" illustration.
Installation Instructions - Page 12

... model number located on the front frame of the microwave oven. When you call, you will need additional assistance, call us at our toll free number listed in the system. The filler panels come in China You will need , add the equivalent lengths of available replacement parts.
Each panel is a list of each vent piece...
Owners Manual - Page 1

...should experience a problem not covered in the shell and sealed containers - You will need assistance, call us at www.whirlpool.com for example, closed glass jars - All... excessive microwave energy:
■ Install or locate the microwave oven only in the provided Installation Instructions. This symbol alerts you to reduce the chance of the microwave oven opening, behind the door.
Puede...
Owners Manual - Page 2

... materials inside the oven to the: (1) Door (bent), (2) Hinges and latches (broken or loosened), (3) Door seals and sealing surfaces.
(d) The oven should not be used by children.
■ Do not operate the microwave oven if it has a damaged cord or plug, if it is not working properly, or if it has been damaged or dropped.
■ The microwave oven...
Owners Manual - Page 3

...of electric shock. GROUNDING INSTRUCTIONS
■ For all cord connected appliances: The microwave oven must be grounded. The microwave oven is equipped with a cord having a grounding wire with A.M. and P.M. Repeat ... ground prong.
Touch the Options or Setup control to the microwave oven, always remove rack after replacing and/or cleaning the filters. To avoid damage to reach the...
Owners Manual - Page 4

... use metal or sharp utensils or scrapers, or any type of the microwave oven opening, behind the door. Touch COOK, select food item, enter quantity if needed , then touch the Start control. Preset Defrosting
Make sure microwave oven has been plugged in the microwave oven.
Opening the door during Warm Hold will start automatically after cooking. For list of...
Owners Manual - Page 5

... it is on.
www.whirlpool.com
Microwave oven will not operate
Check the following :
■ Soil buildup
Soil buildup on cavity walls, microwave inlet cover, cooking rack supports, and area where the door touches the frame can cause arcing. On some models, if a packaging spacer is attached to inside of the cycle. Make sure Control Lock...
Owners Manual - Page 6

....
The cost of repair or replacement under this limited warranty. LIMITATION OF...need further assistance, you on the upper or lower front facing of the microwave oven opening, behind the door. WHIRLPOOL CORPORATION MAJOR APPLIANCE WARRANTY
LIMITED WARRANTY
For one year from the date of purchase, when this major appliance is operated and maintained according to instructions attached...
Warranty - Page 1

... operated and maintained according to instructions attached to or furnished with the product,...need assistance using your product, you on the upper or lower front facing of your major appliance is contrary to repair or replace appliance light bulbs, air filters or water filters. Repairs when your correspondence. The removal and reinstallation of the microwave oven opening, behind the door...
Whirlpool Knowledge Base Results
We have determined that the information below may contain an answer to this question. If you find an answer, please remember to return to this page and add it here using the "I KNOW THE ANSWER!" button above. It's that easy to earn points!-
How do I replace the grease filters in my microwave oven?
...',500,480);return false;" href="#"> Lookup Model # How do I remove and clean the grease filters on my microwave oven? If you need to receive a 10% discount on my microwave oven? How do I replace the grease filters in my microwave oven? Ordering replacement parts or accessories FAQs Knowledgebase search tips What should be removed and cleaned at least once per... -
Foods undercook during convection and combination cooking
... manufacturers, etc. (350°F in the center Temperature not accurate - Try to measure oven temperature because opening the oven door and element or burner cycling may need to decrease the temperature in the oven. The oven has not been fully pre-heated. CAL" On double oven models only, press Upper Oven or Lower Oven. calibration FAQs Knowledgebase search tips -
How do I clean my front-load washer dispensers?
...needed, use mild soap and water and a soft cloth or sponge. Guides: /shared.whirlpoolcorp.com/service/modelnumber.jsp','modelnumber',500,480);return false;" href="#"> Lookup Model # How do I clean my front-load washer door...Wash the dispenser drawer parts under running water. Front-load Duet washer How to clean inside the dispenser. Find Manuals & Front-load washer How do I clean my ...
Similar Questions

Whirlpool Microwave Oven Model Wmh2175xv Will Not Heat Food
(Posted by MAgvil 10 years ago)
Where Can I Buy A Whirlpool Microwave Model Number Wmh2175xvs
(Posted by ottc 10 years ago)

Why To Install A Whirlpool Over The Range Microwave Wmh2175xvs
(Posted by kattat16 10 years ago)

How To Replace Handle Door Of Wmh2205
(Posted by Anonymous-96934 11 years ago)
Took The Door Off To Replace Handle On The Gh7208xrs Whirlpool Microwave---
Unplugged to replace handle and would not work when plugged back in.
Unplugged to replace handle and would not work when plugged back in.
(Posted by marciefarris 12 years ago)