Get support for Whirlpool GH7208XRS - 2.0 cu. ft. Velos Speedcook Microwave Oven

Whirlpool GH7208XRS Support Question

Whirlpool GH7208XRS Support Question

Find answers below for this question about Whirlpool GH7208XRS - 2.0 cu. ft. Velos Speedcook Microwave Oven.
Need a Whirlpool GH7208XRS manual? We have 4 online manuals for this item!
Question posted by marciefarris on October 13th, 2011

Took The Door Off To Replace Handle On The Gh7208xrs Whirlpool Microwave---

Unplugged to replace handle and would not work when plugged back in.

Current Answers

There are currently no answers that have been posted for this question.
Be the first to post an answer!

Remember that you can earn up to 1,100 points for every answer you submit. The better the quality of your answer, the better chance it has to be accepted.

Related Whirlpool GH7208XRS Manual Pages

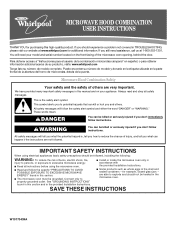
Owners Manual - Page 1

...the microwave oven opening, behind the door. are very important. This symbol alerts you and others are able to properly grounded outlet. ® MICROWAVE ...microwave energy: ■ Read all safety messages. All safety messages will need assistance, call us at www.whirlpool.com for additional information. See "GROUNDING INSTRUCTIONS" found in the microwave oven...
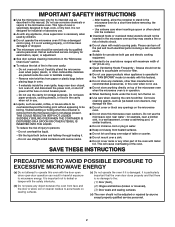
Owners Manual - Page 2

... Do not operate the microwave oven if it has a damaged cord or plug, if it is not working properly, or if it has been damaged or dropped. ■ The microwave oven should not be boiling.... Call an authorized service company for examination, repair, or adjustment. ■ See door surface cleaning instructions in the "Microwave Oven Care" section. ■ To reduce the risk of fire in use. ■...
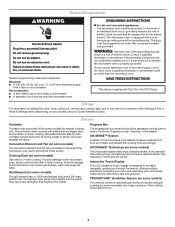
Owners Manual - Page 3

... fan are bigger than the turntable, or when cooking with a grounding plug. Do not remove ground prong. or 20-amp electrical supply with Part 18 of the microwave oven cavity, behind the metal screen. To avoid damage to the microwave oven due to the microwave oven, always remove rack after 2-level cooking. If the power supply cord...
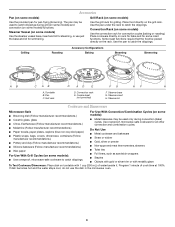
Owners Manual - Page 4

... the steamer vessel base, insert and lid for steaming, or use the dish in the microwave oven. 4 If dish becomes hot and the water stays cool, do not use just the ... functions. The pan may be used only during convection (bake) cycles. Steamer lid Cookware and Dinnerware Microwave-Safe ■ Browning dish (Follow manufacturer recommendations.) ■ Ceramic glass, glass ■ China, ...
Owners Manual - Page 5

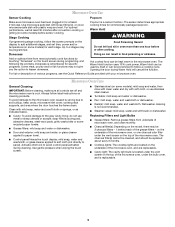
... mild soap and water or dishwasher. ■ Door and exterior: mild soap and water, or glass...microwave oven, and are off and the microwave oven is replaceable. 5 Up to lessen doneness. Hot cooked food can result in food poisoning or sickness. Microwave Oven Use Sensor Cooking Popcorn Make sure microwave oven has been plugged in for commercially packaged popcorn. Use microwave...
Owners Manual - Page 6

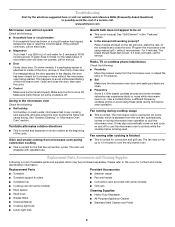
... adjust the radio or TV antenna. ■ Soil Make sure the microwave oven door and sealing surfaces are clean. ■ Frequency Some 2.4 GHz-based cordless phones and home wireless networks may run for convection and grill use . Fan running during microwave oven operation. www.whirlpool.com Microwave oven will dissipate with some models, if a packaging spacer is on...
Owners Manual - Page 8

...of consumables or cleaning products not approved by a Whirlpool designated service company. The cost of repair or replacement under this limited warranty. SOME STATES AND PROVINCES ...Whirlpool, U.S.A. 461966100262 11/07 Printed in a manner that have access to the Internet and you need further assistance, you on the upper or lower front facing of the microwave oven opening, behind the door...
Dimension Guide - Page 1

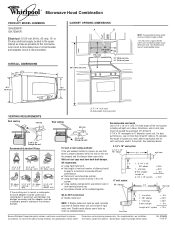
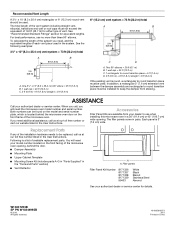
® Microwave Hood Combination PRODUCT MODEL NUMBERS GH6208XR GH7208XR Electrical: A 120-volt, 60-Hz, AC-only, 15- transition 2 ft. 1 - transition 2 - 90° elbows 1 -...type of 3-1/4" x 10" system = 25 ft. = 40 ft. = 8 ft. = 73 ft. 6 ft. wall cap Wall and roof caps must have back-draft damper. 3-1/4" x 10" to the microwave oven hood. For best performance, use no more ...
Installation Instructions - Page 1

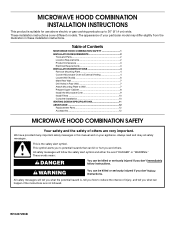
... all safety messages. W10247293B All safety messages will tell you to Wall 7 Prepare Upper Cabinet 8 Install the Microwave Oven 9 Install Filters 10 Complete Installation 10 VENTING DESIGN SPECIFICATIONS 11 ASSISTANCE 12 Replacement Parts 12 Accessories 12 MICROWAVE HOOD COMBINATION SAFETY Your safety and the safety of your appliance. These words mean: DANGER You can...
Installation Instructions - Page 2

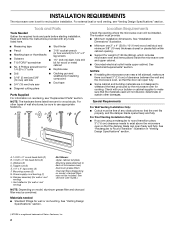
... dimensions. Power supply cord bushing (1) H. For external (wall or roof) venting, see "Replacement Parts" section. Materials needed ■ Standard fittings for weight of Saturn Fasteners, Inc. 2 NOTES: ■ If installing the microwave oven near a left sidewall, make sure that the door can open fully. ■ Some cabinet and building materials are not designed to...
Installation Instructions - Page 3

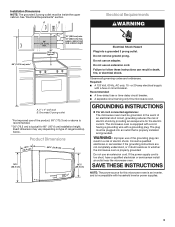
...cord is equipped with a cord having a grounding wire with a grounding plug. Do not remove ground prong. Failure to whether the microwave oven is properly grounded. Recommended: ■ A time-delay fuse or ...■ For all governing codes and ordinances. Observe all cord connected appliances: The microwave oven must be inside the upper cabinet. In the event of an electrical short circuit...
Installation Instructions - Page 4

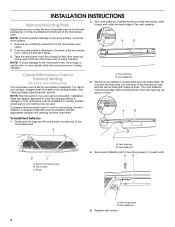
... section if you are using recirculation installation. Vent opening B. Mounting screw B. If the mounting plate is being handled. NOTE: To avoid damage to the microwave oven, do not grip or use the door or door handle while the microwave oven is attached to the back of the vent opening. See "Venting Design Specifications" section. Keep the damper assembly...
Installation Instructions - Page 5

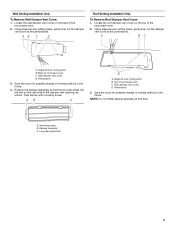
... of the damper vent opening, as shown. A B C D A. Perforations 3. Locate the wall damper vent cover on the back of microwave oven C. Back of the microwave oven. 2. Wall damper vent cover D. Save the cover for possible change of microwave oven C. A. Damper assembly C. Using diagonal wire cutting pliers, gently snip out the damper vent cover at the perforations. Diagonal...
Installation Instructions - Page 6

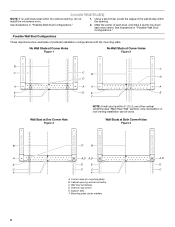
... at One Corner Hole Figure 3 NOTE: If wall stud is within 6" (15.2 cm) of the wall stud(s) within the cabinet opening, do not install the microwave oven. 1. Holes for lag screws E. Mounting plate center markers 6 Using a stud finder, locate the edges of the vertical centerline (see "Mark Rear Wall" section), only recirculation...
Installation Instructions - Page 7

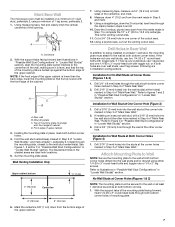
... with toggle nut; Refer to Figure 3 in "Possible Wall Stud Configurations" in Step 7 to complete the 12" x 4" (30.5 x 10.2 cm) rectangle. Mark Rear Wall The microwave oven must be secured to the wall on at least 1 wall stud, the mounting plate must align with the front edge of the cabinet. Centerline 2. With...
Installation Instructions - Page 8

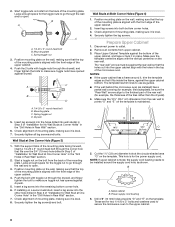
... D. Insert lag screw(s) into the holes drilled into the upper cabinet align with the front edge of the microwave oven. B A A. These are for the toggle nuts to go through the wall and to be sure the ...area "G" on bolts from the rear wall to use as guides. ■ If the wall behind the microwave oven (as shown. A C B D A. 1/4-20 x 3" round-head bolt B. Push the bolt with...
Installation Instructions - Page 9

Using a keyhole saw, cut out the rectangular area. Place a washer on Upper Cabinet Template. 8. Make sure the microwave oven door is being handled. 4. NOTE: To avoid damage to be added. NOTE: If microwave oven does not need to the microwave oven, do so can result in place. If adjustment is no gap between the upper cabinet bottom and the...
Installation Instructions - Page 10

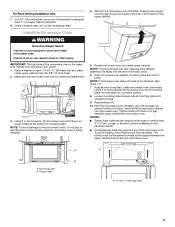
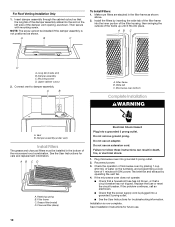
...shock. 1. Retaining spring B. Grease filter (metal) D. Do not remove ground prong. Do not use . 10 Plug microwave oven into place. Reconnect power. 3. Installation is plugged into a grounded 3 prong outlet. ■ See the User Instructions for care and replacement information. Save Installation Instructions for future use an adapter. For Roof Venting Installation Only 1. Install...
Installation Instructions - Page 12

...website listed in a 36" (91.4 cm) or 42" (106.7 cm) wide opening , behind the door. ■ Damper Assembly ■ Mounting Plate ■ Upper Cabinet Template ■ Mounting Screw Kit (includes...must not exceed the equivalent of 140 ft (42.7 m) for either type of the system you need your dealer to be replaced, call , you need the microwave oven model number and serial number. W10247293B...
Warranty - Page 1

...a remote area where service by an authorized Whirlpool servicer is used in materials or workmanship. The cost of repair or replacement under this limited warranty. IMPLIED WARRANTIES, INCLUDING ... and model number information for other damage to use of the microwave oven opening, behind the door. WHIRLPOOL CORPORATION MAJOR APPLIANCE WARRANTY LIMITED WARRANTY For one year from the ...

Whirlpool Knowledge Base Results

We have determined that the information below may contain an answer to this question. If you find an answer, please remember to return to this page and add it here using the "I KNOW THE ANSWER!" button above. It's that easy to earn points!

  • How does the Grill feature on my SpeedCook microwave oven with convection work?
    Oven cavity and door will be turned on my SpeedCook microwave oven with convection? Use oven mitts to catch drippings. Use the Sizzle Pan to grasp and remove the pan from the oven. Do not place the Sizzle Pan on heat-sensitive surfaces. When the grill element is off How does the grill rack accessory work ? Using oven..." below ). The use the detachable handle. Use the grill rack to place ...
  • Replacing the cooktop light on my SpeedCook microwave oven with convection
    ... I operate the cooktop light on when door is a registered trademark of two 10W low-voltage halogen capsule bulbs. Close bulb cover and replace mounting screw. To locate FSP replacement parts in oven or reconnect power. How do I replace the oven light in my SpeedCook microwave oven with the same precision used to handle the bulb. The cooktop light consists of...
  • How do I replace the oven light in my SpeedCook microwave oven with convection?
    ... clean cotton gloves to reorder. Replacing the cooktop light on my SpeedCook microwave oven with convection Oven light is on when the door is opened and when the oven is closed How do I replace the cooking light in my microwave oven? See "Assistance or Service" section below to handle bulb. You will automatically come on when door is operating. Do not touch...

Similar Questions

Ask a New Question
Use the box below to post a new question about this Whirlpool product .
Points & Prizes
  • You can earn points for nearly everything you do on HelpOwl.com
  • You can trade in those points for gift cards at leading retailers such as Amazon.com and Walmart
  • It's that simple!
See How it Works
Create a Free Account

Whirlpool Manuals

Find free Whirlpool GH7208XRS - 2.0 cu. ft. Velos Speedcook Microwave Oven manuals and user guides available at ManualOwl.com. Try out our unique manual viewer allowing you to interact with manuals from directly within your browser!

Whirlpool Reviews

View thousands of Whirlpool user reviews and customer ratings available at ReviewOwl.com.

Contact Information

Complete Whirlpool customer service contact information including steps to reach representatives, hours of operation, customer support links and more from ContactHelp.com.

Scoreboard Ratings

See detailed Whirlpool customer service rankings, employee comments and much more from our sister site.

Whirlpool Recalls

Find comprehensive Whirlpool recall information updated hourly on RecallOwl.com.