Get support for Whirlpool GH7208XRS - 2.0 cu. ft. Velos Speedcook Microwave Oven

Whirlpool GH7208XRS Support Question

Whirlpool GH7208XRS Support Question

Find answers below for this question about Whirlpool GH7208XRS - 2.0 cu. ft. Velos Speedcook Microwave Oven.
Need a Whirlpool GH7208XRS manual? We have 4 online manuals for this item!
Question posted by denaKhry on July 13th, 2014

How To Replace Door Handle On Whirlpool Microwave Model Gh7208xrs-1

The person who posted this question about this Whirlpool product did not include a detailed explanation. Please use the "Request More Information" button to the right if more details would help you to answer this question.

Current Answers

There are currently no answers that have been posted for this question.
Be the first to post an answer!

Remember that you can earn up to 1,100 points for every answer you submit. The better the quality of your answer, the better chance it has to be accepted.

Related Whirlpool GH7208XRS Manual Pages

Owners Manual - Page 1

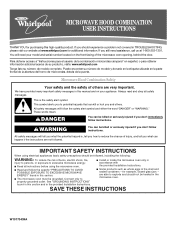
...obtener información adicional acerca de su producto, visite: www.whirlpool.com Tenga listo su número de modelo completo. Always...: WARNING: To reduce the risk of the microwave oven opening, behind the door. SAVE THESE INSTRUCTIONS W10170439A These words mean: DANGER... the microwave oven. All safety messages will tell you what can kill or hurt you still need your model and ...
Owners Manual - Page 2

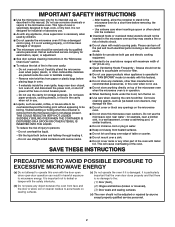
... in the microwave oven as described in use. ■ Liquids, such as lye-based oven cleaners, may create a fire or risk of injury to heat, cook, or dry food. Call an authorized service company for industrial or laboratory use . ■ Do not store anything directly on models with the door open since open-door operation can...
Owners Manual - Page 3

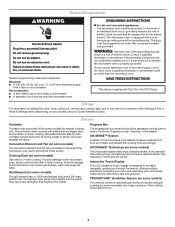
... cooking with plates that are bigger than the turntable, or when cooking with a grounding plug. Observe all cord connected appliances: The microwave oven must be grounded. TRUCAPTURE® Ventilation System (on some models) The vent fan comes on automatically during preset or sensor (on if the cooktop below gets too hot. 3 Features Turntable...
Owners Manual - Page 4

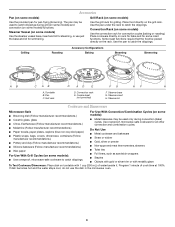
... for steaming, or use the dish in the microwave oven. 4 Steamer Vessel (on some roast functions. Accessories Pan (on the grill rack. The pan may be used only during grill (on some models) and convection (on some models): ■ Metal bakeware may be placed directly on some models) Use the provided pan for convection cycles...
Owners Manual - Page 5

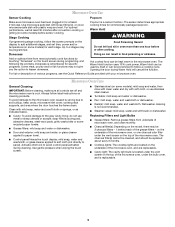
... where the door touches the frame clean. The charcoal filter(s) cannot be cleaned, and should be used by arcing due to panel). Warm Hold can be kept warm in the microwave oven. Replacing Filters and Light Bulbs ■ Grease filters: Remove grease filters from most automatic cook functions by touching "Doneness" on the model, there...
Owners Manual - Page 6

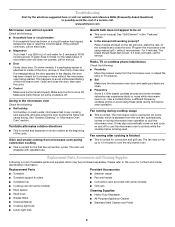
... it , then firmly close the door. Replacement Parts Provided Accessories ■ Turntable ■ Turntable support & rollers ■ Turntable hub ■ Cooking rack (for 2 minutes at the beginning of cold water for some models), which may run for 4 minutes. Troubleshooting First try the steps below is not unusual. www.whirlpool.com Microwave oven will dissipate with some...
Owners Manual - Page 8

...Whirlpool designated service company. Costs associated with electrical or plumbing codes, or use or when it was purchased. Expenses for travel and transportation for future reference. The cost of repair or replacement under this User Instructions and model... or lower front facing of the microwave oven opening, behind the door. WHIRLPOOL CORPORATION MAJOR APPLIANCE WARRANTY LIMITED WARRANTY For...
Dimension Guide - Page 1

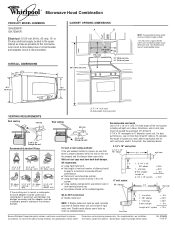
...for planning purposes only. Length of 3-1/4" x 10" system = 25 ft. = 40 ft. = 8 ft. = 73 ft. 6 ft. OVERALL DIMENSIONS (4168.4¹⁄₄c"m) 29⁷⁄₈" (...cooktop below . Because Whirlpool Corporation policy includes a continuous commitment to the microwave oven hood. ® Microwave Hood Combination PRODUCT MODEL NUMBERS GH6208XR GH7208XR Electrical: A 120-...
Installation Instructions - Page 1

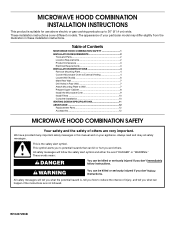
... the instructions are very important. These installation instructions cover different models. This symbol alerts you how to Wall 7 Prepare Upper Cabinet 8 Install the Microwave Oven 9 Install Filters 10 Complete Installation 10 VENTING DESIGN SPECIFICATIONS 11 ASSISTANCE 12 Replacement Parts 12 Accessories 12 MICROWAVE HOOD COMBINATION SAFETY Your safety and the safety of injury...
Installation Instructions - Page 2

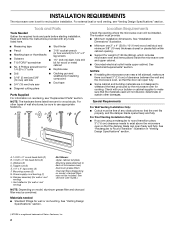
...microwave oven is set for 1/4" x 2" lag screws ■ Scissors ■ 1½" (3.8 cm) diam. For external (wall or roof) venting, see "Replacement...3" (7.6 cm) of microwave oven) Aluminum grease filters Charcoal filters (Depending on model, aluminum grease filter and...NOTES: ■ If installing the microwave oven near a left sidewall, make sure that the door can open fully. ■ Some...
Installation Instructions - Page 3

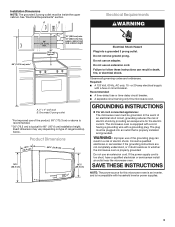
...improved use an adapter. Do not use of electric shock by providing an escape wire for this microwave oven. Required: ■ A 120 Volt, 60 Hz, AC only, 15- In the event...fire, or electrical shock. Do not use an extension cord. Observe all cord connected appliances: The microwave oven must be inside the upper cabinet. See "Electrical Requirements" section. Recommended: ■ A time-...
Installation Instructions - Page 4

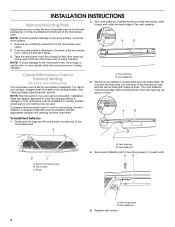
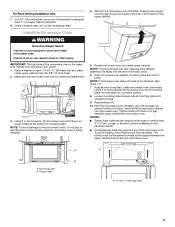
...microwave oven, and the narrow side (with 2 mounting screws (1 on your model, the mounting plate may be made to the microwave oven, do not grip or use the door or door handle while the microwave oven is being handled...of the microwave oven. Vent deflector 5. To Install Vent Deflector: 1. Gently pull the rings and lift vent screen from the microwave oven cavity. 2. Replace vent ...
Installation Instructions - Page 5

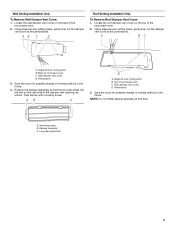
... 3. Save the cover for possible change of the microwave oven. 2. A B C D A. Top of microwave oven C. Back of microwave oven C. Position the damper assembly so that the long ...Only To Remove Roof Damper Vent Cover: 1. Save the cover for possible change of the microwave oven. 2. Damper assembly C. Perforations 3. A B C A. Then secure with mounting screw. ...
Installation Instructions - Page 6

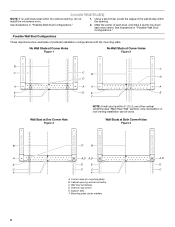
... Figure 4 MOUNTING PLATE MOUNTING PLATE MOUNTING PLATE MOUNTING PLATE B D B A A,D A,D A,D E E E E C C C C F F A. See illustrations in "Possible Wall Stud Configurations." Cabinet opening , do not install the microwave oven. 1. Holes for lag screws E. Mark the center of the vertical centerline (see "Mark Rear Wall" section), only recirculation or roof venting installation...
Installation Instructions - Page 7

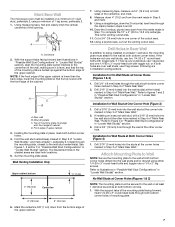
... in one 1/4-20 x 3" round-head bolt with toggle nut; Drill 3/4" (19 mm) holes through both sides of the centerline, and mark. 8. Mark Rear Wall The microwave oven must align with front edge of cabinet. Draw the 2 vertical, plumb lines down 4" (10.2 cm) from the marks made in "Locate Wall Stud(s)" section. Drill...
Installation Instructions - Page 8

...head bolt through the wall and to use as guides. ■ If the wall behind the microwave oven (as shown. Check alignment of mounting plate, making sure that it is level. 4. Prepare ... alignment of mounting plate, making sure it , trim the template edges so that the top of the microwave oven. Cut the 1¹⁄₂" (3.8 cm) diameter hole at One Corner Hole (Figure 3) 1. ...
Installation Instructions - Page 9

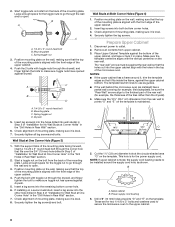
... 9 For Roof Venting Installation Only 7. IMPORTANT: The right side of the upper cabinet. 5. Using 2 or more people to do not grip or use the door or door handle while the microwave oven is the heavy side. Rotate microwave oven up toward upper cabinet. NOTE: If venting through the wall, make sure the damper assembly fits easily into...
Installation Instructions - Page 10

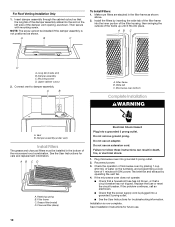
... screw. Install the filters by inserting the wide tab of the filter frame into place. Check the operation of microwave oven by operating the vent fan. 4. A B C To Install Filters: 1. Long tab (inside slot) B. Upper cabinet cutout 2. Microwave oven bottom Complete Installation WARNING A. Do not remove ground prong. Replace the fuse or reset the circuit breaker.
Installation Instructions - Page 12

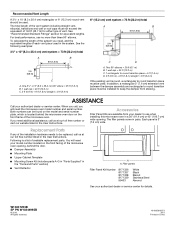
...C. 2 ft (0.6 m) + 6 ft (1.8 m) straight = 8 ft (2.4 m) 6" (15.2 cm) vent system = 73 ft (22.2 m) total A B 6 ft (1.8 m) 2 ft (0.6 m) C D A. Replacement Parts If any of available replacement parts. Two 90° elbows = 20 ft (6.1 m) B. 1 wall cap = 40 ft (12.2 m) C. 1 rectangular to keep the damper from your model number located on the front frame of the microwave oven opening...
Warranty - Page 1

... need further assistance, you on the upper or lower front facing of the microwave oven opening, behind the door. Service calls to Whirlpool within 30 days from the date of purchase. 6. The cost of repair or replacement under this User Instructions and model number information for repairs. If you do not have been removed, altered or...

Whirlpool Knowledge Base Results

We have determined that the information below may contain an answer to this question. If you find an answer, please remember to return to this page and add it here using the "I KNOW THE ANSWER!" button above. It's that easy to earn points!

  • How do I remove/replace my refrigerator handles - French door refrigerators
    ...(s) feel(s) loose, follow the directions below for reattaching the handles. If your  French door refrigerator. See illustrations 1 and 2. How do I remove/replace my refrigerator handles - To remove handles: Use a 3/32" Allen wrench to keep the screws for removing and replacing the handles. To replace the handles, reverse the directions. Side by side refrigerator Ordering...
  • How do I clean the oven cavity on my gas range?
    ... to slide. Applying a cool, damp cloth to reduce smoke and avoid damage. Cleaning Storage Drawers See your model, see Food spills should be able to move the oven door gasket. The door gasket is extremely sensitive to clean this area. Exposure to the fumes may result in discoloring, loss of porcelain...
  • Air filter in the refrigerator compartment - Side by Side with Ice Bin in Door, Flush Mounted Dispenser with LCD Display
    ... do I clean the air filter on the side tabs. Installing the Air Filter (on the back of the door. Place the indicator face-down into place. On models with a status indicator, which must be replaced every 6 months or when the status indicator has completely changed from its packaging. Install the new air filter...

Similar Questions

How To Replace Door Handle?
how to take door handle off
(Posted by vpelakh 7 years ago)
Replace Door Handle
How do I replace the door handle on a Whirlpool GH5184XPS Can you email directions and diagram
(Posted by johnhogan 11 years ago)
Took The Door Off To Replace Handle On The Gh7208xrs Whirlpool Microwave---
Unplugged to replace handle and would not work when plugged back in.
(Posted by marciefarris 12 years ago)
We Took The Door Off To Replace The Handle On The Gh7208xrs And Now It Won't Wor
Unplugged to replace door handle and when plugged back in power will not come on.
(Posted by marciefarris 12 years ago)
Ask a New Question
Use the box below to post a new question about this Whirlpool product .
Points & Prizes
  • You can earn points for nearly everything you do on HelpOwl.com
  • You can trade in those points for gift cards at leading retailers such as Amazon.com and Walmart
  • It's that simple!
See How it Works
Create a Free Account

Whirlpool Manuals

Find free Whirlpool GH7208XRS - 2.0 cu. ft. Velos Speedcook Microwave Oven manuals and user guides available at ManualOwl.com. Try out our unique manual viewer allowing you to interact with manuals from directly within your browser!

Whirlpool Reviews

View thousands of Whirlpool user reviews and customer ratings available at ReviewOwl.com.

Contact Information

Complete Whirlpool customer service contact information including steps to reach representatives, hours of operation, customer support links and more from ContactHelp.com.

Scoreboard Ratings

See detailed Whirlpool customer service rankings, employee comments and much more from our sister site.

Whirlpool Recalls

Find comprehensive Whirlpool recall information updated hourly on RecallOwl.com.