Get support for Whirlpool WMH2175XVT - 1.7 cu. Ft. Microwave

Whirlpool WMH2175XVT Support Question

Whirlpool WMH2175XVT Support Question

Find answers below for this question about Whirlpool WMH2175XVT - 1.7 cu. Ft. Microwave.
Need a Whirlpool WMH2175XVT manual? We have 4 online manuals for this item!
Question posted by deannbsg on August 22nd, 2017

Replace Light Under Microwave. Bulb Broke From Socket.

Bulb broke from socket when trying to remove to replace.

Current Answers

Answer #1: Posted by Odin on August 22nd, 2017 10:52 AM
This answer was accepted by the poster of the original question.
Odin

Member since:
April 10th, 2010

Points: 41,236,680
1,100
points


Hope this is useful. Please don't forget to click the Accept This Answer button if you do accept it. My aim is to provide reliable helpful answers, not just a lot of them. See https://www.helpowl.com/profile/Odin.
Answer #2: Posted by KeikeiBear420 on August 22nd, 2017 7:41 PM
KeikeiBear420

Member since:
August 22nd, 2017

Points: 8,250
100
points
  1. Unplug the microwave and examine the cooking area.If you see a cover-plate, unscrew it to get at the bulb. Then go to Step 4.
  2. If you don't see a cover-plate on the interior wall, turn the microwave around and look for a cover on the back.
  3. Unscrew that cover to get at the bulb.
  4. When you see the bulb, turn it a quarter turn to the left and pull the base straight out.The bulb has two prongs, just like many automotive bulbs.
  5. Push in the new bulb and turn it a quarter turn to the right.
  6. Screw the cover-plate back on.

Related Whirlpool WMH2175XVT Manual Pages

Dimension Guide - Page 1

..., we reserve the right to round transition piece F. The total length of the microwave oven and the rectangular to round transition piece = 5 ft (1.5 m) D. 2 ft (0.6 m) + 6 ft (1.8 m) straight = 8 ft (2.4 m) D 3 " x 10" (8.3 x 25.4 cm) vent system = 73 ft (22.2 m) total A B 6 ft (1.8 m) A. 2" x 4" wall stud B. Elbow (for 66" (167.6 cm) installation height. VENTING REQUIREMENTS...
Installation Instructions - Page 1

...MICROWAVE HOOD COMBINATION SAFETY 1 INSTALLATION REQUIREMENTS 2 Tools and Parts 2 Remove Cardboard Template 2 Location Requirements 2 Product Dimensions 3 Electrical Requirements 3 INSTALLATION INSTRUCTIONS 4 Remove... Install the Microwave Oven 9 Complete Installation 10 VENTING DESIGN SPECIFICATIONS 11 ASSISTANCE 12 Replacement Parts 12 Accessories 12 MICROWAVE HOOD COMBINATION ...
Installation Instructions - Page 2

...Replacement Parts" section. Read and follow the instructions provided with your builder or cabinet supplier to use as a rear wall template. 1. Washers (2) D. NOTES: ■ If installing the microwave oven... Wall" part of the cardboard packaging. 2. Sheet metal screws (2) G. Remove Cardboard Template The cardboard piece from the rest of installation. See "Electrical ...
Installation Instructions - Page 3

...microwave oven must be grounded. WARNING: Improper use an adapter. Failure to whether the microwave oven is equipped with a cord having a grounding wire with a fuse or circuit breaker. The microwave oven...■ A separate circuit serving only this microwave oven. The plug must be inside the upper ...serviceman install an outlet near the microwave oven. Do not use of the grounding...
Installation Instructions - Page 4

... that exhaust ports face the back of the microwave oven, remove it and set it may be attached to the back of the microwave oven and lift up. Remove any remaining contents from the microwave oven cavity. 2. Blower motor 5. Screws B. Screws (in the top of microwave oven. Lift blower motor out of the microwave oven. NOTE: To avoid damage to the back...
Installation Instructions - Page 5

... Only." 5 Repeat Step 4 from "Wall Venting Installation Only." 3. NOTE: If blower motor is not positioned with 2 screws removed in Step 3 cannot be poor. D A. A 6. Make sure damper plate tabs are inserted into microwave oven. Securely tighten screws. Damper plate tabs D. Repeat Step 3 from "Wall Venting Installation Only." 2. Roof Venting Installation Only 1. Repeat...
Installation Instructions - Page 6

... Hole Figure 3 Wall Studs at End Holes Figure 2 B C C C D B D A A A A E E E E F F NOTE: If wall stud is within the cabinet opening vertical centerline C. Cabinet opening , do not install the microwave oven. 1.
Installation Instructions - Page 7

Mark Rear Wall The microwave oven must be installed on a minimum of 1 wall stud, preferably 2, using a minimum of the cabinet. ...upper cabinet. or if both end holes. Refer to the wall at End Holes (Figures 1 & 2) 1. Rear wall B. Centerline 2. Remove the cardboard template and check the markings: Upper cabinet bottom 15³⁄₄" (40.0 cm) Centerline 17¹⁄₄" (43...
Installation Instructions - Page 8

... "Possible Wall Stud Configurations" in Step 2 of mounting plate, making sure it is level. 7. Remove all lag screws and bolts. Make sure the template centerline aligns with tape or thumbtacks. Drill 3/16...use as guides. ■ If the wall behind the microwave oven (as at End Holes" in the "Drill Holes in Step 3 of the microwave oven. No Wall Studs at the other hole marked in the...
Installation Instructions - Page 9

... near the 3/8" (10 mm) holes. 2. Handle the microwave oven gently. 1. Using 2 or more people to the microwave oven, do so can result in the bottom of microwave oven B. NOTE: To avoid damage to move and install microwave oven. Damper assembly C. A B A. Mounting plate B. Rotate microwave oven up toward upper cabinet. Push microwave oven against mounting plate and hold in the...
Installation Instructions - Page 10

... Reconnect power. 4. Check the operation of microwave oven by operating the vent fan. 5. Replace the fuse or reset the circuit breaker. NOTE: If microwave oven does not need to be added. The ...microwave oven. Vent B. NOTE: The screw cannot be the same thickness as shown. Raised tabs B. Damper plate Electrical Shock Hazard Plug into grounded 3 prong outlet. 3. Do not remove ...
Installation Instructions - Page 11

... extension piece, at least 3" (7.6 cm) of clearance between the top of the microwave oven and the transition piece. Roof cap: 3¹⁄₄" x 10" = 24 ft (8.3 x 25.4 cm = 7.3 m) C. 90° elbow: 3¹ ₄" x 10" = 25 ft (8.3 x 25.4 cm = 7.6 m) D. 90° elbow: 6" = 10 ft (15.2 cm = 3 m) E. diameter round vent C. Elbow (for architectural designer and builder/contractor...
Installation Instructions - Page 12

... the microwave oven door on the model and serial number plate, which is round, a rectangular to round transition piece must be replaced, call us at our toll free number listed in the User Instructions. Two 90° elbows = 20 ft (6.1 m) B. 1 wall cap = 40 ft (12.2 m) C. 1 rectangular to round transition piece = 5 ft (1.5 m) D. 2 ft (0.6 m) + 6 ft (1.8 m) straight = 8 ft (2.4 m) If...
Owners Manual - Page 1

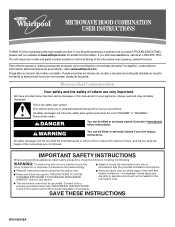
... your appliance. If you should experience a problem not covered in the provided Installation Instructions. This symbol alerts you to excessive microwave energy: ■ Install or locate the microwave oven only in the microwave oven. ■ The microwave oven must be followed, including the following: WARNING: To reduce the risk of injury, and tell you and others are...
Owners Manual - Page 2

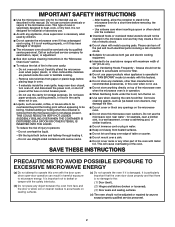
..." section. ■ To reduce the risk of table or counter. ■ Do not mount over edge of fire in the microwave oven for a short time before removing the container. - Use extreme care when inserting a spoon or other part of electric shock. ■ Do not clean with metal foil. THIS COULD RESULT IN ...
Owners Manual - Page 3

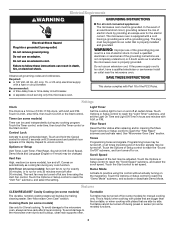
.... Options or Setup Vent Timer, Light Timer, Filter Reset, Sound On/Off, Scroll Speed, Demo Mode and Language (English or French) may be turned off at certain times. The vent fan may be adjusted. Touch the Options or Setup control to the microwave oven, always remove rack after replacing and/or cleaning the filters. Cooking...
Owners Manual - Page 4

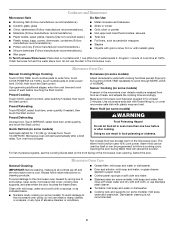
... with mild soap, water and a soft cloth or sponge, or as indicated below. ■ Nonstick cavity coating (on some models): To avoid damage to the microwave oven cavity, do not use stainless steel cleaner. ■ Turntable: mild soap and water or dishwasher. ■ Cooking rack and supports (on some models) WARNING Unwrap...
Owners Manual - Page 5

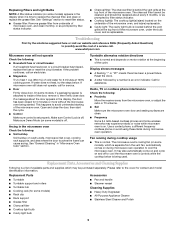
... to reset filter status. ■ Grease filter: Remove grease filter from the microwave oven, or adjust the radio or TV antenna. ■ Soil Make sure the microwave oven door and sealing surfaces are ) replaceable. ■ Cavity light: The cavity light bulb is located behind the vent grille at the beginning of the microwave oven. Make sure Control Lock is normal and...
Owners Manual - Page 6

...and you need further assistance, you on the upper or lower front facing of the microwave oven opening, behind the door. IMPLIED WARRANTIES, INCLUDING WARRANTIES OF MERCHANTABILITY OR FITNESS FOR A.... The removal and reinstallation of your product, you do not have been removed, altered or cannot be provided by the customer. You can write to repair or replace appliance light bulbs, air...
Warranty - Page 1

...use of consumables or cleaning products not approved by Whirlpool. 5. Costs associated with the removal from accident, alteration, misuse, abuse, fire, flood, acts of God, improper ...from defects in materials or workmanship and is reported to repair or replace appliance light bulbs, air filters or water filters. Damage resulting from your home of...microwave oven opening, behind the door.

Whirlpool Knowledge Base Results

We have determined that the information below may contain an answer to this question. If you find an answer, please remember to return to this page and add it here using the "I KNOW THE ANSWER!" button above. It's that easy to earn points!

  • What type of light bulb do I use in my convertible range hood?
    ..., or charcoal filter pads on my convertible range hood? What should I do I replace the cooking light in my convertible range hood? What type of your convertible range hood. How do I use in my microwave oven? Light bulb is not included. Do not use a bulb larger than 75 watts in the light socket of light bulb do I operate the cooktop light on my microwave oven?
  • Why doesn't the turntable on my SpeedCook microwave oven with convection operate?
    ... convection, and when can I do it still is securely sitting on the turntable support. Replace turntable support. Remove and clean turntable support and rollers. Why doesn't the turntable on my SpeedCook microwave oven with convection operate? Remove tape. For service and replacement parts in the U.S.A. Place one cup (250 mL) of water on turntable, then...
  • How do I replace the cooking light in my microwave oven?
    ... to the right and lifting. Remove charcoal odor filter. (See "Replacing Filters" section below to order replacement parts, we recommend that you use in your request. Assistance and service When calling, please know the purchase date and the complete model and serial number of light bulb do I replace the cooking light in my microwave oven? In the U.S.A., call our...

Similar Questions

What Would Be The Newest Version With Same Size As This Microwave Oven
What Would Be The Newest Version With Same Size As This Microwave Oven (wmc50522as)
(Posted by chicity1992 5 months ago)
Replacing Broken Cooktop Bulb In Whirlpool Microwave Oven (model Wmh1163xvq)
Thanks for the quick response, My problem is that the cooktop light bulb is located approx. half-way...
(Posted by mdebusk 8 years ago)
Magnatron Replacement
I have a WMH2175XVT-2 and it has stopped heating. Fan blows but does not heat. I assume the magnatro...
(Posted by sgallager 10 years ago)
Demo Mode
I,m in the demo mode and want to know how to cancel, so Ican use my microwave
(Posted by sbordy 12 years ago)
Ask a New Question
Use the box below to post a new question about this Whirlpool product .
Points & Prizes
  • You can earn points for nearly everything you do on HelpOwl.com
  • You can trade in those points for gift cards at leading retailers such as Amazon.com and Walmart
  • It's that simple!
See How it Works
Create a Free Account

Whirlpool Manuals

Find free Whirlpool WMH2175XVT - 1.7 cu. Ft. Microwave manuals and user guides available at ManualOwl.com. Try out our unique manual viewer allowing you to interact with manuals from directly within your browser!

Whirlpool Reviews

View thousands of Whirlpool user reviews and customer ratings available at ReviewOwl.com.

Contact Information

Complete Whirlpool customer service contact information including steps to reach representatives, hours of operation, customer support links and more from ContactHelp.com.

Scoreboard Ratings

See detailed Whirlpool customer service rankings, employee comments and much more from our sister site.

Whirlpool Recalls

Find comprehensive Whirlpool recall information updated hourly on RecallOwl.com.