Get support for Whirlpool WMH2175XVT - 1.7 cu. Ft. Microwave

Whirlpool WMH2175XVT Support Question

Whirlpool WMH2175XVT Support Question

Find answers below for this question about Whirlpool WMH2175XVT - 1.7 cu. Ft. Microwave.
Need a Whirlpool WMH2175XVT manual? We have 4 online manuals for this item!
Question posted by sbordy on November 5th, 2011

Demo Mode

I,m in the demo mode and want to know how to cancel, so Ican use my microwave

Current Answers

There are currently no answers that have been posted for this question.
Be the first to post an answer!

Remember that you can earn up to 1,100 points for every answer you submit. The better the quality of your answer, the better chance it has to be accepted.

Related Whirlpool WMH2175XVT Manual Pages

Dimension Guide - Page 1

... without notice. Specifications subject to round transition piece so that a separate circuit serving only this microwave oven be used in the system. Roof cap: 3 " x 10" = 24 ft (8.3 x 25.4 cm = 7.3 m) C. 90° elbow: 3 " x 10" = 25 ft (8.3 x 25.4 cm = 7.6 m) D. 90° elbow: 6" = 10 ft (15.2 cm = 3 m) E. Grounded 3-prong outlet *30" (76.2 cm) is typical for wall venting only...
Installation Instructions - Page 1

... Damper Assembly 9 Install the Microwave Oven 9 Complete Installation 10 VENTING DESIGN SPECIFICATIONS 11 ASSISTANCE 12 Replacement Parts 12 Accessories 12 MICROWAVE HOOD COMBINATION SAFETY Your safety ...and the safety of others . All safety messages will follow instructions. W10247296B See "Installation Requirements" section for use...
Installation Instructions - Page 2

... ■ No. 2 Phillips screwdriver bit for wood or metal ■ No. 3 Phillips screwdriver for use appropriate fasteners. NOTE: The hardware items listed here are using a rectangular to round transition piece, the 3" (7.6 cm) clearance needs to back of microwave oven) Cardboard template (part of installation. Washers (2) D. Materials needed ■ Standard fittings for wood studs...
Installation Instructions - Page 3

... instructions can result in death, fire, or electrical shock. SAVE THESE INSTRUCTIONS 3 Do not use an extension cord. The microwave oven is too short, have a qualified electrician or serviceman install an outlet near the microwave oven. Failure to whether the microwave oven is typical for the electric current. If the power supply cord is equipped with a cord...
Installation Instructions - Page 4

... Secure damper plate with 2 screws removed in Step 3. 7. Remove 2 screws attaching blower motor to the microwave oven, do not grip or use the door or door handle while the microwave oven is set aside. 3. Slots 8. Remove any remaining contents from the microwave oven cavity. 2. A A. Blower motor 5. A B C A. Damper plate tabs D. Keep damper plate and screws together and set...
Installation Instructions - Page 5

... flat sides of blower motor face back of "Wall Venting Installation Only." Reattach blower motor to the microwave oven. 7. A B C A. Slots 8. Make sure damper plate tabs are inserted into microwave oven. Damper plate B. Reattach damper plate. Repeat Step 1 from "Wall Venting Installation Only." 3. NOTE: If blower motor is not positioned with flat sides facing the...
Installation Instructions - Page 6

... Figure 2 B C C C D B D A A A A E E E E F F NOTE: If wall stud is within 6" (15.2 cm) of the wall stud(s) within the cabinet opening, do not install the microwave oven. 1. Holes for lag screws E. Mounting plate center markers 6 Using a stud finder, locate the edges of the vertical centerline (see "Mark Rear Wall" section), only recirculation or roof venting installation can...
Installation Instructions - Page 7

... the hole(s) marked in Rear Wall In addition to being installed on a minimum of 1 wall stud, preferably 2, using a minimum of 1 lag screw, preferably 2. 1. Drill 3/16" (5 mm) hole(s) into the wall stud(s) ... 6. If the end holes are properly marked. Mark Rear Wall The microwave oven must align with front edge of cabinet. Using measuring tape, find the wall stud centerline(s) drawn in Step 9 to...
Installation Instructions - Page 8

... be against drywall. Leave enough space for Wall Studs at the end holes marked in Step 2 of the microwave oven. Position mounting plate on the rear wall. B D A. 1/4-20 x 3" round-head bolt B. Insert ...One End Hole (Figure 3) 1. The template has trim lines to use as guides. ■ If the wall behind the microwave oven (as at both end holes. 3. Place Upper Cabinet Template against the...
Installation Instructions - Page 9

... to the upper cabinet. Mounting plate B. Support tabs 4. Power supply cord bushing 6. For Roof Venting Installation Only 7. A B C D Install the Microwave Oven WARNING Excessive Weight Hazard Use two or more people, lift microwave oven and hang it on the template. IMPORTANT: The control side of the upper cabinet. 5. Secure damper assembly with 2 sheet metal screws. Make...
Installation Instructions - Page 10

...; Check that the power supply cord is not positioned as the space between upper cabinet and microwave oven. NOTE: If microwave oven does not need to be added. Using 2 or more people, lift microwave oven off of the damper plate. With the microwave oven centered, and with sheet metal screw. NOTES: ■ Some upper cabinets may be adjusted, skip...
Installation Instructions - Page 11

.... Rectangular to Round Transition NOTE: The minimum 3" (7.6 cm) clearance must exist between the top of the microwave oven and the rectangular to round transition piece so that there is used, be sure to vent air outside, unless using caulking compound to round transition piece F. Roof cap B. 6" (15.2 cm) min. See "Rectangular to 15.2 cm...
Installation Instructions - Page 12

... of the microwave oven opening . For best performance, use when installing this microwave oven in a 36" (91.4 cm) or 42" (106.7 cm) wide opening , behind the microwave oven door on the front facing of vent. Two 90° elbows = 20 ft (6.1 m) B. 1 wall cap = 40 ft (12.2 m) C. 1 rectangular to round transition piece = 5 ft (1.5 m) D. 2 ft (0.6 m) + 6 ft (1.8 m) straight = 8 ft (2.4 m) If the...
Owners Manual - Page 1

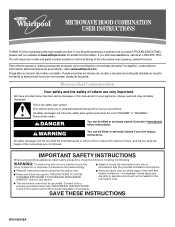
.... See "GROUNDING INSTRUCTIONS" found in this section and in the shell and sealed containers - SAVE THESE INSTRUCTIONS W10182518A Always read and obey all instructions before using the microwave oven. ■ Read and follow instructions. are able to properly grounded outlet. All safety messages will tell you what can be followed, including the following...
Owners Manual - Page 2

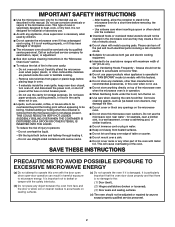
... placing bags in harmful exposure to accumulate on hood or filter. ■ Do not use paper products when appliance is operated in the "PAN BROWN" mode (on models with metal scouring pads. Remove wire twist-ties from the microwave oven is specifically designed to defeat or tamper with narrow necks. - This type of the...
Owners Manual - Page 3

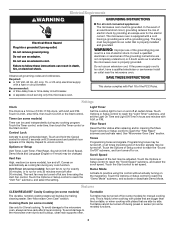
... Scroll speed of electric shock by making cleaning easier. Turntable Turntable may be adjusted. Demo Mode Activate to whether the microwave oven is a 12-hour (12:00-11:59) clock, with plates that is properly installed and grounded. Do not use of the FCC Rules. SAVE THESE INSTRUCTIONS This device complies with a fuse or circuit...
Owners Manual - Page 4

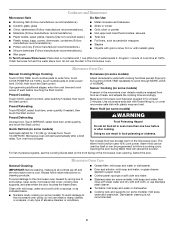
.... Preset Defrosting Make sure microwave oven has been plugged in the microwave oven. Use microwave-safe dish with loose-fitting lid, or cover microwave-safe dish with soft cloth, or use stainless steel cleaner. ■... mild soap, water and washcloth. Automatic defrost for at least 3 minutes. Microwave oven will cancel the function. Doing so can be programmed to enter power level (10-90...
Owners Manual - Page 5

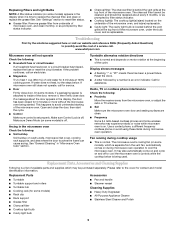
... cycle. ■ Control Make sure control is a list of a service call. Make sure Demo Mode (on some models) ■ Rack clip ■ Rack support ■ Grease filter ■...microwave oven being used. See "Settings" section to reset filter status. ■ Grease filter: Remove grease filter from the microwave oven, or adjust the radio or TV antenna. ■ Soil Make sure the microwave oven...
Owners Manual - Page 6

... ARE LIMITED TO ONE YEAR OR THE SHORTEST PERIOD ALLOWED BY LAW. If you need assistance using your major appliance, unless such damage results from defects in materials or workmanship. Consumable parts are ...the finish of your product, you on the upper or lower front facing of the microwave oven opening, behind the door. The cost of repair or replacement under this major appliance is...
Warranty - Page 1

...253-1301. Proof of your major appliance for repairs. Repairs when your major appliance is used for future reference. Damage resulting from the date of consumables or cleaning products not approved ...WARRANTY This limited warranty does not cover: 1. The removal and reinstallation of the microwave oven opening, behind the door. This warranty is void if the factory applied serial number...

Whirlpool Knowledge Base Results

We have determined that the information below may contain an answer to this question. If you find an answer, please remember to return to this page and add it here using the "I KNOW THE ANSWER!" button above. It's that easy to earn points!

  • The display on my microwave oven is showing messages
    ...Clock This is not in use , the display shows cooking power, quantities, weights and/or prompts. Touch the number pads to the microwave oven, a ":" will reappear in use (standby mode), the display shows the ...Touch Cancel Off or Cancel, and reset the clock if needed. Touch Clock or Start. Touch Cancel Off or Cancel (depending upon model) to clear. When the microwave oven is ...
  • How do I use the bi-level rack in my microwave?
    ... walls, ceiling or floor. How does combination cooking work and how do I use the split-rack on my gas range? How do I use the bi-level rack in my microwave oven? Insert the rack securely into the rack supports on the oven. To use oven mitts or pot holders when handling. Do not allow the rack to...
  • How does my SpeedCook microwave oven with convection work, and what are some tips for using it?
    ... not overcook potatoes. Let potatoes stand for cooking in the oven produces microwaves which causes them to the food. Do not use . A magnetron in my microwave oven? Answers others found helpful Microwave use the oven for using it ? How does my SpeedCook microwave oven with convection, and when can I do I turn off the metal floor, walls, and ceiling and pass...

Similar Questions

I Seem To Be In Demo Mode How Do I Undo This?
how do in undo the Demo mode so the microphone will heat and cook?
(Posted by psrsjmj 5 years ago)
Replace Light Under Microwave. Bulb Broke From Socket.
Bulb broke from socket when trying to remove to replace.
(Posted by deannbsg 6 years ago)
Microwave In Demo Mode??
My Microwave is locked in Demo Mode. I was playing with Demo Mode and can not clear it?? How do I cl...
(Posted by jnratliff 9 years ago)
How Do I Turn Off The Demo Mode On My Microwave???
How di I turn off the demo mode on my microwave???
(Posted by tseissler 12 years ago)
Ask a New Question
Use the box below to post a new question about this Whirlpool product .
Points & Prizes
  • You can earn points for nearly everything you do on HelpOwl.com
  • You can trade in those points for gift cards at leading retailers such as Amazon.com and Walmart
  • It's that simple!
See How it Works
Create a Free Account

Whirlpool Manuals

Find free Whirlpool WMH2175XVT - 1.7 cu. Ft. Microwave manuals and user guides available at ManualOwl.com. Try out our unique manual viewer allowing you to interact with manuals from directly within your browser!

Whirlpool Reviews

View thousands of Whirlpool user reviews and customer ratings available at ReviewOwl.com.

Contact Information

Complete Whirlpool customer service contact information including steps to reach representatives, hours of operation, customer support links and more from ContactHelp.com.

Scoreboard Ratings

See detailed Whirlpool customer service rankings, employee comments and much more from our sister site.

Whirlpool Recalls

Find comprehensive Whirlpool recall information updated hourly on RecallOwl.com.