Get support for Whirlpool WMH2175XVT - 1.7 cu. Ft. Microwave

Whirlpool WMH2175XVT Support Question

Whirlpool WMH2175XVT Support Question

Find answers below for this question about Whirlpool WMH2175XVT - 1.7 cu. Ft. Microwave.
Need a Whirlpool WMH2175XVT manual? We have 4 online manuals for this item!
Question posted by alondrikisssx on May 1st, 2021

La Rejilla Si Se Usa En El Micro Mientas Se Esta Usando?

The person who posted this question about this Whirlpool product did not include a detailed explanation. Please use the "Request More Information" button to the right if more details would help you to answer this question.

Current Answers

Answer #1: Posted by Troubleshooter101 on May 3rd, 2021 5:59 AM
This answer was accepted by the poster of the original question.
Troubleshooter101

Member since:
September 30th, 2015

Points: 2,927,060
1,100
points
Consulte este enlace a continuación para saber cómo usarlo correctamente https://applianceanalysts.com/how-to-use-microwave-grill/


Thanks


Please respond to my effort to provide you with the best possible solution by using the "Acceptable Solution" and/or the "Helpful" buttons when the answer has proven to be helpful. Please feel free to submit further info for your question, if a solution was not provided. I appreciate the opportunity to serve you!
Troublshooter101

Related Whirlpool WMH2175XVT Manual Pages

Dimension Guide - Page 1

... 15.2 cm) rectangular to round transition piece = 5 ft (1.5 m) D. 2 ft (0.6 m) + 6 ft (1.8 m) straight = 8 ft (2.4 m) D 3 " x 10" (8.3 x 25.4 cm) vent system = 73 ft (22.2 m) total A B 6 ft (1.8 m) A. 2" x 4" wall stud B. Specifications subject to round transition piece so that a separate circuit serving only this microwave oven be inside the upper cabinet. See the following...
Installation Instructions - Page 1

... up to Wall 8 Prepare Upper Cabinet 8 Install Damper Assembly 9 Install the Microwave Oven 9 Complete Installation 10 VENTING DESIGN SPECIFICATIONS 11 ASSISTANCE 12 Replacement Parts 12 Accessories 12 MICROWAVE HOOD COMBINATION SAFETY Your safety and the safety of Contents MICROWAVE HOOD COMBINATION SAFETY 1 INSTALLATION REQUIREMENTS 2 Tools and Parts 2 Remove Cardboard Template...
Installation Instructions - Page 2

... structures, be free of 150 lbs (68 kg), which includes microwave oven and items placed inside the microwave oven and upper cabinet. ■ Grounded electrical outlet inside the perforation ...follow the instructions provided with your builder or cabinet supplier to exist above the microwave oven so that the materials used will be combined. Special Requirements For Wall Venting ...
Installation Instructions - Page 3

... a cord having a grounding wire with a fuse or circuit breaker. Do not use an extension cord. See "Electrical Requirements" section. Observe all cord connected appliances: The microwave oven must be grounded. Grounded 3 prong outlet *30" (76.2 cm) is properly installed and grounded. upper cabinet and side cabinet depth Electrical Shock Hazard Plug into...
Installation Instructions - Page 4

...microwave oven. Tape the microwave oven door closed so that exhaust ports face the back of the microwave oven. Lift blower motor out of microwave oven with 2 screws removed in Step 1. 4 Rotate Blower Motor The microwave oven is being handled. 4. Reattach blower motor to the back of the microwave oven...avoid damage to top of the microwave oven. Keep damper plate and screws together...
Installation Instructions - Page 5

... Step 4 from "Wall Venting Installation Only." 2. Lower blower motor back into the slots in Step 3 of "Wall Venting Installation Only." 5 Reattach blower motor to the microwave oven. 7. Exhaust port IMPORTANT: If blower motor is not correctly oriented, the 2 screws removed in Step 1 of "Wall Venting Installation Only." Damper plate B. Screws C. Secure damper...
Installation Instructions - Page 6

... configurations with the mounting plate. See illustrations in "Possible Wall Stud Configurations." End holes (on mounting plate) B. Cabinet opening , do not install the microwave oven. 1. Wall stud centerlines D. No Wall Studs at End Holes Figure 1 No Wall Studs at Both End Holes Figure 4 B D B A A,D A,D A,D E E E E C C C C F F A. Mounting plate center markers...
Installation Instructions - Page 7

... level. 6. Cut a 3/4" (19 mm) hole in the lower corners, and draw a horizontal line across the bottom edge of the cardboard template. Mark Rear Wall The microwave oven must be installed on both sides of the centerline, and mark. 10. Top of cardboard template must be on the wall, making sure its top...
Installation Instructions - Page 8

... cabinet bottom. Make sure the template centerline aligns with the holes in Step 2 of the microwave oven. If installing on at One End Hole" in the "Drill Holes in Step 3 of mounting... plate must be sure the "Rear Wall" arrows align to use as guides. ■ If the wall behind the microwave oven (as at End Holes" in the "Drill Holes in Step 3 of "Mark Rear Wall." 2. B A C ...
Installation Instructions - Page 9

... in place. 9 Secure damper assembly with 2 sheet metal screws. Check that the damper blade hinge is for wall venting only) 1. Failure to move and install microwave oven. Damper blade D. Mounting plate B. NOTE: If upper cabinet is the heavy side. B A A. Power supply cord bushing 6. Cut 3/4" (19 mm) hole at the bottom of the...
Installation Instructions - Page 10

...raised tabs of water on a covered surface. 8. Do not use an extension cord. Plug microwave oven into a grounded 3 prong outlet. Connect vent to follow these instructions can result in place...for future use. 10 The blocks must be installed if the damper assembly is required, rotate microwave oven downward. A B A. Refer to provide) may be adjusted, skip steps 7-9. 7. Damper...
Installation Instructions - Page 11

...3" (7.6 cm) of clearance between the top of the microwave oven and the rectangular to round transition piece F. VENTING DESIGN ...ft (8.3 x 25.4 cm = 7.6 m) D. 90° elbow: 6" = 10 ft (15.2 cm = 3 m) E. diameter round vent C. If venting through the wall, be sure to vent air outside, unless using the most direct route by minimizing the length of the vent and number of the microwave oven...
Installation Instructions - Page 12

...) wide opening , behind the microwave oven door on the front frame of 140 ft (42.7 m) for equivalent lengths. One 3¹⁄₄" x 10" (8.3 x 25.4 cm) 90° elbow = 25 ft (7.6 m) B. 1 wall cap = 40 ft (12.2 m) C. 2 ft (0.6 m) + 6 ft (1.8 m) straight = 8 ft (2.4 m) 6" (15.2 cm) vent system = 73 ft (22.2 m) total A B 6 ft (1.8 m) 2 ft (0.6 m) C D A. In addition, a rectangular...
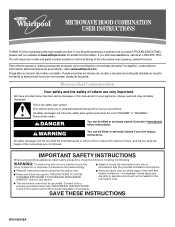
Owners Manual - Page 1

... shock, fire, injury to persons, or exposure to excessive microwave energy: ■ Install or locate the microwave oven only in accordance with the provided Installation Instructions. ■ Read all safety messages. Puede encontrar su número de modelo y de serie en la etiqueta ubicada en la parte frontal de la abertura del horno de microondas, detrás de...
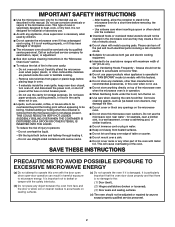
Owners Manual - Page 2

... an authorized service company for examination, repair, or adjustment. ■ See door surface cleaning instructions in the "Microwave Oven Care" section. ■ To reduce the risk of oven is not always present. Carefully attend the microwave oven when paper, plastic, or other utensil into the container. ■ Oversized foods or oversized metal utensils should be...
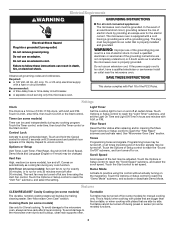
Owners Manual - Page 3

...delay fuse or time-delay circuit breaker. ■ A separate circuit serving only this microwave oven. Touch CLOCK, enter time, then touch CLOCK or the Start control. Tones Programming tones...avoid unintended start. GROUNDING INSTRUCTIONS ■ For all cord connected appliances: The microwave oven must be turned off after 30 minutes). Filter Reset Reset the filter status ...
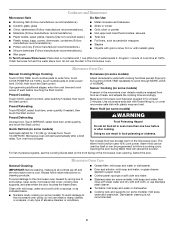
Owners Manual - Page 4

... rack and supports (on some models) Food Poisoning Hazard Do not let food sit in the microwave oven. Microwave oven will cancel the function. To avoid damage to the microwave oven caused by touching COOK TIME repeatedly to the microwave oven cavity, do not use metal or sharp utensils or scrapers, or any type of cook time at...
Owners Manual - Page 5

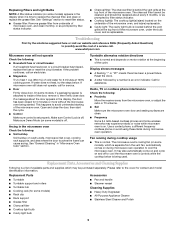
...front of a service call for service. ■ Door Firmly close door. www.whirlpool.com Microwave oven will not operate Check the following : ■ Soil buildup Soil buildup on some models) ... Control Make sure control is an error indicator. Arcing in "Microwave Oven Care" section. See "General Cleaning" in the microwave oven Check the following : ■ Household fuse or circuit breaker ...
Owners Manual - Page 6

... original purchase date is reported to parts or systems resulting from warranty coverage. 3. Damage resulting from accident, alteration, misuse, abuse, fire, flood, acts of the microwave oven opening, behind the door. Cosmetic damage, including scratches, dents, chips or other damage to correct house wiring or plumbing. 2. Costs associated with electrical or plumbing...
Warranty - Page 1

... Canada, contact your major appliance for repairs. This warranty is contrary to correct house wiring or plumbing. 2. Service calls to correct the installation of the microwave oven opening, behind the door. Repairs to instruct you need assistance using your model number and serial number on the label located on how to Whirlpool...

Whirlpool Knowledge Base Results

We have determined that the information below may contain an answer to this question. If you find an answer, please remember to return to this page and add it here using the "I KNOW THE ANSWER!" button above. It's that easy to earn points!

  • Blue streaks are running down the inner door of the dishwasher
    ... locked position. Make sure that the rinse aid cap is missing, please contact the Whirlpool Customer eXperience Center to use rinse aid in my oven door glass?
  • Display showing letters and numbers and hidden features/functions
    ...day from the display. To Lock/Unlock cooktop: Before using, turn all control knobs to your oven. On some models you want to display. Error code on the display window. Do you ... feature which allows you to clear the display. Please refer to Off. During Celsius mode, oven temperature is the display showing letters and numbers and hidden features/functions? Press and hold ...
  • Preparing oven to self clean
    ... area does not get hot enough during self-cleaning to not move or bend the gasket. Remove oven racks to clean this area. At high temperatures, foods react with porcelain. Staining, etching, pitting ... left before I  do before self-cleaning may burn or melt, which will damage the oven. Remove any foil from the cooktop because they are some tips for using a glass cleaner and...

Similar Questions

Our Whirlpool Gh7208xrb Micro Wave Has An F9.q Code On It Things To Check First
says check connecting to door controls. How do you remove front glass assembly. I remvoved all neces...
(Posted by Wilburn1965 7 years ago)
Light Operation Whirlpool Micro Model Wmh 31017aw - 2
The light was working fine, high low, off. Recently when you push the light button, FULL appears in ...
(Posted by denmo20 8 years ago)
Micro Door
any recall on this microwae door
(Posted by cmontross1 10 years ago)
How Do I Change The Bulb In The Micro- Oven? Model Gsc309pvs00 Combination Oven
I have a GSC309PVSoo oven/micro combination and the micro bulb is out. How do I change it? Is it a w...
(Posted by grog11 11 years ago)
Should You Remove Metal Dish From Micro Oven Combo When Used In Micro Mode?
Is it better to remove the provided metal plate and only use the glass one when using the whirlpool ...
(Posted by Pbundey985 12 years ago)
Ask a New Question
Use the box below to post a new question about this Whirlpool product .
Points & Prizes
  • You can earn points for nearly everything you do on HelpOwl.com
  • You can trade in those points for gift cards at leading retailers such as Amazon.com and Walmart
  • It's that simple!
See How it Works
Create a Free Account

Whirlpool Manuals

Find free Whirlpool WMH2175XVT - 1.7 cu. Ft. Microwave manuals and user guides available at ManualOwl.com. Try out our unique manual viewer allowing you to interact with manuals from directly within your browser!

Whirlpool Reviews

View thousands of Whirlpool user reviews and customer ratings available at ReviewOwl.com.

Contact Information

Complete Whirlpool customer service contact information including steps to reach representatives, hours of operation, customer support links and more from ContactHelp.com.

Scoreboard Ratings

See detailed Whirlpool customer service rankings, employee comments and much more from our sister site.

Whirlpool Recalls

Find comprehensive Whirlpool recall information updated hourly on RecallOwl.com.