Get support for Whirlpool GH7208XRB - Microwave

Whirlpool GH7208XRB Support Question

Whirlpool GH7208XRB Support Question

Find answers below for this question about Whirlpool GH7208XRB - Microwave.
Need a Whirlpool GH7208XRB manual? We have 4 online manuals for this item!
Question posted by Wilburn1965 on December 5th, 2016

Our Whirlpool Gh7208xrb Micro Wave Has An F9.q Code On It Things To Check First

says check connecting to door controls. How do you remove front glass assembly. I remvoved all necessary parts, but glass does not come fre

Current Answers

Answer #1: Posted by Odin on December 5th, 2016 9:36 AM
This answer was accepted by the poster of the original question.
Odin

Member since:
April 10th, 2010

Points: 41,236,700
1,090
points


Hope this is useful. Please don't forget to click the Accept This Answer button if you do accept it. My aim is to provide reliable helpful answers, not just a lot of them. See https://www.helpowl.com/profile/Odin.

Related Whirlpool GH7208XRB Manual Pages

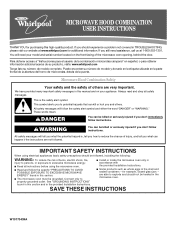
Owners Manual - Page 1

...." Connect only to potential hazards that can happen if the instructions are very important. We have provided many important safety messages in this section. ■ The microwave oven must be grounded. IMPORTANT SAFETY INSTRUCTIONS When using the microwave oven. ■ Read and follow instructions. are able to reduce the chance of the microwave oven opening, behind the door...
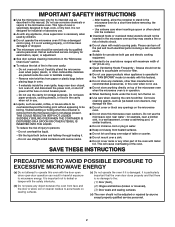
Owners Manual - Page 2

... that the oven door close supervision is necessary when used above both before removing the container. - Call an authorized service company for examination, repair, or adjustment. ■ See door surface cleaning instructions in the "Microwave Oven Care" section. ■ To reduce the risk of oven is damaged. Use extreme care when inserting a spoon or other part of the oven with...
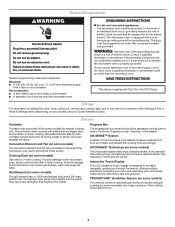
Owners Manual - Page 3

...Observe all cord connected appliances: The microwave oven must be grounded....microwave oven. TRUCAPTURE® Ventilation System (on some models) The vent fan comes on automatically during preset or sensor (on some models) functions. Do not use an adapter. It also shows instructions, tips and graphics. Do not remove... ■ For all governing codes and ordinances. The plug must...
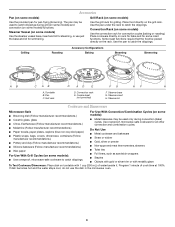
Owners Manual - Page 4

... G HF H A. Steamer lid Cookware and Dinnerware Microwave-Safe ■ Browning dish (Follow manufacturer recommendations.) ■ Ceramic glass, glass ■ China, Earthenware (Follow manufacturer recommendations.) For...) Use the provided pan for steaming, or use the dish in the microwave oven. 4 Turntable B. Place food directly on some models) Use the steamer vessel base,...
Owners Manual - Page 5

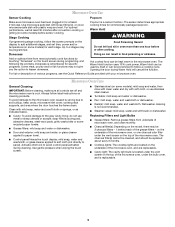
...glass cleaner applied to soft cloth (not directly to avoid control panel activation during Warm Hold will cancel the function. Activate child lock to panel). Use microwave-safe dish with loose-fitting lid, or cover microwave-safe dish with your microwave oven...Replacing Filters and Light Bulbs ■ Grease filters: Remove grease filters from most automatic cook functions by touching "...
Owners Manual - Page 6

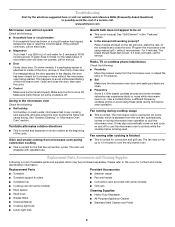
... Parts, Accesssories and Cleaning Supplies Following is a list of the microwave oven. Open and close door. Arcing in the display, the door has been closed for the first few convection cycles. without the microwave oven being used. If it , then firmly close the door. www.whirlpool.com Microwave oven will dissipate with some models), which may also automatically come...
Owners Manual - Page 8

...and model number information for Factory Specified Parts and repair labor to be easily ...removal and reinstallation of your major appliance is located in -home service is operated and maintained according to instructions attached to correct the installation of the microwave oven opening, behind the door. Have your major appliance. W10170439A SP PN W10170448A © 2007 Whirlpool...
Dimension Guide - Page 1

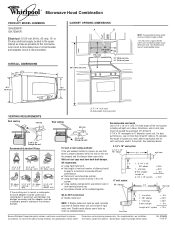
...assembly and the adapter must be used in the upper cabinet as close as possible to the microwave oven hood. Flexible metal elbows count twice as much as two feet of rigid metal vent. transition 2 ft. 1 - Because Whirlpool...185;⁄₂" (39.4 cm) A. 2" x 4" wall stud B. ® Microwave Hood Combination PRODUCT MODEL NUMBERS GH6208XR GH7208XR Electrical: A 120-volt, 60-Hz, AC...
Installation Instructions - Page 1

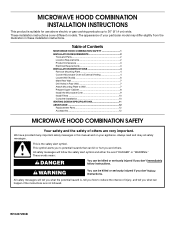
...follow instructions. These installation instructions cover different models. Table of Contents MICROWAVE HOOD COMBINATION SAFETY 1 INSTALLATION REQUIREMENTS 2 Tools and Parts 2 Location Requirements 2 Product Dimensions 3 Electrical Requirements 3 INSTALLATION INSTRUCTIONS 4 Remove Mounting Plate 4 Convert Microwave Oven to External Venting 4 Locate Wall Stud(s 6 Mark Rear Wall 7 Drill...
Installation Instructions - Page 2

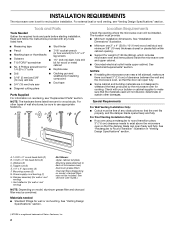
... microwave oven so that the door can open fully. ■ Some cabinet and building materials are using a rectangular to round transition piece, 3" (7.6 cm) clearance needs to make sure that the vent fits properly, and the damper blade opens freely and fully. Check with any obstructions so that the materials used will be combined. Damper assembly...
Installation Instructions - Page 3

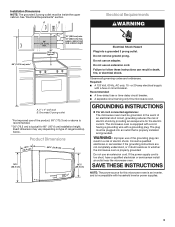
..." (76.2 cm) min. 30" (76.2 cm) typical** 12" (30.5 cm) min. 13" (33.0 cm) max. Do not use an extension cord. Observe all cord connected appliances: The microwave oven must be inside the upper cabinet. The plug must be grounded. WARNING: Improper use of the grounding plug can result in a risk of electric...
Installation Instructions - Page 4

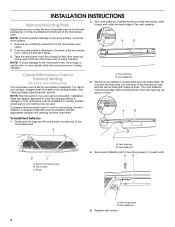
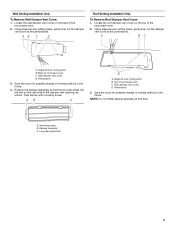
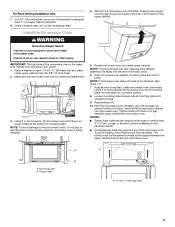
... be made to the venting system. Mounting screw B. To prepare the microwave oven for recirculation installation. A A. Vent deflector 4. A B B C A. Remove any remaining contents from the top of the microwave oven. Keep the damper assembly in case the venting method is changed, or the microwave oven is reinstalled in the vent opening, as shown (wide side down . To...
Installation Instructions - Page 5

... long tab slides into the slot on the back of microwave oven C. Then secure with mounting screw. NOTE: Do not install damper assembly at the perforations. Save the cover for possible change of microwave oven C. Top of the microwave oven. 2. Damper assembly C. AB C D Roof Venting Installation Only To Remove Roof Damper Vent Cover: 1. Using diagonal wire cutting pliers...
Installation Instructions - Page 6

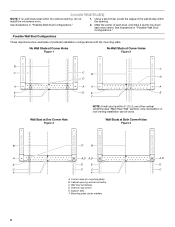
...(s) within the opening vertical centerline C. Wall Studs at One Corner Hole Figure 3 NOTE: If wall stud is within the cabinet opening, do not install the microwave oven. 1. Cabinet opening .
Installation Instructions - Page 7

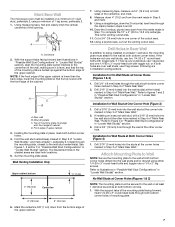
... bottom corner holes of "Mark Rear Wall." 2. Drill a 3/4" (19 mm) hole through the mounting plate, closest to the wall stud centerline(s). Mark Rear Wall The microwave oven must be secured to complete the 12" x 4" (30.5 x 10.2 cm) rectangle. D A C B A. Rear wall B. Find the wall stud centerline(s) marked in Step 7 to the wall on...
Installation Instructions - Page 8

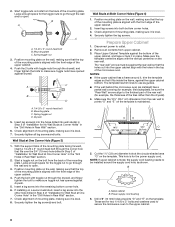
... 7. Securely tighten the lag screw(s) and bolt. Remove all lag screws and bolts. This hole is metal,... the thickest part of the rear wall (for Wall Stud at the circular shaded area "G" on the rear wall. Check alignment of...covering (for two 1/4-20 x 3" bolts and washers used to secure the microwave oven to outlet. 2. These are for example, tile backsplash), be against drywall...
Installation Instructions - Page 9

...or use the door or door handle while the microwave oven is being handled. 4. Push microwave oven against mounting plate and hold in the bottom of microwave oven still tilted, ...9 Handle the microwave oven gently. 1. Using 2 or more people, lift microwave oven and hang it in place, insert bolts through the wall, make sure the damper assembly fits easily into microwave oven. With front...
Installation Instructions - Page 10

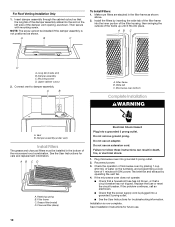
...remove ground prong. Plug microwave oven into a grounded 3 prong outlet. AB C D A. Mounting screw D. AB C D A. Grease filter (metal) D. Do not use an extension cord. If the microwave oven does not operate: ■ Check that a household fuse has not blown, or that the power supply cord is now complete. For Roof Venting Installation Only 1. A B C To Install Filters: 1. Connect...
Installation Instructions - Page 11

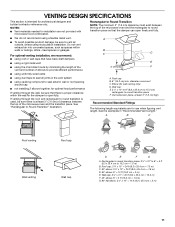
...(15.2 cm) min. Vent extension piece, at least 3" (7.6 cm) of clearance between the top of the microwave oven and the transition piece. A B C Roof venting Roof cap Wall venting Wall cap D E F G A. ...: The minimum 3" (7.6 cm) clearance must exist between the top of the microwave oven and the rectangular to vent air outside, unless using recirculation installation. See the examples...
Warranty - Page 1

...microwave oven opening, behind the door. Consumable parts are excluded from your home of Whirlpool, U.S.A. 461966100262 11/07 Printed in a remote area where service by a Whirlpool...does not apply. You can write to Whirlpool with electrical or plumbing codes, or use your model number and serial... been altered or removed from unauthorized modifications made to repair or replace ...

Whirlpool Knowledge Base Results

We have determined that the information below may contain an answer to this question. If you find an answer, please remember to return to this page and add it here using the "I KNOW THE ANSWER!" button above. It's that easy to earn points!

  • How do I raise (or proof) bread using my SpeedCook microwave oven with convection?
    ... Before baking, remove plastic wrap from ... close the door. then select...microwave oven to proof bread using my SpeedCook microwave oven with 2 cups (500 mL) boiling water on the touch screen or Start control. Proofing time may vary depending on my SpeedCook microwave oven with convection, and how do I cook in stages or steps using my SpeedCook microwave oven with cooking spray. Check...
  • How do I cook with my temperature probe?
    ... removing the probe, touch  Choose a setting. temperature. When food temperature reaches 90°F, the displayed temperature will change after 20 minutes, the display will show "Check" and "Probe." Start/Enter to turn off the microwave oven when it might result in unfavorable cooking results.  Make sure the probe does not touch any part...
  • Recommended installation for electrical, drain and water supply connections for dishwashers.
    ... order your dishwasher Online purchases can receive a 10% discount by entering F9A75Q4 as the Promo Code during check out. Quick check for dishwashers. Recommended installation for electrical, drain and water supply connections for proper drain hose The dishwasher warranty does not cover View or purchase the necessary kits needed to complete your Dishwasher Installation Kits

Similar Questions

Is There A List Of Error Codes For This Microwave?
Looking for error codes for the WMH1163 XVS microwave. I have an F6 and can not find a list of error...
(Posted by mrstan 4 years ago)
How Do You Replace The Lightbulb In The Whirlpool Gh7208xrb Microwave?
The screw in the light bulb cover has no grooves for a screw driver to fit. I showed a picture of th...
(Posted by Iwakuni16 10 years ago)
Gh7208xrb Problems
My microwave will only beep a single repetitive beep when plugged in. Nothing appears to be working....
(Posted by jamesrussell08 12 years ago)
Ask a New Question
Use the box below to post a new question about this Whirlpool product .
Points & Prizes
  • You can earn points for nearly everything you do on HelpOwl.com
  • You can trade in those points for gift cards at leading retailers such as Amazon.com and Walmart
  • It's that simple!
See How it Works
Create a Free Account

Whirlpool Manuals

Find free Whirlpool GH7208XRB - Microwave manuals and user guides available at ManualOwl.com. Try out our unique manual viewer allowing you to interact with manuals from directly within your browser!

Whirlpool Reviews

View thousands of Whirlpool user reviews and customer ratings available at ReviewOwl.com.

Contact Information

Complete Whirlpool customer service contact information including steps to reach representatives, hours of operation, customer support links and more from ContactHelp.com.

Scoreboard Ratings

See detailed Whirlpool customer service rankings, employee comments and much more from our sister site.

Whirlpool Recalls

Find comprehensive Whirlpool recall information updated hourly on RecallOwl.com.