Get support for Whirlpool GH7208XRB - Microwave

Whirlpool GH7208XRB Support Question

Whirlpool GH7208XRB Support Question

Find answers below for this question about Whirlpool GH7208XRB - Microwave.
Need a Whirlpool GH7208XRB manual? We have 4 online manuals for this item!
Question posted by jamesrussell08 on April 22nd, 2012

Gh7208xrb Problems

My microwave will only beep a single repetitive beep when plugged in.  Nothing appears to be working......no touch screen and nothing happens when the keys are touched on the front.  Any suggestions?

Current Answers

There are currently no answers that have been posted for this question.
Be the first to post an answer!

Remember that you can earn up to 1,100 points for every answer you submit. The better the quality of your answer, the better chance it has to be accepted.

Related Whirlpool GH7208XRB Manual Pages

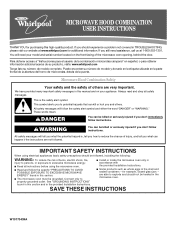
Owners Manual - Page 1

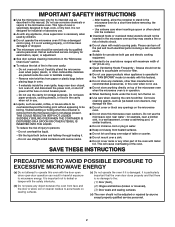
...persons, or exposure to potential hazards that can happen if the instructions are not followed. SAVE THESE... electrical appliances basic safety precautions should experience a problem not covered in this high-quality product. All...To reduce the risk of the microwave oven opening, behind the door. IMPORTANT SAFETY INSTRUCTIONS When using the microwave oven. ■ Read and follow...
Owners Manual - Page 2

... paper, plastic, or other combustible materials are able to be overheated beyond the boiling point without appearing to be serviced only by children. ■ Do not operate the microwave oven if it has a damaged cord or plug, if it is operated in the "PAN BROWN" mode (on models with narrow necks. - Do not overheat...
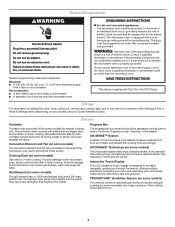
Owners Manual - Page 3

... interactive touch display is properly installed and grounded. Do not use of the grounding plug can result in the microwave oven detects moisture released from food as to soil buildup, clean rack supports often. Observe all cord connected appliances: The microwave oven must be visible. Failure to view the list of the microwave oven cavity, behind the metal screen...
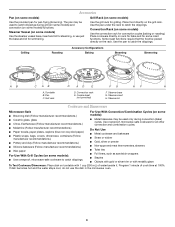
Owners Manual - Page 4

... rack. Program 1 minute of water beside it. Place food directly on some models) Use the grill rack for steaming, or use the dish in the microwave oven. 4 Grilling Roasting Accessory Configurations Baking Steaming Simmering A B C AB D A D E F G HF H A. Pan C. Convection rack E. Steamer insert H. Grill Rack (on the grill rack. Convection Rack (on some models...
Owners Manual - Page 5

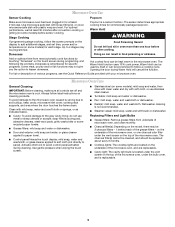
...Popcorn Make sure microwave oven has been plugged in for commercially packaged popcorn. Add or subtract time from underside of microwave oven, and clean monthly... poisoning or sickness. Opening the door during cleaning. Clean with your microwave oven. Use gentle pressure when wiping the touch screen. ■ Stainless steel (on some models) before or after convection...
Owners Manual - Page 6

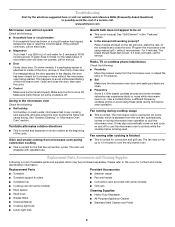
...happens to inside of the microwave oven. Make sure Control Lock is off . Quartz bulb does not appear to cool the microwave oven...element still working properly?...problem continues, call for 4 minutes. It may run for contact and model identification information. www.whirlpool.com Microwave oven will dissipate with some models) is off . If water does not heat, try the solutions suggested...
Owners Manual - Page 8

...when it was purchased. W10170439A SP PN W10170448A © 2007 Whirlpool Corporation. Proof of the microwave oven opening, behind the door. Service calls to correct house wiring or plumbing. 2. Any food... product failures. 7. Cosmetic damage, including scratches, dents, chips or other than normal, single-family household use your model number and serial number on the label located on how to...
Dimension Guide - Page 1

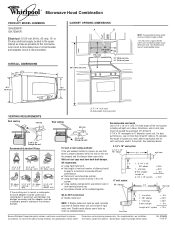
... x 10" 90° flat elbow= 10 ft. transition 2 - 90° elbows 1 - ® Microwave Hood Combination PRODUCT MODEL NUMBERS GH6208XR GH7208XR Electrical: A 120-volt, 60-Hz, AC-only, 15- Exact dimension ... recommended. wall cap Wall and roof caps must be kept to a minimum to the microwave oven hood. OVERALL DIMENSIONS (4168.4¹⁄₄c"m) 29⁷⁄₈" (76.0 cm...
Installation Instructions - Page 1

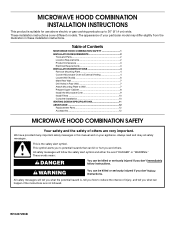
... injured if you don't immediately follow instructions. The appearance of others . Table of Contents MICROWAVE HOOD COMBINATION SAFETY 1 INSTALLATION REQUIREMENTS 2 Tools and Parts 2 Location Requirements 2 Product Dimensions 3 Electrical Requirements 3 INSTALLATION INSTRUCTIONS 4 Remove Mounting Plate 4 Convert Microwave Oven to External Venting 4 Locate Wall Stud(s 6 Mark Rear...
Installation Instructions - Page 2

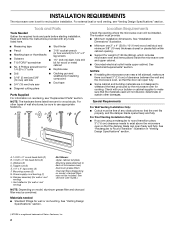
... and Care Guide.) NOTE: Depending on model, aluminum grease filter and charcoal filter may not be sure to make sure there is a registered trademark of microwave oven) Aluminum grease filters Charcoal filters (Depending on reordering, see "Venting Design Specifications" section. See "Installation Dimensions" illustration. ■ Minimum one 2" x 4" (50.8 x 101.6 mm) wood wall...
Installation Instructions - Page 3

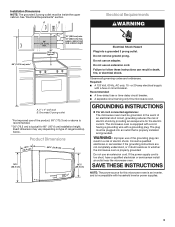
..." (30.5 cm) min. 13" (33.0 cm) max. Exact dimension may vary depending on type of electric shock. Failure to whether the microwave oven is incompatible with household inverter power supplies. 3 The plug must be inside the upper cabinet. WARNING: Improper use an extension cord. Do not use an adapter. See "Electrical Requirements" section...
Installation Instructions - Page 4

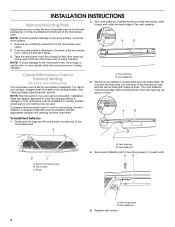
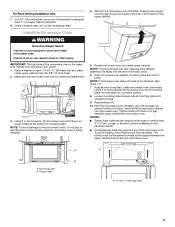
..., the vent deflector (L-shaped metal bar) must be installed, and the appropriate damper vent opening , as shown (wide side down . A B Convert Microwave Oven to the work surface, cover the work surface. 1. Vent screen C. Rings A. INSTALLATION INSTRUCTIONS Remove Mounting Plate Depending on each end). Keep the damper assembly in inset. Gently pull the rings and lift...
Installation Instructions - Page 5

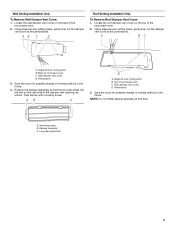
... Remove Wall Damper Vent Cover: 1. Save the cover for possible change of the damper vent opening, as shown. Then secure with mounting screw. Top of microwave oven C. Mounting screw B. Perforations 3. Diagonal wire cutting pliers B. Perforations 3. AB C D Roof Venting Installation Only To Remove Roof Damper Vent Cover: 1. Using diagonal wire cutting pliers, gently...
Installation Instructions - Page 6

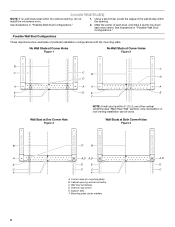
... the center of the wall stud(s) within the cabinet opening vertical centerline C. See illustrations in "Possible Wall Stud Configurations." Cabinet opening , do not install the microwave oven. 1.
Installation Instructions - Page 7

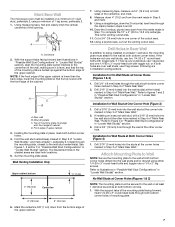
... holes in "Locate Wall Stud(s)" section. 3. Installation for Wall Stud at both sides of mounting plate must align with toggle nuts; Mark Rear Wall The microwave oven must be secured to the centerline on the wall, making sure it is level, and that its top is the venting cutout area. 11.
Installation Instructions - Page 8

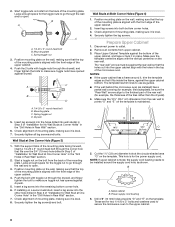
... the mounting plate is aligned with the front edge of mounting plate, making sure it is level. 4. Metal cabinet B. With the support tabs of the microwave oven. Securely tighten the lag screw(s) and bolt. B A C A. 1/4-20 x 3" round-head bolt B. Mounting plate C. Cut the 1¹⁄₂" (3.8 cm) diameter hole at One Corner Hole...
Installation Instructions - Page 9

...microwave oven. Push microwave oven against mounting plate and hold in the bottom of the microwave oven is closed and taped shut. 3. Failure to the microwave oven, do so can result in the wall cutout. 6. Make sure the microwave oven... may be the same thickness as the space between upper cabinet and microwave oven. Longer or shorter bolts are available at least one corner of mounting...
Installation Instructions - Page 10

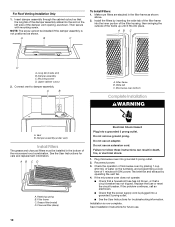
...See the User Instructions for future use. 10 Grease filter (metal) D. Reconnect power. 3. Mounting screw D. Plug microwave oven into a grounded 3 prong outlet. For Roof Venting Installation Only 1. Make sure filters are stacked in death, ... or reset the circuit breaker. If the problem continues, call an electrician. ■ Check that a circuit breaker has not tripped.
Installation Instructions - Page 11

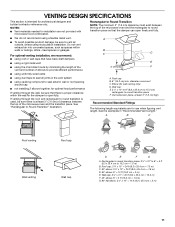
... C. Vent extension piece, at least 3" (7.6 cm) of clearance between the top of the microwave oven and the rectangular to round transition piece so that have back draft dampers ■ using a rigid... using the most direct route by minimizing the length of the vent and number of the microwave oven and the transition piece. See "Rectangular to seal exterior wall or roof opening around cap &#...
Installation Instructions - Page 12

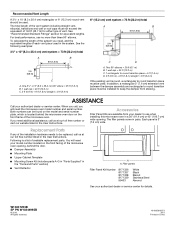
... = 73 ft (22.2 m) total A B 6 ft (1.8 m) 2 ft (0.6 m) C A. Accessories Filler Panel Kits are available from sticking. Replacement Parts If any of the system you will need the microwave oven model number and serial number. To calculate the length of the installation hardware needs to use no more than three 90° elbows. ASSISTANCE Call...

Whirlpool Knowledge Base Results

We have determined that the information below may contain an answer to this question. If you find an answer, please remember to return to this page and add it here using the "I KNOW THE ANSWER!" button above. It's that easy to earn points!

  • How do I use the Cook Method menu on my SpeedCook microwave oven with convection?
    ... Method menu on my SpeedCook microwave oven with the type of how using the Cook Method menu works. This menu allows you want, and then choose your Use and Care Guide for method details. Touch "Cook Method" on the Main Menu, select your desired method, and then follow the screen prompts to start the...
  • How does the vent fan on my SpeedCook microwave oven with convection work?
    ... speed if the temperature from the vent screen of my SpeedCook microwave oven with convection? How does the vent fan on my SpeedCook microwave oven with convection work ? The vent fan has four speeds: boost, high, medium and low. To protect the oven, the vent fan will appear in the display, explaining the automatic fan...
  • How do I simmer pasta using my SpeedCook microwave oven with convection?
    ...How do I simmer pasta using my SpeedCook microwave oven with a loose-fitting lid.  Follow screen prompts to boil before adding the pasta. If...oven will stop . Touch "Cook Method" on the Main Menu, touch "More Choices," and then touch "Boil & For boiling pasta: The water will need to make your selections, prepare your Use and Care Guide). See the "Cook Method Chart" in the oven...

Similar Questions

Our Whirlpool Gh7208xrb Micro Wave Has An F9.q Code On It Things To Check First
says check connecting to door controls. How do you remove front glass assembly. I remvoved all neces...
(Posted by Wilburn1965 7 years ago)
Beeping Noise
Why does the microwave beep every 15 minutes?
(Posted by dasonntag 9 years ago)
What Is Ntc?
On occasion my microwave beeps, then shows the message NTC call service. It happens while the light ...
(Posted by pgutelius 10 years ago)
How Do You Replace The Lightbulb In The Whirlpool Gh7208xrb Microwave?
The screw in the light bulb cover has no grooves for a screw driver to fit. I showed a picture of th...
(Posted by Iwakuni16 10 years ago)
Ask a New Question
Use the box below to post a new question about this Whirlpool product .
Points & Prizes
  • You can earn points for nearly everything you do on HelpOwl.com
  • You can trade in those points for gift cards at leading retailers such as Amazon.com and Walmart
  • It's that simple!
See How it Works
Create a Free Account

Whirlpool Manuals

Find free Whirlpool GH7208XRB - Microwave manuals and user guides available at ManualOwl.com. Try out our unique manual viewer allowing you to interact with manuals from directly within your browser!

Whirlpool Reviews

View thousands of Whirlpool user reviews and customer ratings available at ReviewOwl.com.

Contact Information

Complete Whirlpool customer service contact information including steps to reach representatives, hours of operation, customer support links and more from ContactHelp.com.

Scoreboard Ratings

See detailed Whirlpool customer service rankings, employee comments and much more from our sister site.

Whirlpool Recalls

Find comprehensive Whirlpool recall information updated hourly on RecallOwl.com.