Get support for Whirlpool WMH1163XVS

Whirlpool WMH1163XVS Support Question

Whirlpool WMH1163XVS Support Question

Find answers below for this question about Whirlpool WMH1163XVS.
Need a Whirlpool WMH1163XVS manual? We have 4 online manuals for this item!
Question posted by pgutelius on March 22nd, 2014

What Is Ntc?

On occasion my microwave beeps, then shows the message NTC call service. It happens while the light and fan are operating. The mw oven was not operating.

Current Answers

Answer #1: Posted by Odin on March 22nd, 2014 9:33 AM
This answer was accepted by the poster of the original question.
Odin

Member since:
April 10th, 2010

Points: 41,236,660
1,100
points


Hope this is useful. Please don't forget to click the Accept This Answer button if you do accept it. My aim is to provide reliable helpful answers, not just a lot of them. See https://www.helpowl.com/profile/Odin.

Related Whirlpool WMH1163XVS Manual Pages

Dimension Guide - Page 1

... straight = 8 ft (2.4 m) B C 3" (7.6 cm) D A. ® Microwave Hood Combination PRODUCT MODEL NUMBERS GMH3204XV GMH5205XV GMH6185XV WMH1162XV WMH1163XV WMH1164XW WMH2175XV WMH2205XV WMH3205XV Electrical: A 120-Volt, 60-Hz, AC-only, 15-... to round transition piece so that a separate circuit serving only this microwave oven be inside the upper cabinet. Vent extension piece, at least 3" ...
Installation Instructions - Page 1

... illustration in Rear Wall 7 Attach Mounting Plate to potential hazards that can happen if the instructions are very important. All safety messages will tell you what can kill or hurt you to Wall 8 Prepare Upper Cabinet 8 Install Damper Assembly 9 Install the Microwave Oven 9 Complete Installation 10 VENTING DESIGN SPECIFICATIONS 11 ASSISTANCE 12 Replacement Parts...
Installation Instructions - Page 2

... Dimensions" illustration. ■ Minimum one 2" x 4" (50.8 x 101.6 mm) wood wall stud and minimum 3/8" (10 mm) thickness drywall or plaster/lath within cabinet opening where the microwave oven will not discolor, delaminate or sustain other damages. Power supply cord bushing (1) H. See "Venting Design Specifications" section. For Roof Venting Installation Only: ■ If you...
Installation Instructions - Page 3

... an outlet that is properly installed and grounded. Do not use of electric shock. Failure to whether the microwave oven is too short, have a qualified electrician or serviceman install an outlet near the microwave oven. The microwave oven is typical for the electric current. WARNING: Improper use an extension cord. Consult a qualified electrician or serviceman if...
Installation Instructions - Page 4

... screws attaching damper plate to the venting system. Reattach blower motor to the back of microwave oven. Screws C. Slots 8. NOTE: To avoid possible damage to back of the microwave oven. Remove any remaining contents from the microwave oven cavity. 2. Wall Venting Installation Only 1. Reattach damper plate. Secure damper plate with 2 screws removed in Step 3. 7. Lift blower...
Installation Instructions - Page 5

... motor so that exhaust ports face the top of microwave oven, and flat sides of blower motor face back of the microwave oven (as shown), performance will be reattached to back of microwave oven with 2 screws removed in the top of the microwave oven. D A. Reattach blower motor to the microwave oven. 7. A B C A. Damper plate B. Secure damper plate with 2 screws removed in...
Installation Instructions - Page 6

... Configurations These depictions show examples of each stud, and draw a plumb line down each stud center. Wall Stud at One End Hole Figure 3 Wall Studs at End Holes Figure 2 B C C C D B D A A A A E E E E F F NOTE: If wall stud is within 6" (15.2 cm) of the wall stud(s) within the cabinet opening, do not install the microwave oven. 1. Cabinet opening...
Installation Instructions - Page 7

... mm) hole in Step 4. Centerline 2. Mark the centerline 3/8" (1 cm) down from the marks made in Step 3 of the cutout area. 14. Mark Rear Wall The microwave oven must be 14¹⁄₈" (35.9 cm) from the centerline. 5. A A. NOTES: ■ If the front edge of the upper cabinet is lower than the...
Installation Instructions - Page 8

...the upper cabinet align with the holes in Rear Wall" section. 2. With the support tabs of the microwave oven. Mounting plate C. C A 6. With the support tabs of the mounting plate facing forward, insert a... section. 7. Mounting plate C. Refer to use as guides. ■ If the wall behind the microwave oven (as at both end holes of mounting plate, making sure it is level. 7. No Wall Studs...
Installation Instructions - Page 9

...IMPORTANT: The control side of mounting plate. Sheet metal screws 3. Mounting plate B. Push microwave oven against mounting plate and hold in the wall cutout. 6. NOTE: If upper cabinet ... out the rectangular area. Install Damper Assembly (for the power supply cord. Handle the microwave oven gently. 1. Secure damper assembly with 2 sheet metal screws. Cut the 1¹⁄₂...
Installation Instructions - Page 10

...an adapter. Failure to the User Instructions for troubleshooting information. Check the operation of microwave oven by operating the vent fan. 5. Test vent fan and exhaust by placing 1 cup (250 mL) of water on the.... Raised tabs B. Do not remove ground prong. Reconnect power. 4. If the microwave oven does not operate: ■ Check that a household fuse has not blown, or that the power...
Installation Instructions - Page 11

...x 25.4 cm = 3 m) 11 Vent extension piece, at least 3" (7.6 cm) of clearance between the top of the microwave oven and the transition piece. A B C Roof venting Roof cap Wall venting Wall cap D E F G A. Elbow (for architectural...minimum 3" (7.6 cm) clearance must exist between the top of the microwave oven and the rectangular to vent air outside, unless using a flexible metal ...
Installation Instructions - Page 12

... replacement parts. Each panel is a list of the system you need the microwave oven model number and serial number. Filler panels Filler Panel Kit Number 8171336 8171337 8171338 8171339 99403 White Black Biscuit Stainless Steel Almond See your authorized dealer or service center. See the following examples: 3¹⁄₄" x 10" (8.3 x 25.4 cm...
Owners Manual - Page 1

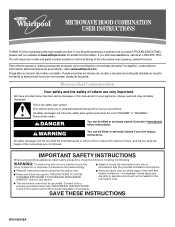
... abertura del horno de microondas, detrás de la puerta. This symbol alerts you to excessive microwave energy: ■ Install or locate the microwave oven only in accordance with the provided Installation Instructions. ■ Read all safety messages. These words mean: DANGER You can be grounded. for purchasing this section. ■ Some products such...
Owners Manual - Page 2

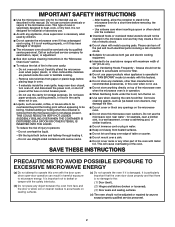
... harmful exposure to be used by anyone except properly qualified service personnel. 2 Do not use . ■ Do not store anything directly on top of the microwave oven when the microwave oven is important not to defeat or tamper with the door open since open-door operation can burn off power at the fuse or circuit breaker...
Owners Manual - Page 3

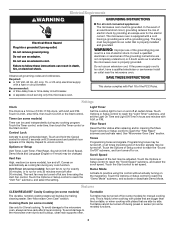
... Clock The Clock is too short, have a qualified electrician or serviceman install an outlet near the microwave oven. Timer (on some models) Timer can result in the display. Vent Fan High, medium (on . Light Timer Set the cooktop light to soil buildup, clean rack supports often. Filter Reset Reset the filter status after 30 minutes...
Owners Manual - Page 4

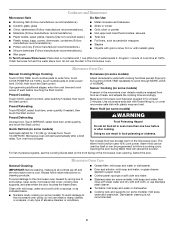
...dish becomes hot and the water stays cool, do not use the dish in the microwave oven detects moisture released from food as indicated below. ■ Nonstick cavity coating (on the... front facing of cook time at signal. Automatic defrost for at least 3 minutes. Microwave oven will cancel the function. Adjust doneness for automatic cooking functions (except Popcorn) by arcing due...
Owners Manual - Page 5

... the display when it , then firmly close door. Display shows messages ■ A flashing ":" or "PF" means there has been a power failure. The microwave oven's cooling fan (on some models) ■ Rack clip ■ Rack support ■ Grease filter ■ Charcoal filter ■ Cooktop light bulb ■ Cavity light bulb ■ Pan and handle ■ Steamer vessel Cleaning...
Owners Manual - Page 6

...numbers that is contrary to published user or operator instructions and/or installation instructions. 4. Repairs ... the upper or lower front facing of the microwave oven opening, behind the door. Outside the 50... fuses, or to repair or replace appliance light bulbs, air filters or water filters. Please...SHALL BE PRODUCT REPAIR AS PROVIDED HEREIN. Service calls to correct house wiring or plumbing. ...
Warranty - Page 1

...repair or replace appliance light bulbs, air filters or water filters. Major appliances with original model/serial numbers that is contrary to published user or operator instructions and/or ...borne by a Whirlpool designated service company. Consumable parts are excluded from your product, you on the upper or lower front facing of the microwave oven opening, behind the door. ...

Whirlpool Knowledge Base Results

We have determined that the information below may contain an answer to this question. If you find an answer, please remember to return to this page and add it here using the "I KNOW THE ANSWER!" button above. It's that easy to earn points!

  • What is the vent fan on my microwave for and how do I operate it?
    ... turned off . To turn on at medium speed when any sensor cooking function begins. My fan is running slower than usual FAQs Knowledgebase search tips My microwave oven will not run Fan runs during automatic fan operation, "Auto Fan is on, fan speed will remain on for off . It will remain on until the cooking function ends. It...
  • Fan runs during use and after oven is off
    ... What is the vent fan on my SpeedCook microwave oven with convection work? During any of the convection functions? Does the cooling fan runs during use to cool the electronic controls. FAQs Knowledgebase search tips My fan is running after the oven is turned off Why does the fan run after I operate it? The cooling fan may continue to...
  • How do I set the clock on my microwave oven?
    ... Clock or Start. The display on my microwave oven is a standard 12-hour clock (12:00-11:59) and does not show a.m.or p.m. Touch Clock. How do I set the clock on my microwave oven?  This is showing messages How does the Style 1 freestanding electronic oven control display operate on my microwave oven? Touch the number pads to set the...

Similar Questions

Microwave Exhaust Fan
I have repositioned the exhaust fan so that the fins are facing out the back of the microwave. When ...
(Posted by Anonymous-153793 8 years ago)
Beeping Noise
Why does the microwave beep every 15 minutes?
(Posted by dasonntag 10 years ago)
I Am Told That Microwave Oven Wmh1163xv(q)is No Longer Available.
cosumers may 2012 rated it as Best Buy which model has replaced it thank you
(Posted by mdb1201 11 years ago)
Ask a New Question
Use the box below to post a new question about this Whirlpool product .
Points & Prizes
  • You can earn points for nearly everything you do on HelpOwl.com
  • You can trade in those points for gift cards at leading retailers such as Amazon.com and Walmart
  • It's that simple!
See How it Works
Create a Free Account

Whirlpool Manuals

Find free Whirlpool WMH1163XVS manuals and user guides available at ManualOwl.com. Try out our unique manual viewer allowing you to interact with manuals from directly within your browser!

Whirlpool Reviews

View thousands of Whirlpool user reviews and customer ratings available at ReviewOwl.com.

Contact Information

Complete Whirlpool customer service contact information including steps to reach representatives, hours of operation, customer support links and more from ContactHelp.com.

Scoreboard Ratings

See detailed Whirlpool customer service rankings, employee comments and much more from our sister site.

Whirlpool Recalls

Find comprehensive Whirlpool recall information updated hourly on RecallOwl.com.