Vizio E320-B0 Support Question
Vizio E320-B0 Support Question
Find answers below for this question about Vizio E320-B0.Need a Vizio E320-B0 manual? We have 2 online manuals for this item!
Question posted by fatdog551948 on November 17th, 2015
Picture On The Screen Is Boxed, How To I Get The Picture On The Entire Screen.
The person who posted this question about this Vizio product did not include a detailed explanation. Please use the "Request More Information" button to the right if more details would help you to answer this question.
Current Answers
Answer #1: Posted by TechSupport101 on November 17th, 2015 5:51 AM
TechSupport101

Member since:
May 24th, 2013 Points: 12,171,305

Member since:
May 24th, 2013 Points: 12,171,305
Hi. Do see page 18 & 19 of the .pdf doc here https://www.helpowl.com/manuals/Vizio/E320B0/214868 titled 'Download'. However, if this happened without an action on any human's part, it may indicated a hardware defect.
Related Vizio E320-B0 Manual Pages
Download - Page 7

...Screen Aspect Ratio 18 Adjusting the Picture Settings 19
Adjusting the Advanced Picture Settings 20 Adjusting the Professional Picture Settings 21
Adjusting the Color Tuner Settings 21 Renaming the Custom Picture Mode 23 Creating a Custom Picture Mode 24 Locking a Custom Picture Mode 24 Deleting a Custom Picture...and Connections 5
Rear Panel 5 Side Panel 6 Front Panel 7 Remote Control ...
Download - Page 10

... the hex screw into an upright position and place on a flat, level, and stable surface.
4.
Screw Size: Screw Pitch: Screw Length: Hole Pattern:
E320-B0
M4 0.70mm 12mm 100mm (V) x 100mm (H)
Be sure the...help you will need a wall mount. To prevent injury or damage to the TV, ask someone to the screen, place the TV on a wall, you .
1. Attach your TV and wall mount to your mount....
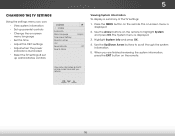
Download - Page 23

... an easy-to highlight a menu option, and press the OK bWuidtteon ZtooomseleNcortmathl aPtanoorpamtiicon.
Exit 2DWhile3nD avigating the on-screen menu, you can:
VIZIO
TV Settings
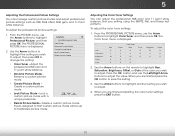
• Adjust the Picture settings • Adjust the Audio settings
Picture Audio Timers
• Activate the Sleep Timer • Adjust the Tuner settings • Set up Closed Captioning...
Download - Page 24

... Input source.
• Stretch expands the display image to view and press OK. Press the WIDE button on -screen menu. Since the picture is displaying a 480i/480p source.
• Wide stretches a 4:3 aspect ratio picture to view and press OK. Use the Arrow buttons to highlight the aspect ratio you wish to the edges...
Download - Page 25

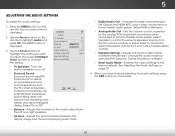
... useful in adjusting the flesh tones in the picture.
Standard picture mode meets ENERGY STAR® requirements. Auto Brightness Control automatically adjusts the brightness of the TV screen according to highlight Picture and press OK. Adjusts the black level of the picture. When Input thisWsideettingCiCs too low, the picture may be adjusted to distinguish in a dark...
Download - Page 26

... the Left/
Right Arrow buttons to adjust the horizontal position of the
displayed picture. Use the Up/Down Arrow buttons to ensure the image is centered
and completely fills the screen. Network Settings Help
20 The Advanced Picture menu is controlled by the content on the remote. Adjust the vertical and horizontal
positions...
Download - Page 27
... the SMPTE, Flat, and Ramp test patterns. From the PROFESSIONAL PICTURE menu, use the Arrow buttons to highlight Professional Picture, and then press OK. Adjust the professional HSB color and 11 point white balance.
• Rename Picture Mode Rename a custom picture mode.
• Create Picture Mode Create a custom picture mode.
• Lock Picture Mode -
Lock a custom picture mode with...
Download - Page 29
... Test Pattern.
Use the Left/Right Arrow buttons to highlight On to exit the menu screens.
To disable the Ramp Test Patter, use the Arrow buttons to highlight Off.
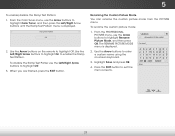
3. To rename the custom picture mode:
1. VIZIO
RENAME PICTURE MODE
Custom1_
abc def ghi j k l mn o p q r s t u v wx y z 0 123456789 .@# .com Space
Save
23 Ramp Test Pattern...
Download - Page 30

... remote. Network Settings Help
24
To lock a custom picture mode:
1.
InPpruet ss thWiedeEXIT CbCutton to exit the menu screens. Locking a Custom Picture Mode
You can create a custom picture mode. The LOCK PICTURE MODE menu is displayed.
2. Exit
2D
3D
2. 5
Creating a Custom Picture Mode You can lock the custom picture mode with a unique passcode to prevent any changes...
Download - Page 31

..., use the Arrow buttons to exit the menu screens.
25
5 The Delete PICTURE MODE window is displayed. Delete
Cancel
2.
To delete the user created [your picture mode] picture mode, select the Delete button. Press the EXIT button to highlight Delete Picture Mode, and then press OK. Use the Left/Right Arrow buttons to the Calibrated...
Download - Page 32
... and press OK. TruSurround completes the entertainment experience by providing deep, rich bass and by selecting Flat, Dynamic, Center, Bass Boost, or Bright. • Input ResWeidteAudiCoC Mode - Select On or...audio system. See Resetting the Audio Settings on the remote. Use the Arrow buttons on -screen menu is displayed.
3.
Lip Sync
- Adjusts the loudness of the audio output from the ...
Download - Page 38

...antenna for Over-the-Air signals, cable TV directly from the wall (no cable box), or a device with closed captions you wish to display, then press EXIT.
Use...then use the Left/Right Arrow buttons to turn Closed Captions On or Off.
4. See the diagram on -screen menu is not being broadcast with a composite video connection.
Change the transparency of the closed captions:
1. ...
Download - Page 39

...window to block the picture.
Text
Background (BG)
Closed caption text sample
Window 33
Closed Captions Screen Layout Change the color of the closed captioning box.
• Window Opacity...the closed captioning box
4. Change the opacity of background appears behind the text. There is red. Typical choices include:
• Transparent background, opaque window-The entire window remains ...
Download - Page 40

...highlight the input and press OK.
Enter Wiydoe ur ZcouomstomNolrambalel Puansoinragmicthe on the remote. ABC
Input
Wide
CC
Sleep Timer
Picture Audio
VIZIO
Name Device
HDMI-1
TV
Blu-ray_
abc def ghi j k l mn o p q r s ...For example, if you can rename the inputs. Press the MENU button on -screen keyboard and press OK.
5.
The Devices menu is displayed.
2. Highlight the ...
Download - Page 41
...:
• View system information
• Set up parental controls
• Change the on-screen menu language
• Set the time
• Adjust the CEC settings
• Adjust when...View status information for the TV, remote, current input and your network.
Sleep Timer
Picture Audio
Network Settings Help
35 The System menu is displayed.
2.WiUdese thZoeomArroNwormbaul ttPoannosraominc the ...
Download - Page 42

The on-screen menu is displayed. Use the Arrow buttons on the remote to its rating, you must enable the Program Rating feature. Enter your TV signals, such as a VCR, satellite or cable box, or DVR. The... for Over-the-Air signals or when connected to cable TV directly from the wall (no cable box). • You have not set a custom parental passcode, see Changing the Parental Control Passcode on...
Download - Page 47

... setup you want to connect the TV with your network. Press the MENU button on -screen instructions. Follow the on the remote. Wide
Zoom
Normal Panoramic
Exit
2D
3D
ABC
Input
Wide
CC
Sleep Timer
Picture Audio
Network Settings Help
41 Highlight Guided Setup and press OK.
VIZIO
Guided Setup Tuner Setup...
Download - Page 52

... Ensure the TV is off.
• Check the audio settings.
See Adjusting the Advanced Picture Settings on page 20. • Press the INPUT button on page 19.
• Check all ...of external devices (Blu-ray player, game console, cable/satellite box) that are connected correctly. See Adjusting the Audio Settings on the screen. • Ensure all devices are connected to a window for...
Download - Page 53

The picture is precision-manufactured using an extremely high level of technology. However, sometimes pixels may be low.
The TV has pixels (dots) that H-Size and V-Position in the on-screen menu are...The TV remembers the viewing mode on each input source. The display image does not cover the entire screen. • If you are always dark or always lit. • Your HDTV is distorted. ...
Download - Page 6

To prevent scratches or damage
to the screen, place the TV on a soft surface such as shown.
Align the base with the neck and tighten the included M4 8mm Phillips screw using a Phillips
screwdriver as a blanket. Place the TV on a clean, flat surface. INSTALLING THE BASE
1
2
Place the TV screen-down on a flat, stable surface.
Similar Questions

Picture Fades To White, Then Back To Color.
I have a 5 year old vizio tv that has never given me any trouble. Just yesterday, the picture slowly...
I have a 5 year old vizio tv that has never given me any trouble. Just yesterday, the picture slowly...
(Posted by leashaali 7 years ago)


Vizio Vw37l Hdtv40a Weight
What is the weight of the 37" vizio VW37L HDTV40A. How many pounds is it.
What is the weight of the 37" vizio VW37L HDTV40A. How many pounds is it.
(Posted by lindasecondofseven 11 years ago)

Why When I Put My Tv On Panoramic Do The Arms And Bodies Of People Look Distored
(Posted by katbowe3 12 years ago)