Sony UPX-C300 Support Question
Sony UPX-C300 Support Question
Find answers below for this question about Sony UPX-C300 - Document Camera - Compact.Need a Sony UPX-C300 manual? We have 1 online manual for this item!
Question posted by sherryrooks on December 30th, 2019
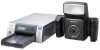
Upx-c300
Our printer is making a clicking sound as it prints, like the paper is catching on something. What is causing this and is it worth repairing? Please advise..thanks!
Current Answers
Answer #1: Posted by aliraza09 on April 19th, 2020 1:50 AM
aliraza09

Member since:
April 19th, 2020 Points: 3,300
Member since:
April 19th, 2020 Points: 3,300
The cause of the problem may be that the printer's clutch actuator is disengaged. To fix a disengaged clutch actuator, try the procedure below:
i. Open the printer lid.
ii. Unplug the power cord from the back of the printer.
iii. Remove the upper (OUT) paper tray.
iv. Slide the carriage assembly, which holds the ink cartridges, away from the left side of the printer. If the carriage assembly moves away from the left side, go to Step 6.
v. If the carriage assembly is stuck on the left side, go to the next step.
vi. If the carriage assembly is stuck at the left side, push down on the large black bar directly above the three large rollers and release it so it springs back up. Gently lift the carriage assembly and try moving it to the right again.
vii. Locate the metal gear assembly at the left side of the printer. Directly above the metal gear is the clutch actuator (also known as the slider arm), a small plastic arm approximately 50 mm (2 inches) in length. On the right edge of the clutch actuator is an "arrow" or "tooth" that points down. The arrow on the clutch actuator should be in the space to the right of the metal gear and plastic half-gear just below the clutch actuator.
viii. If the arrow on the clutch actuator is stuck between the metal gear and plastic half-gear, (see Figure 1) lift the clutch actuator and move the arrow to the right of the plastic half-gear. Once the arrow on the clutch actuator is to the right of the gears (see Figure 2), the clutch actuator should move freely right and left about 12.7 mm (0.5 inches).
ix. Replace the upper (OUT) paper tray.
x. Close the printer lid.
xi. Plug in the power cord to the back of the printer.
xii. Turn the printer on.
xiii. Print a self-test by pressing and holding the Resume button (upper button) for five seconds and releasing it.
xiv. If the same problem still exists, verify that both ink cartridges are snapped into the carriage tightly and are not loose. See the printer User's Guide or the HP Toolbox in Windows for instructions on installing the ink cartridges.
xv. Try printing a self-test again.
Hope this helps!
Related Sony UPX-C300 Manual Pages
Operating Instructions - Page 1
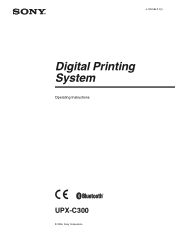
4-109-584-11(1)
Digital Printing System
Operating Instructions GB
UPX-C300
© 2006 Sony Corporation
Operating Instructions - Page 3
... All companies and product names mentioned herein may cause undesired operation. Duplication, edition, or printing of the unit, operate the disconnect device to...printer, pay special attention not to the addresses given in the U.S.A. Unless you have permission of copyright holders for damages. For the DKC-C300X Digital Still Camera
For the customers in separate service or guarantee documents...
Operating Instructions - Page 4
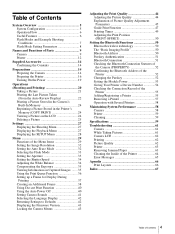
... the Connection Record of the Printer 55 Adding/Registering a Printer 55 Removing a Printer 57 Operation with Several Printers 58
Maintaining System Performance 58 Camera 58 Printer 59 Cleaning 59
Specifications 59
Troubleshooting 61 Camera 61 While Taking Pictures 61 Camera LCD 62 Printing 62 Picture Quality 62 Printer 63 Removing Jammed Paper 63 Cleaning the Inside of the...
Operating Instructions - Page 5
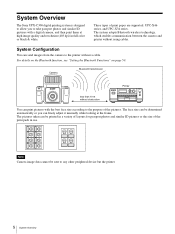
... Bluetooth wireless technology, which enables communication between the camera and printer without obstruction
Printer
MENU
EXEC
PRINT ALARM
You can print pictures with a digital camera, and then print them at the frame.
Note
Camera image data cannot be sent to the printer without a cable. System Overview
The Sony UPX-C300 digital printing system is designed to allow you can finely...
Operating Instructions - Page 7
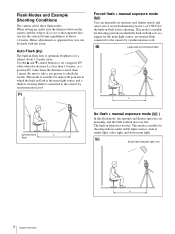
...camera offers three flash modes. Use the v and V control buttons to set manually, and the built-in flash acts as a trigger for shooting indoors under stable light sources, such as studio light, video...built-in flash before shooting.
When setting up, make sure the distance between the camera and the subject (L) is connected to the camera by synchronization cord. Auto Flash ( )
The built...
Operating Instructions - Page 16

...cartridge together with print paper of a different size may produce incorrect printing results or cause paper jams and other problems. • Do not print on the printing surface or ink ribbon may lower the print quality. • When removing partially used print paper. Camera
Tripod
Preparing the Printer
Before using too much force when tightening may damage the screw hole. Make sure that...
Operating Instructions - Page 19
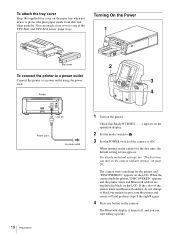
...
Tray cover
2
To connect the printer to a power outlet
Connect the printer to a power outlet using the power
3
cord.
4
Printer
Power cord
19 Preparations
to any button on the camera.
The Bluetooth display is turned off and perform steps 1 through 3 again.
4 Press any of the camera to protect the print paper inside from dust and other particles...
Operating Instructions - Page 24
... set .
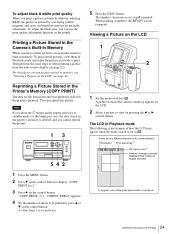
5 Press the EXEC button.
You can use the print quality adjustment function on the printer.
The LCD in Playback mode
The following is an example of sheets to . Printing a Picture Stored in the Camera's Built-In Memory
When a picture is taken, its data is printed.
"COPY PRINT: 1 [1 - 9 PRINT: EXEC]" appears.
4 Set the number of how the...
Operating Instructions - Page 31
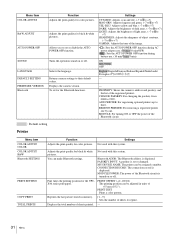
...set or changed. Displays the total number of the registered printers.
Fine tunes the printing position for black & white pictures. PRINT OFFSET (-2/-1/0/1/2) The printing position can be assigned a number. Adjusts the print quality for the UPCX46 series print paper. Turns the operation sound on or off . PROPERTY: Shows the camera's address and passkey, and the list of sheets...
Operating Instructions - Page 50

... positioned on the print paper.
1
2 34
65
1 Turn on the printer.
2 Press the MENU button.
3 Press v or V on page 22. To exit PRINT SETTING
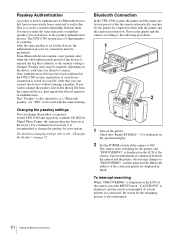
Press the MENU button to return to the READY screen. Setting the Bluetooth Functions
Bluetooth wireless technology
The bluetooth1) wireless technology allows communication between the camera and the printer you intend to...
Operating Instructions - Page 51
...:
1
DIGITAL PHOTO PRINTER
MENU EXEC
PRINT ALARM
PUSH OPEN
2
1 Turn on the device, each device connection is stored in black. If you wish to create a trusted relationship between the camera and the printer, the message changes to as a "Bluetooth passkey" etc. Turn on the printer and the camera according to each device in the UPX-C300 system, registration...
Operating Instructions - Page 52
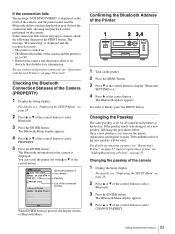
... the LCD of the control button to select
Bluetooth.
3 Press the ENTER button. The Bluetooth information for all cameras and printers at the factory. Confirming the Bluetooth Address of the Printer
1
1
DIGITAL PHOTO PRINTER
2 3,4
MENU EXEC
PRINT ALARM
1 Turn on the printer.
2 Press the MENU button.
3 Press V of the control button to be performed on the...
Operating Instructions - Page 53
...
button.
If it is set a four-digit passkey.
8 Press B of the printer
1 Turn on the printer.
The display returns to Bluetooth Menu. "Bluetooth ADDR" appears.
5 Press V of... button to display "PASSKEY
INPUT [>>]."
6 Press B of the control button to connect the camera and the printer using the Bluetooth function. "PASSKEY INPUT [X:X:X:X]" appears.
||
Current digit to be set Passkey
...
Operating Instructions - Page 54
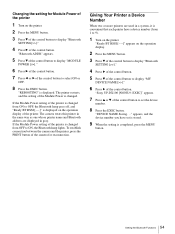
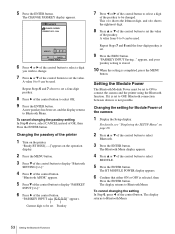
To establish connection between the camera and the printer, press the PRINT button of the camera for Module Power of the printer
1 Turn on the operation display.
2 Press the MENU button.
3 Press V of the control button to display "Bluetooth
SETTING [>>]."
4 Press B of the control button.
5 Press V of ...
Operating Instructions - Page 55
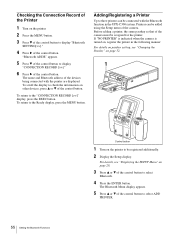
To return to be connected with the printer are displayed. Printers can be registered additionally.
2 Display the Setup display. If "NO PRINTER" is indicated when the camera is turned on, register the printer in the UPX-C300 system. For details, see "Changing the Passkey" on page 52.
1
DIGITAL PHOTO PRINTER
MENU EXEC
PRINT ALARM
PUSH OPEN
55 Setting the Bluetooth...
Operating Instructions - Page 56
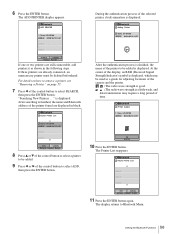
... appears.
is displayed. After searching is finished, the name and Bluetooth address of the printer found are still connectable, add printer(s) as a guide for adjusting locations of the camera and the printer.
: The radio wave strength is good. : The radio wave strength is displayed. Sony UP-DX100 ADDRESS 00:A0:96:12:24:E1...
Operating Instructions - Page 58
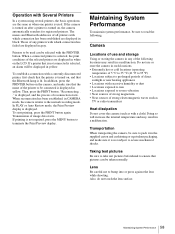
...
TV or radio transmitters
Heat dissipation
Do not cover the camera (such as when one printer is selected, the print conditions of any printers with which connection has been established are displayed in black. Those of the selected printer are displayed in white on the camera, and make sure it in the supplied carton and cushioning or...
Operating Instructions - Page 65
... button to transmit. CHECK PRINTER
MEDIA MISMATCH PUSH [EXEC]
• The print paper and print cartridge do not match.
tInstall the paper tray, and press the EXEC button.
• The print paper has run out.
FAILED!
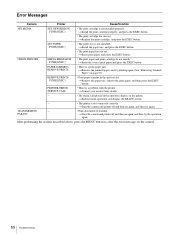
• Print data failed to clear the error message on again, and then try again. Error Messages
Camera
Printer
Cause/Solution
SET MEDIA
SET NEW...
Operating Instructions - Page 67
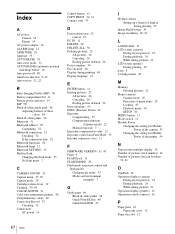
... 26 Canceling 26 Exiting picture deletion 26 Device number 54 Die-cut print 40 Display during printing 49 Display language 42
E
ENTER button 11 Erasing pictures 25
All ...O
OnePush 34 Operation display (camera)
During layout preview 23 During playback 24 While taking pictures 21 Operation display (printer) 12 Operation sounds (camera) 41
P
Paper jams 63 Paper jam cover 13
Paper tray slot 12
67 Index
Operating Instructions - Page 68
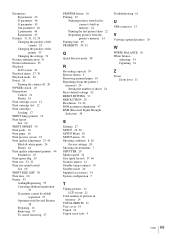
...Preparations
Camera 14 Printer 16 Print cartridge cover 12 Print cartridge slot 12 Print cartridges Loading 17 PRINT lamp (printer) 12 Print layout List 66 PRINT OFFSET 50 Print packs 16 Print paper 18 Print preview screen 23 Print quality adjustment 23, 44 Black & white prints 24 Printer 44 Print quality adjustment (printer) 44 Parameters 45 Print queue flag 24 Print size 23, 32 Print size (print...
Similar Questions


Color Shift
I have a Sony UPX-C300. When I print a photo the Red is shifted up and the Yellow is shifted down. H...
I have a Sony UPX-C300. When I print a photo the Red is shifted up and the Yellow is shifted down. H...
(Posted by seidl 11 years ago)

Flash Campatible For Sony Upx C300
(Posted by luckyoa 11 years ago)

Saving Prints On Pc
It seems Bluetooth on this camera for the printer only. How can I save my prints to my PC?
It seems Bluetooth on this camera for the printer only. How can I save my prints to my PC?
(Posted by vprochilo 13 years ago)