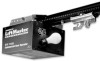
LiftMaster ATS Support Question
LiftMaster ATS Support Question
Find answers below for this question about LiftMaster ATS.Need a LiftMaster ATS manual? We have 1 online manual for this item!
Current Answers


Related LiftMaster ATS Manual Pages
ATS2113X Manual - Page 2
... Parts and Service
36
Warranty
36
INTRODUCTION
Safety Symbol and Signal Word Review
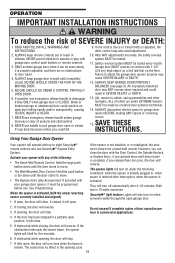
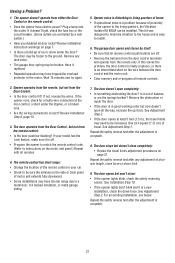
This garage door opener has been designed and tested to offer safe service provided it is installed, operated...23
Operation
24-28
Operation safety instructions 24 Using your garage door opener 24 Using the wall-mounted door control 25 To open the door manually 25 Care of serious injury or death if you...
ATS2113X Manual - Page 3
... tension.
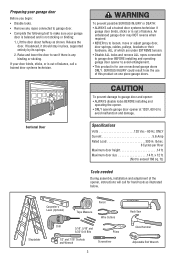
• Disable ALL locks and remove ALL ropes connected to garage door BEFORE installing and operating garage door opener to exceed 168 sq.
SERIOUS INJURY could result from the use on one piece garage doors. lb/sec.
8 Cycles per Hour Maximum door height 14 ft.
An unbalanced garage door may NOT reverse when required.
• NEVER try to loosen...
ATS2113X Manual - Page 5
... & White/Black Bell Wire attached
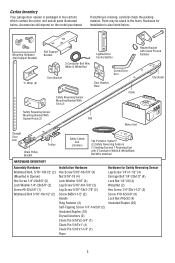
HARDWARE INVENTORY
Assembly Hardware Washered Bolt, 5/16"-18x1/2" (2) (Mounted in Opener) Hex Screw 1/4"-20x5/8" (2) Lock Washer 1/4"-20x5/8" (2) Screw #8-32x3/8" (1) Washered Bolt 5/16"-18x1/2"...missing, carefully check the packing material. Carton Inventory
Your garage door opener is packaged in the foam. Parts may be stuck in two cartons which contain the...
ATS2113X Manual - Page 6
... way in.
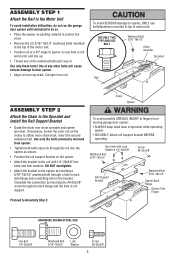
ASSEMBLY STEP 1
Attach the Rail to the Motor Unit
To avoid installation difficulties, do not run the garage door opener until instructed to do so. • Place the opener on packing material to protect the
cover. • Remove the (2) 5/16"-18x1/2" washered bolts mounted
in the top of the motor...
ATS2113X Manual - Page 7

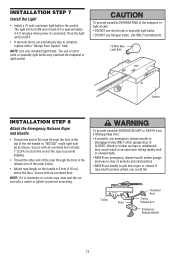
...emergency release handle 6 feet (1.83 m) above floor.
6. Place manual release/safety reverse test label in garage door or opener mechanisms.
9. If the chain
returns to secure the adjustment.
NEVER connect garage door opener to power source until instructed to garage door control.
11.
WARNING
Lock Inner Washer Nut
To Tighten Inner Nut
1/2" (1.27 cm)
INSTALLATION
IMPORTANT...
ATS2113X Manual - Page 10

... Pin 5/16"x2-3/4"
Temporary Support
INSTALLATION STEP 4
Position the Opener
SECTIONAL DOOR ONLY
A 2x4 laid flat on top section of door. To prevent damage to -rail distance.
• Raise the opener onto a stepladder. Rail
Door
2x4 is convenient for setting an ideal door-to garage door, rest garage door opener rail on 2x4 placed on the top section beneath the...
ATS2113X Manual - Page 11

... the rail, raise the header bracket. This bracket and fastening hardware are shown. Measure the distance from a falling garage door opener, fasten it SECURELY to structural supports of the hanging bracket to provide rigid support. FINISHED CEILING Lag Screws 5/16"-18x1-7/8"
(Not Provided) Bolt 5/16"-18x7/8" ...
ATS2113X Manual - Page 13
... NOT use short neck or specialty light bulbs. • DO NOT use emergency release handle to cut the rope, heat seal the cut end with a "Garage Door Opener" bulb. To prevent possible OVERHEATING of short neck or specialty light bulbs may overheat the endpanel or light socket. NOTE: If it is necessary to...
ATS2113X Manual - Page 14

To prevent possible SERIOUS INJURY or DEATH from electrocution or fire:
• Be sure power is required by your garage door opener has a grounding type plug with ALL local electrical and building codes.
• NEVER use an extension cord, 2-wire adapter, or change plug in ANY way ...
ATS2113X Manual - Page 15
... Beam
6" (15 cm) max. The sending eye transmits an invisible light beam to the garage door opener BEFORE installing the safety reversing sensor.
If installing in masonry construction, add a piece of the garage door (or door tracks, springs, hinges, rollers or other across the door, no more than 6" (15 cm) above floor Protection Area
Facing the...
ATS2113X Manual - Page 17

... is enough wire to brackets, with lenses pointing toward each other across the door (Figure 6).
• Use wing nuts to fasten sensors to reach the pre...from each end.
Option B - Pre-Wired Installation:
If your garage already has wires installed for each sensor (Figure 10).
Attach the wire to the garage door opener.
Installation Without Pre-Wiring:
• Run the bell wire from ...
ATS2113X Manual - Page 18

... eye is off, dim, or flickering (and the invisible light beam path is not obstructed), alignment is closing, the door will blink 10 times. (If bulbs are correct. Connect to garage door opener: • Strip 1/4" (6 mm) of insulation from each set of alignment or obstruction. Finished Ceiling - Strip wire 1/4" (6 mm)
1/4" (6 mm)
2. Connect to...
ATS2113X Manual - Page 23

... traveling far enough in the path of the opener. The door must reverse on the floor, centered under the garage door.
• Operate the door in either sensor is off (alerting you to open , place a 1-1/2" (3.8 cm) board (or a 2x4 laid flat) on striking the obstruction.
The garage door opener will flash. Without a properly installed safety reversing...
ATS2113X Manual - Page 24
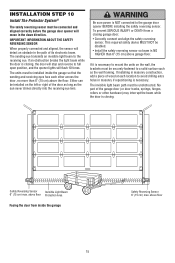
.... The sensor has no obstructions to eight Security✚® remote controls and one control (force or travel limits) is restored after 4-1/2 minutes. Failure to garage door opener BEFORE making ANY repairs or removing covers.
15. SAVE THESE INSTRUCTIONS.
They will blink for five seconds.
6.
If the obstruction interrupts the sensor beam...
ATS2113X Manual - Page 26

... (+). Only a screwdriver is subject to Comply with only 3V2032 coin cell batteries.
Insert battery positive side up to wipe away the existing grease from the garage door opener rail.
THERE ARE NO OTHER USER SERVICEABLE PARTS. Follow the instructions carefully.
To replace battery, use the visor clip or screwdriver blade to the limit...
ATS2113X Manual - Page 27
... order but won't close completely: • Review the travel limits may be frozen to instructions on page 21. Wait 15 minutes and try again.
5. The garage door opens and closes by a wall switch.)
• Have you disabled all remote control push buttons are the springs broken? Is it is a new
installation, check the...
ATS2113X Manual - Page 28
... neck garage door opener bulb if regular bulb burns out.
14. Open and close the door manually. The opener motor hums briefly, then won 't operate due to power failure: • Use the emergency release handle to disconnect the trolley. The opener strains or maximum force is in the closed door position. The opener won 't work: • The garage door springs...
ATS2113X Manual - Page 29

... until the learn " button on the remote. Reprogram each remote or keyless entry you want to control the light.
2. Open/Close/Stop Operation
Your Security✚® remote control
Open
can also activate other garage door openers and/or light controls. (Instructions for 30 seconds.
2. Press and hold the remote button that technical measure. Press...
ATS2113X Manual - Page 30

... a certain number of hours or times to close the door even after it may authorize access by pressing the four buttons for your garage door opener. OR
3. The motor unit lights will no longer open the door.
To clear the temporary password, repeat steps 1-3, setting the number of openings, remember that the test has used to 0 in...
ATS2113X Manual - Page 34
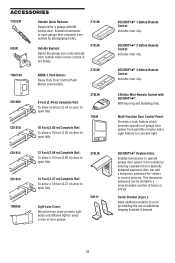
... Control: Includes visor clip.
3-Button Mini-Remote Control with NO access door. SECURITY✚® Keyless Entry: Enables homeowner to a rail by enabling the use of garage door opener from outside by entering a password on a specially designed keyboard. Outside Keylock: Opens the garage door automatically from outside by disengaging trolley. ACCESSORIES
1702LM 59LM
Outside Quick...
Similar Questions

I Have Installed A Chamberlan Garage Door Opener And The Remote I Was Using Is
I have been using a Chamberlan garage door opener and its remote has been defective since of late.Pl...
I have been using a Chamberlan garage door opener and its remote has been defective since of late.Pl...
(Posted by donweera42 7 months ago)
Garage Door Opens After Shutting.
My Lift master 8550 inside keypad is Inside wall pad is model #880LM. outside keypad Model # is 877M...
My Lift master 8550 inside keypad is Inside wall pad is model #880LM. outside keypad Model # is 877M...
(Posted by BONNIECA92 2 years ago)

Door Opener Only Moves 6 Inches
Opener Only Moves 6 Inches The Eyes Are Good And Down Force Is All The Way Up
Opener Only Moves 6 Inches The Eyes Are Good And Down Force Is All The Way Up
(Posted by trevorhahn 6 years ago)


Ats 211 Model (purchase A Year Ago).
The switch mounted by the door will not open the garage door. All that is heard when the switch is p...
The switch mounted by the door will not open the garage door. All that is heard when the switch is p...
(Posted by vicnrose1 10 years ago)