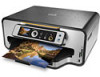
Kodak ESP 7250 Support Question
Kodak ESP 7250 Support Question
Find answers below for this question about Kodak ESP 7250 - All-in-one Printer.Need a Kodak ESP 7250 manual? We have 4 online manuals for this item!
Question posted by elas on March 20th, 2014
How To Reset Factory Network Settings Kodak Printer Esp7250
The person who posted this question about this Kodak product did not include a detailed explanation. Please use the "Request More Information" button to the right if more details would help you to answer this question.
Current Answers
Related Kodak ESP 7250 Manual Pages
Networking Setup Guide - Page 2
...) connection
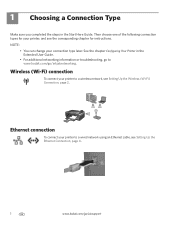
To connect your printer to a wired network using an Ethernet cable, see Setting Up the Ethernet Connection, page 4.
1
www.kodak.com/go to a wireless network, see the corresponding chapter for your connection type later.
1 Choosing a Connection Type
Make sure you completed the steps in the Extended User Guide.
• For additional networking information or troubleshooting...
Networking Setup Guide - Page 3
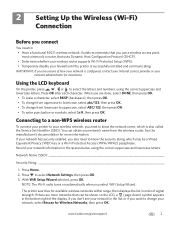
....11 wireless network. Kodak recommends that uses Dynamic Host Configuration Protocol (DHCP). • Determine whether your wireless router supports Wi-Fi Protected Setup (WPS). • Temporarily disable your network information in order of how your network is also called the Service Set Identifier (SSID). Using the LCD keyboard
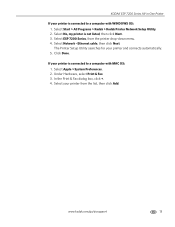
On the printer, press , , or to select Network Settings, then...
Networking Setup Guide - Page 4
...Network Settings, then press OK. 3. b.
When the confirmation message appears, press OK. When the printer is successfully connected, install the KODAK All-in-One Printer Software on your wireless router's software, locate the PIN screen. Press to select Unlisted network...light should be a button on the device or a virtual button in -One Printer Software on automatically when you received ...
User guide - Page 10
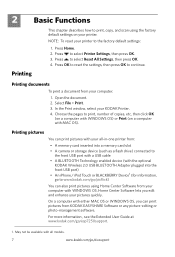
Press OK to reset the settings, then press OK to select Printer Settings, then press OK. 3. Printing documents
To print a document from your printer to the factory default settings:
1. Printing pictures
You can print pictures with your all models.
7
www.kodak.com/go/aiosupport
Choose the pages to print, number of copies, etc, then click OK
(on a computer with...
Extended user guide - Page 4
...Scanning Before you begin scanning ...48 Changing the scan settings for scanning from the control panel 48 Scanning from ...printer firmware...63 Updating if your printer is connected to a computer with WINDOWS OS 63 Updating if your printer is connected to a computer with MAC OS 64 Monitoring and adjusting printer performance ...64 Checking ink levels...64 Resetting factory...kodak.com/go/aiosupport
Extended user guide - Page 10
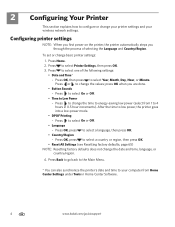
... Minute. After the time to select a country or region, then press OK.
• Reset All Settings (see Resetting factory defaults, page 65) NOTE: Resetting factory defaults does not change the date and time, language, or
country/region.
4. Press OK, press to low power, the printer goes into a low-power mode.
• DPOF Printing - Press to select On...
Extended user guide - Page 11

... your printer to the network.
www.kodak.com/go/aiosupport
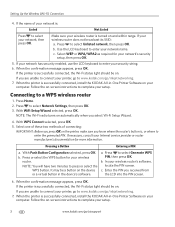
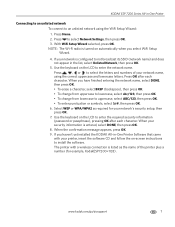
5 Service Set Identifier). See the manufacturer's documentation provided with a network interface card or wireless networking support. • A working 802.11 wireless network. Read the following information. Connecting to a listed network See Before you select WiFi Setup Wizard. To connect to select Network Settings, then...
Extended user guide - Page 13
... OK.
5. When you haven't yet installed the KODAK All-in -One Printer
Connecting to an unlisted network To connect to select the letters and numbers of the printer plus a number (for your network is configured to select Network Settings, then press OK. 3. Press Home. 2. KODAK ESP 7200 Series All-in -One Printer Software that came
with a wireless connection is listed...
Extended user guide - Page 14

To connect to select Network Settings, then press OK. 3. c. Configuring Your Printer
Using WPS to connect to a Wi-Fi network If your router supports Wi-Fi Protected Setup (WPS), you configure your printer for a wireless network by pressing buttons or entering a PIN. Press to a network using WPS:
1. Select one of two methods of the printer plus a number (for your...
Extended user guide - Page 15
...it is for the printer. If you selected Manual (Static), you are prompted to www.kodak.com/go/inkjetnetworking. Use the navigation buttons to select Network Settings, then press OK. 3. www.kodak.com/go to ... then press OK. 4. KODAK ESP 7200 Series All-in-One Printer
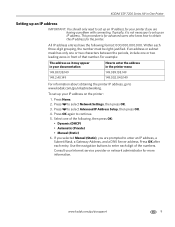
Setting up an IP address
IMPORTANT: You should only need to continue. 5. To set up your printer if you are having ...
Extended user guide - Page 16
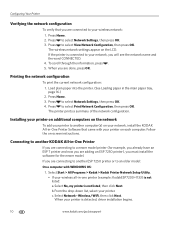
... to another ESP 7250 printer or to another KODAK All-in -One Printer Software that you are adding an ESP 7250 printer), you must install the software for example, you already have an ESP 7 printer and now you will see the network name and the word CONNECTED. 4. Press to select Network Settings, then press OK. 3. c. Select Network -
b. The wireless network settings appear on...
Extended user guide - Page 17
.../go /aiosupport
11 Select No, my printer is listed, then click Next. b. Select Network - When your printer is detected, driver installation begins. Select Yes, my printer is not listed, then click Next. Click the + sign to select Network Settings, then press OK. 3. On the printer control panel, press Home. 2.
c. www.kodak.com/go /inkjetnetworking. 6.
Press to add...
Extended user guide - Page 18
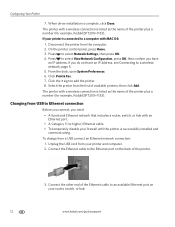
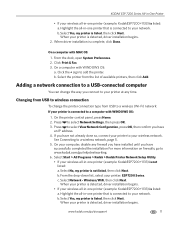
...kodak.com/go/aiosupport From the dock, open System Preferences. 6. Select the printer from your printer is connected to Ethernet connection
Before you connect, you need: • A functional Ethernet network...to a wireless network, page 5. 5. Click the + sign to select Network Settings, then press OK. 4. Disconnect the printer from a USB connect an Ethernet network connection: 1.
...
Extended user guide - Page 19
Select Start > All Programs > Kodak > Kodak Printer Network Setup Utility. 2. The Printer Setup Utility searches for your printer from the printer drop-down menu. 4. Select ESP 7200 Series, from the list, then click Add. Ethernet cable, then click Next. Select Apple > System Preferences. 2. Select No, my printer is connected to a computer with MAC OS: 1. Under Hardware, select ...
Extended user guide - Page 32
....7 in . / 184 x 216 mm) - In the Print dialog box, make sure that KODAK ESP 7200 Series AiO is selected,
then click Properties. 4. Open the document. 2.
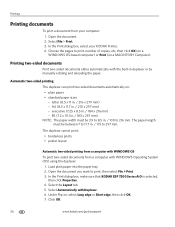
Automatic two-sided ...poster layout
Automatic two-sided printing from a computer with WINDOWS OS To print two-sided documents from your KODAK Printer. 4. executive (7.25 x 8.5 in . / 175 to 216 mm. Printing
Printing documents
To print a...
Extended user guide - Page 43
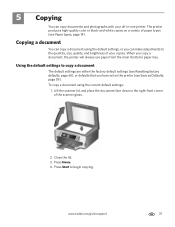
..., and place the document face down in -one printer. www.kodak.com/go/aiosupport
37
Using the default settings to begin copying. Press Start to copy a document
The default settings are either the factory default settings (see Resetting factory defaults, page 65), or defaults that you copy a document, the printer will always use paper from the main (bottom) paper...
Extended user guide - Page 48
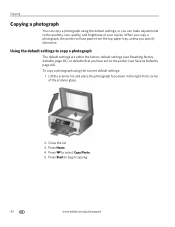
...). Press Home. 4. When you copy a photograph, the printer will use paper from the top paper tray, unless you have set on the printer (see Resetting factory defaults, page 65), or defaults that you specify otherwise. Press to begin copying.
42
www.kodak.com/go/aiosupport
Using the default settings to the quantity, size, quality, and brightness of...
Extended user guide - Page 71
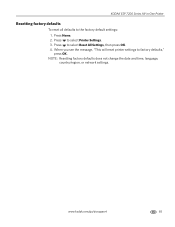
... to select Reset All Settings, then press OK. 4. NOTE: Resetting factory defaults does not change the date and time, language, country/region, or network settings.
Press to select Printer Settings. 3.
When you see the message, "This will reset printer settings to the factory default settings: 1. KODAK ESP 7200 Series All-in-One Printer
Resetting factory defaults
To reset all defaults...
Extended user guide - Page 75

...
Power light Off Blinks continuously Blinks intermittently
On
What it means
The printer is busy. KODAK ESP 7200 Series All-in-One Printer
Status lights
The status lights indicate the condition of the printer and into the back of the printer.
Wait for available wireless networks within range, press OK, turn on and there is a working connection...
Extended user guide - Page 89
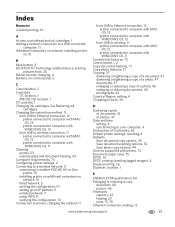
...13
from USB to wireless connection, 11 printer connected to computer with MAC OS, 12 printer connected to computer with WINDOWS OS, 11
Cleaning printer, 53 scanner glass and document backing, 54
Computer requirements, 74 Configuring printer settings, 4 Connecting to a wireless network, 5
connecting to another KODAK All-in-One printer, 10
installing printer on additional computers on control panel...
Similar Questions

On Network Set Up I Have Error Code 7300 What Is This Code.
unable to set up wireless conection due to error 7300
unable to set up wireless conection due to error 7300
(Posted by timelainebrind 9 years ago)

Kodak 7250 Printer Won't Reset Network Setting
(Posted by szivanyGi 10 years ago)

How To Fix A Stuck Printer Cartridge Model Esp 7250
(Posted by gemindo 10 years ago)

Which Printer To Add Esp 5250 Do I Add To My Mac
(Posted by togcern 10 years ago)

Kodak Esp C315 How To Reset Network Settings
(Posted by joshlelect 10 years ago)