JVC D870U Support Question
JVC D870U Support Question
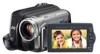
Find answers below for this question about JVC D870U - GR Camcorder - 680 KP.Need a JVC D870U manual? We have 1 online manual for this item!
Question posted by rbbridges1 on February 19th, 2013
I Have Lost My Cord To My Camera & Need Another One. Where Can I Get One?
The person who posted this question about this JVC product did not include a detailed explanation. Please use the "Request More Information" button to the right if more details would help you to answer this question.
Current Answers
Answer #1: Posted by tintinb on February 23rd, 2013 7:36 AM
tintinb

Member since:
October 26th, 2012 Points: 7,056,560

Member since:
October 26th, 2012 Points: 7,056,560
The USB data cable/cord for your JVC D870U device can be purchased online. However, the exact price varies based on the pricing of the seller. You can purchase this cable from the following stores.
- http://www.ebay.com.au/itm/USB-Cable-JVC-GR-D870-GR-D870U-GR-D875-GR-D875US-GR-D90-GR-D90K-GR-D90U-/121049557787
- http://www.cellularfactory.com/camcorder/JVC/3/356370/
- http://www.amazon.com/JVC-GR-D870-Camcorder-Cable-Mini/dp/B00301PSNK
Please read the user's manual here for more information.
http://www.helpowl.com/manuals/JVC/D870U/1540
If you have more questions, please don't hesitate to ask here at HelpOwl. Experts here are always willing to answer your questions to the best of our knowledge and expertise.
Regards,
Tintin
Related JVC D870U Manual Pages
Instruction Manual - Page 1

ENGLISH
The camcorder illustrations appearing in pages 4 - 6 to ensure safe use of the GR-D870. Before use, please read the safety information and precautions contained in this instruction manual are of this digital video camera.
INSTRUCTIONS
DIGITAL VIDEO CAMERA
GR-D850 GR-D870
LYT1809-001A
EN
Dear Customer, Thank you for purchasing this product.
Instruction Manual - Page 2

...; 13)
MENU
16:9 WIDE SCREEN
BLANK/ 16:9 INDEX
Set MEMORY/VIDEO Switch to "PLAY". (੬ 13)
2 The screen will be displayed for
approx. 3 seconds. 2 EN Easy Start Guide 1.
Notes: • The battery pack is not charged at
the time of the camcorder
BATT.
2. Preparation
1 Attach the battery pack. Please charge the battery...
Instruction Manual - Page 3

... data, make a trial recording and play back picture on a connected
TV. (੬ 40)
Note: • We recommend
cleaning your camcorder for recording.
3 Press the Recording Start/Stop button
to check that the video and sound have been recorded correctly. • As a start recording. Note: • To set the date and time. (੬...
Instruction Manual - Page 5

... enclosure that it is designed to be caused.)
CAUTION: To avoid electric shock or damage to the camcorder from an AC outlet, use this equipment, fire or electric shock may not be placed on top ...by a newspaper, or cloth etc.
CAUTIONS: • This camcorder is no longer wobbly, and then plug the larger end of the power cord into the AC Adapter until it has sufficient space on all ...
Instruction Manual - Page 6

... for long periods of time. 12. When carrying, be exposed to excessive heat such as power-supply cord or plug is shown, it on unsteady or unlevel surfaces. Connecting cables (Audio/Video, S-Video, etc.) to the camcorder and leaving it is required when the apparatus has been damaged in damage. Carrying or holding the...
Instruction Manual - Page 8

... select
e 6 FOCUS Move the control lever up /down/ 2 Press down . Do not use the provided cables for connections.
Accessories
AC Adapter AP-V14E
Power Cord
or
Audio/Video Cable (ø3.5 mini-plug to RCA plug)
Battery Pack BN-VF808U
Shoulder Strap (੬ 9)
Lens Cap (੬ 9)
USB Cable
CD-ROM
Note: Make sure...
Instruction Manual - Page 9

... EN 9
Peel off the pad and thread the end of the strap through the buckle, adjust its length, and use the strap guide to the camcorder as shown in place.
Thread the strap through the eyelet. ENGLISH
Position the buckle near the eyelet and reattach the pad.
Instruction Manual - Page 10

Velcro Strip
Tripod Mounting
Align the camcorder stud hole with the tripod stud, and the mounting socket with the screw and lock it in place. Bottom of the camcorder
10 EN Getting Started
Grip Adjustment
Open the pad and make grip adjustments. • Remove any security tags that may be
attached to the velcro.
Instruction Manual - Page 11

Memory Card (optional)
Clipped edge
3 Close the Card cover.
Appears when the camcorder does not recognize the loaded memory card.
Card Cover ()
2 Firmly insert the card ...memory card. (੬ 27)
CARD ERROR! If the indication still appears, the memory card is a problem with this camcorder. After the card comes out a little, pull it again. To remove the SD Card Push the SD Card once....
Instruction Manual - Page 12

However, this is not a malfunction. • Power-linked operation
You can rotate 270˚. • Colored bright spots may appear all over the LCD monitor. 12 EN Getting Started
X
Index
8QP e
a
Z
VW K
b c
d L 1 2
U T
6R YI J7
M
5 f g
S
4 3N O
Notes: • The LCD monitor can also turn the camcorder on/off by opening/closing the LCD monitor during the recording mode.
Instruction Manual - Page 13

...[] (੬ 36)/Spot Exposure
(੬ 36)
Press down the lock button. G Audio/Video Output Connector [AV] (੬ 40) H DC Input Connector [DC] (੬ 16)... Shoulder Strap Eyelet (੬ 9) U Grip Strap (੬ 10) V Camera Sensor
(Be careful not to the IEEE1394-1995
industry specification and ...OFF: To switch off the camcorder.
ENGLISH
MEMORY: To record in a memory card...
Instruction Manual - Page 14

...)
Selected Program AE Indicator (੬ 38)
LCD (੬ 31)
: LCD Backlight Indicator
(Appears for approx. 5
seconds after turning on the camcorder.)
During Both Video And D.S.C. 14 EN Getting Started LCD Monitor Indications
During Video Recording Only
16:9 LP
- - -min
REC
SOUND 12 B I T
WH
15:55
Tape Running Indicator (੬ 19)
(Rotates while tape...
Instruction Manual - Page 16

.... • The LED Light is used. • Before extended use . POWER/ CHARGE Lamp
AC Adapter
Power Cord
To AC Outlet (110V to 240V)
2 Attach the battery pack.
• With the "r" (arrow) on...• The POWER/CHARGE lamp on the camcorder blinks to indicate charging has started.
• When the POWER/CHARGE lamp goes out, charging is worn out and needs to
the unit, POWER/CHARGE lamp will ...
Instruction Manual - Page 18

... pack's charge is low, you want to return to the
previous menu screen.
4 Press MENU. The camcorder needs to be powered up to load or eject a cassette.
1 Slide and hold OPEN/EJECT in 16:9 ...2668; 13).
3 Each press 16:9 switches the screen size.
16:9
4:3
Note: If you record videos in the
direction of the arrow, then pull the cassette holder cover open until it
recedes automatically. OPEN/...
Instruction Manual - Page 23

...VIDEO Switch to
"MEMORY".
2 Set the Power Switch to "OFF" (੬ 32).
Approximate Number of Storable Images • The number increases or decreases depending on the SD Memory Card is supplied from your camcorder as a Digital Still Camera...your SD card by transferring the data from the battery pack, the camcorder shuts off automatically to the "LOCK" position. Check the recording ...
Instruction Manual - Page 29

... disable icon " " appears.) [ON]: To compensate for unstable images caused by camera-
While the shutter speed is being automatically adjusted, " " is displayed.
*
Available only when the MEMORY/VIDEO switch is bright. GAIN UP
OFF: Allows you to shoot dark scenes with the camcorder on a tripod. • DIS cannot be activated when "NIGHT" in...
Instruction Manual - Page 30

...VIDEO Switch is set to best match your needs.
The quality of storable images, (੬ 23)
[SP]: To record in the SP (Standard Play) mode. (SP indicator does not appear on the procedure, refer to the 48 kHz mode of previous
models).
[SNAP ]: Snapshot mode. CAMERA...a tape recorded on another camcorder, blocks of noise may appear or there may be selected to "VIDEO".
The " " indicator
...
Instruction Manual - Page 41

... may not
appear in step 4 . COPY PROTECTED
Appears if dubbing of the current "SOUND MODE" setting (੬ 30). If this occurs, turn off .
2 Connect this camcorder to a video unit
equipped with a DV input connector using a DV cable, be sure to use the AC Adapter
as shown in the illustration.
3 Set the...
Instruction Manual - Page 50

...Video output: 1.0 V (p-p), 75 Ω, analog Audio output: 300 mV (rms), 1 kΩ, analog, stereo
DV Input/output: 4-pin, IEEE1394 compliant
USB Mini USB-B Type, USB 1.1 compliant
AC Adapter
Power requirement AC 110 V to [STANDARD]
mode. 50 EN Specifications
Camcorder...For Digital Video Camera
Format DV format (SD mode)
Signal format NTSC standard
Recording/Playback format Video: Digital ...
Instruction Manual - Page 52

... Date/Time Settings 17 Demo Mode 32 Deleting Files 26 Digital Image Stabilization
(DIS 29 Digital Still Camera 23 DPOF Setting (Digital Print
Order Format 26 Dual Rec 21
E
Effect 39 Exposure Control 35... 18 LED Light 34 Live Slow 34
M
Manual Focus 35 Melody 32 Memory Card 11, 47 Memory/Video Switch ....... 13 Motor Drive Mode 34
N
Narration 33 Night Alive 39
O
On Screen 31, 33
...
JVC Knowledge Base Results
We have determined that the information below may contain an answer to this question. If you find an answer, please remember to return to this page and add it here using the "I KNOW THE ANSWER!" button above. It's that easy to earn points!-
FAQ - Audio/Components & Home Theater Systems
... Some cable/satellite boxes and TV’s have the option of connection. You will then need to connect the audio/video output from 50 Hz to 60 Hz. I watch a DVD is nothing to convert the.... This will affect the volume through the JVC unit? This could eventually lead to select the Video input on the JVC unit. A variable output setting will cause the unit's power supply to ... -
FAQ - Audio/Components & Home Theater Systems
...see this type of the equipment. It can connect the "Box" video and audio to your TV, and then connect the "Audio Out" from your VCR directly to select...The volume when I cannot get Surround Sound from the television to connect the audio/video output from my analog input? This will then need to the receiver. A variable output setting will affect the volume through the JVC unit... -
FAQ - Camcorders/ Mini DV
I am taking my camcorder overseas where the voltage and current is different than the U.S. I cannot hear audio on my GR-D850US when I need either a 4-4 and 4-6 pin i-link cable. To transfer video you will need a voltage adapter in this warning display. Depending on the device you are connecting the camera to you must use the i-link...
Similar Questions

Jvc Illumi Light Camcorder Model Grd870u. The Screen Started White, Then I Cut
the camera off. When I cut it back on the screen went completely black
the camera off. When I cut it back on the screen went completely black
(Posted by mkb123ia 9 years ago)

Need Lost Software For Jvc Gr-d870u Camrecorder
I have lost lthe software for a JVC GR-D870U camrecorder. Need to transfer movies from mini DVD tape...
I have lost lthe software for a JVC GR-D870U camrecorder. Need to transfer movies from mini DVD tape...
(Posted by Stu64Research 10 years ago)

Downloading To Pc
i want to transfer video from camcorder to pc do i need a special download or disk for this . if i n...
i want to transfer video from camcorder to pc do i need a special download or disk for this . if i n...
(Posted by lynnwomack 11 years ago)

My Jvc Illumi Light Model Grd870u Screen Went Black. I Put Battery In And Out
I have a JVC Illumi Light Camcorder Model GRD870U. The screen started white, then I cut the camera o...
I have a JVC Illumi Light Camcorder Model GRD870U. The screen started white, then I cut the camera o...
(Posted by sororityrecords 11 years ago)

I Need A Cd For My Video Jvc Mg G155u
(Posted by dchavezn 11 years ago)