Get support for Genie ProMax Stealth

Genie ProMax Stealth Support Question

Genie ProMax Stealth Support Question

Find answers below for this question about Genie ProMax Stealth.
Need a Genie ProMax Stealth manual? We have 1 online manual for this item!
Question posted by bruce1040 on April 29th, 2013

How To Get Remote To Work

I have a Genie pro stealth opener with 2 Three button remote controls that worked perfectly. I purchased a model G3T remote and the instructions do not match this opener. I have played with it some and now none of the remotes work. How do I get all 3 remotes to work?

Current Answers

There are currently no answers that have been posted for this question.
Be the first to post an answer!

Remember that you can earn up to 1,100 points for every answer you submit. The better the quality of your answer, the better chance it has to be accepted.

Related Genie ProMax Stealth Manual Pages

Owner's Manual - Page 1

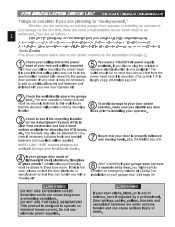
... Series PMX-IC B Series Automatic Chain Drive/Belt Drive Garage Door Operator System Complete with and SERIES II Electronics Remote Control Operator MUST be installed with the included SERIES II Wall Control! Self-diagnostic Electronic Sensory Protection System (SAFE-T-BEAM SYSTEM) MUST Be Installed To Close Door! Owner's Manual SAVE FOR FUTURE REFERENCE Customer Service CALL...
Owner's Manual - Page 2

... Genie Company or an authorized Genie Dealer. (The issue numbers below refer to consider an emergency release kit (GER-2) for attaching the STB brackets. The brackets may not be added to these type doors If this wall Insure 6 that your garage does not have a separate entry door, you read and fully understand all information and instructions...
Owner's Manual - Page 4

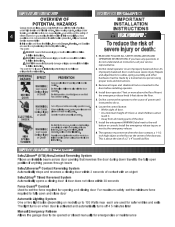
... and adjustments to do not understand an instruction, call your service representative. 2. llow children to play with an object Safe-T-Stop® Timed Reversed System Automatically opens a closing door if door does not close within 30 seconds Force Guard® Control Used to set the force required for opening and closing door For maximum safety set the minimum...
Owner's Manual - Page 10

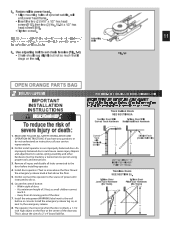
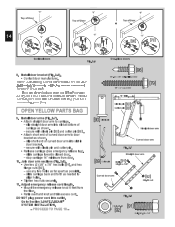
... around itself, tie securely. Placepowerheadandchannelonclean,flatsurface. 4. 1...OPERATOR ASSEMBLY OPEN BLUE PARTS BAG Screws fobraga.ttPalcehaisnegsliegthatscidoevefroraruesienclalutedre. wn over "D"-shaft on top... on the rail FOR HELP-1.800.354.3643 OR GENIECOMPANY.COM Toward Door Toward Power Head Carriage ERTamegleeragseency ERCmoelreedragseency ERKmenloeebragseency Fig. 1-1 [69]Hex ...
Owner's Manual - Page 11

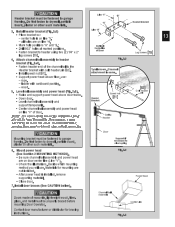
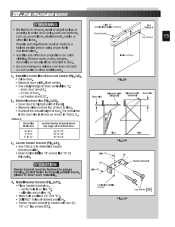
.... 5. Locate the control button: • Within sight of door. • At a minimum height of 5 feet, so small children cannot reach it Fig. 1-4 OPEN ORANGE PARTS BAG 2... This is about the size of the door. 7. Jam1b-(PTNyioepcTeeraHDcaokro)drware Pivo1t-(TPNyioepceTerHaDcaokrdo) wr are "H" "H" READ AND FOLLOW ALL SAFETY, INSTALLATION AND OPERATION INSTRUCTIONS. Repairs and adjustments...
Owner's Manual - Page 13

...Door nceSlecuaeprspssoaprrrtyiniftgo Fig. 2-4 Power Head CAUTION Doors made of door. Install header bracket (Fig. 2-3) Line "H" • Place bracket so: - Attach channel/rail assembly to garage...is same. • Support power head above door tracks. • Open door. • Level channel/rail assembly and ...door. 7. ladder with cardboard packing. - Materials for bracing instructions...
Owner's Manual - Page 14

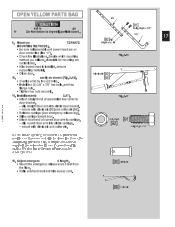
...:oeSdigedhlfot-dodrroisloliornngolnysl.cyr,ewwhsilearleaginstecnredweds faorreumseeawnitth bccooennrBcteaeqecructnaiyiruneosgdueryadodnouodoroarrdddomdeoiastrin.iogunnfaaslcvmtuaarrtyee,rrmiwaoiltsdhnifaiecneaydtieqodun.esPsmtlieoaanysse OPEN YELLOW PARTS BAG [96] 1/4"-20 x 3/4" Self-Drilling Screw 1/4" x 2" Lag Screw [79] 14" MIN. slip straight door arm into slot in [90] and cotter pin [89...
Owner's Manual - Page 15

... door rise (Fig. 2-10). • Open door to highest point of travel. • Measure distance from top of door to floor. • Subtract the actual height of CLOSED door ...instructions. • Handles and other vehicle parts. (Vertical cLeinnteer"lVin"e of door) Door header Line "H" TABSeLeE A Top of door 15 Inside of door and header (Fig. 2-9). • Close door. • Measure door...
Owner's Manual - Page 17

...; After power head is installed, remove supporting material. • Close door. 10. Materials for mounting are on door center line (line "V"). • Check the illustrations. Clevis pin[[8990...door arms to carriage. - Install assemb 2-17). Decide which mounting Fig. 2-16 method you will use. Fig. 2-17 • Attach straight end of curved door arm to door bracket. - OPEN...
Owner's Manual - Page 18

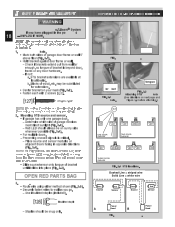
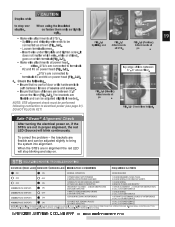
...; Sunlitdileitscoluicrkcse/isnetonspolarcoent(oFitgo.n3g-u3e).of bracket OPEN RED PARTS BAG 3. • • RS- SUN tongue FIG. 3-3 Attaching STB' kets (See directions on next page and Figure 3-4 before attaching.) RED LED GREEN LED GREEN LED RED RED LED LED GREEN LED ONE DOOR GARAGE TWO DOOR GARAGE GREEN LED RED RED LED LED GREEN GREEN...
Owner's Manual - Page 19

... and AttaatcShmTBe.nts FIG. 3-8 (ProMax) Apttoachments at STB's. 3 19 - are between lenses of door or its hardware is in proper ... SERVICE 2.CALL CUSTOMER SERVICE NDOOTWEN: IUFNOTPILERDAOTOINRGISPCRLOOBSLEEDM. HOLD WALL CONTROL BUTTON CUSTOMER SERVICE: 1.800.354.3643 or www.geniecompany.com... wire attachments at . FIG. 3-8 (Stealth) Apttoachments at power head. - #2 oMax...
Owner's Manual - Page 20

... ws Fig. 4-2 Lighted Button - from tLeOrminal. - More than one lighted wall control per operator will cause the . • to terminal "1" MoOn Epower head and "B" on wall control. - Open and closes door from moving parts of door. - Dr . 1. Away from 3 inside garage 4 - Connect striped wires to malfunction. Controls door operator lights from floor, so...
Owner's Manual - Page 21

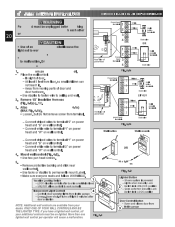
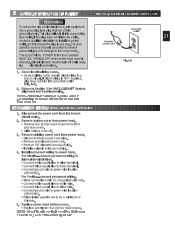
...way. Fig. 5-1 ing electrical connections. 1. For Stealth-connect permanent wiring to internal terminal block. •...cover off while mak- NcoOvTeEr:isCoirncupitobwoearrhdesaadrebelifgohrtesoepnesritaivtieo.nM. For ProMax-connect permanent wiring. • Make connections with ...damage to the door operator MUST BE TURNED OFF when ...GROUND). The door pOowpeerractoorrd operator ...
Owner's Manual - Page 22

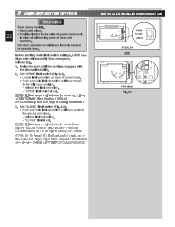
... CLASS 2 PUSH BUT ON 1 COM 2 SAF TY BEAM 3 DO N T USH LMTS U LE S D OR I TT C E LIM T SET OPEN FOR E CLO E FOR E RAD O SIG AL LEA N CODE 4 5 6 MORE FORCE PRO MAX Fig. 6-1 SE NLESS DOOR IS ATTACHED LIMIT SET OPEN FORCE LOSE E 5 6 MORE FORC Before starting main limit switch settings, LOCK carriage onto rail assembly (See...
Owner's Manual - Page 23

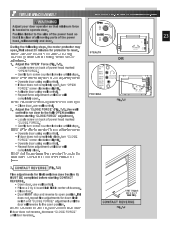
... not completely opeOSnE, turn "CLOSE FORCE" screw clockwise slightly. • Operate door using wall control. • Repeat force adjustment until it sMtOoRps. FOR HELP-1.800.354.3643 OR GENIECOMPANY.COM STEALTH OP N CL SE OR LIMIT SET OPEN FORCE CLOSE FORCE RADIO SIGNAL LEARN CODE PRO MAX MORE FORCE Fig. 7-1 1 2 NEC CLASS 2 3 4 MO E MORE C OSE...
Owner's Manual - Page 24

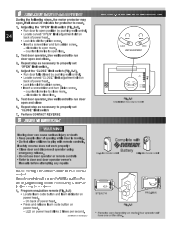
.... • Look into slot for each remote Remote controls will clockwise to run door open . Use wall control to open and close 6. If safety reverse does not work if STB's malfunction Winchheensparwogaryamfromminagnrteemnnoat.e control keep at least 24 1. Program one-button remote (Fig. 9-1) • Locate learn code button and learn code button on next page) FOR HELP-1.800.354...
Owner's Manual - Page 25

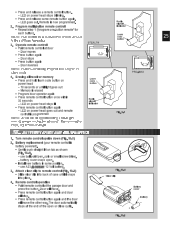
...the garage door and press the button. battery cover snaps open or close cycle. Attach visor clip to remote control (Fig. 10-2) • Slide visor clip into place. 4. Program multi-button remote control Rsiniagddniciaoaltor • Repeat step 1 ("program one-button remote" for each button). iNsOfoTrEa: Edaifcfehrebnutttoopneorantoarm. Operate remote control STEALTH Lcboueadttreonn...
Owner's Manual - Page 27

...,ligahntdohili.nges monthly. t on the floor • Close door by using wall button or remote control. • IsfedeoSorecfatiiolsnto7-rCeOveNrsTeAConT cRoEnVtaEcRt wSEith. MAINTENANCE FOR HELP-1.800.354.3643 OR GENIECOMPANY.COM MONTHLY MAINTENANCE DOOR SPRINGS and DOOR HARDWARE CONTACT REVERSE • DmPRoanOnuFoatElolSypSiefIrOsapNteriAngLgasFraOagrRee dbSorEooRkreVanIuC.tCoEmO...
Owner's Manual - Page 28

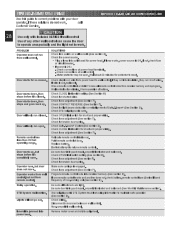
...Check OPEN limit switch for shorted wires Check force adjustment (See Section 7). Check Safe-T-Beam® System(See section 3). Do Not attempt to maintain safe operation (See section 3). Use self-diagnostic STB System troubleshooting information to retune remote controls. Non-compatible wall control. Door starts down , then stops and goes back up , but door Operator works from...
Owner's Manual - Page 29

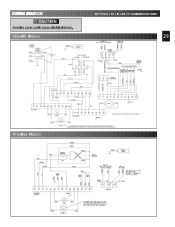
WIRING DIAGRAM CAUTION Opening cover could cause electrical shock. (Stealth Motor) FOR HELP-1.800.354.3643 OR GENIECOMPANY.COM 29 (ProMax Motor)

Similar Questions

Garage Door Opener Not Working
Green light and red light are on the safety"eye" When pushing wall, remote or key pad the screw driv...
(Posted by scanty5 9 years ago)
Remote Set Up
How to set up a remote
(Posted by douglas1112 9 years ago)
Promax Stealth Anx700
we have a Promax Stealth garage door opener model ANX700. We are trying to figure out how to program...
(Posted by sandrachurch 9 years ago)
Pro Max Stealth 1200 Garage Door Will Not Close
Before it would be able to close with 1 touch of the button. Now you have to keep the button pushed ...
(Posted by firelos 11 years ago)
Ask a New Question
Use the box below to post a new question about this Genie product .
Points & Prizes
  • You can earn points for nearly everything you do on HelpOwl.com
  • You can trade in those points for gift cards at leading retailers such as Amazon.com and Walmart
  • It's that simple!
See How it Works
Create a Free Account

Genie Manuals

Find free Genie ProMax Stealth manuals and user guides available at ManualOwl.com. Try out our unique manual viewer allowing you to interact with manuals from directly within your browser!

Genie Reviews

View thousands of Genie user reviews and customer ratings available at ReviewOwl.com.

Contact Information

Complete Genie customer service contact information including steps to reach representatives, hours of operation, customer support links and more from ContactHelp.com.

Scoreboard Ratings

See detailed Genie customer service rankings, employee comments and much more from our sister site.