GE E1680W Support Question
GE E1680W Support Question
Find answers below for this question about GE E1680W.Need a GE E1680W manual? We have 26 online manuals for this item!
Question posted by zaneycj on December 10th, 2011
Screen Background Change
How do you add user screens to the camera?
Current Answers
Related GE E1680W Manual Pages
User Manual (English) - Page 1
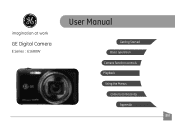
imagination at work
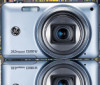
GE Digital Camera
E Series : E1680W
User Manual
Getting Started Basic operation
Camera function controls
Playback
Using the Menus
Camera connectivity
Appendix
EN
User Manual (English) - Page 2
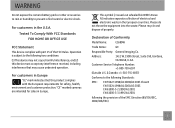
...6857)
Conforms to prevent a fire hazard or electric shock. WARNING
Do not expose the camera battery pack or other accessories to rain or humidity to the following Standards:
EMC: ... CA 90248, U.S.A. "CE" marked cameras are intended for safety, health,
environment and customer protection. Please recycle and dispose of Conformity
Model Name:
E1680W
Trade Name:
GE
Responsible Party: General...
User Manual (English) - Page 3
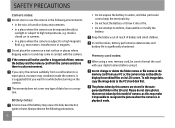
...digital camera before turning on its LCD screen. The warranty does not cover any type of babies and small children.
Do not change or delete the folder names or file names in playback mode.
Do not place the camera...data, copy the image data to a warm place, moisture may condense inside the camera. If the camera will not be used for a while before using a new memory card, be ...
User Manual (English) - Page 4
...camera before using this GE digital camera.
Using other types of batteries may damage the camera and void the warranty.
• Do not touch the camera lens. • Please do not expose the camera to service the camera yourself.
• Do not drop or knock the camera...the prior written permission of battery that comes with the camera. No part of this publication may be reproduced, ...
User Manual (English) - Page 5
... to help you locate information quickly and easily:
Indicates useful information to clean the camera. Every effort has been made to ensure that the contents of time.
• Do not use your GE digital camera.
Indicates precautions to make changes without notice. About This Manual
This manual provides you with a slightly damp soft cloth...
User Manual (English) - Page 6
...1
Safety information 1 About this manual 2
Symbols used in this manual 2
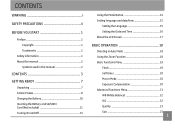
CONTENTS 3 GETTING READY 7
Unpacking 7 Camera Views 8 Charging the Battery 10 Inserting the Battery and SD/SDHC Card (Not included 11 Turning On and Off ...time 15
Setting the Language 15 Setting the Date and Time 16 About the LCD Screen 17
BASIC OPERATION 18
Shooting in Auto Mode 18 Using the Zoom Function 18 ...
User Manual (English) - Page 16
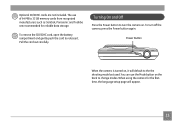
The use the Mode button on the back to change modes.
Power Button
When the camera is turned on . To remove the SD/SDHC card, open the battery compartment ..., Panasonic and Toshiba are not included.
To turn the camera on , it . When using the camera for reliable data storage. You can use of 64 MB to turn off the camera, press the Power button again. Pull the card out ...
User Manual (English) - Page 20
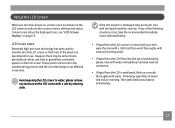
... care with the liquid inside the monitor. Then seek medical assistance immediately.
17 LCD Screen notes: Extremely high-precision technology has been used to water; If the LCD monitor is...the LCD Screen
When you turn the camera on, various icons are shown on the LCD screen with a soft dry cleaning cloth. If any moisture on the LCD screen to indicate the current camera settings and...
User Manual (English) - Page 21
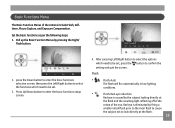
... the optical zoom will turn the camera on page 46)
When the optical zoom reaches its maximum value, it stops momentarily.
When taking photos, you can zoom in the LCD screen and press the
Shutter button halfway to take photos. Press the Shutter button fully to digital zoom automatically. In the Mode menu...
User Manual (English) - Page 22
...flash to cause
the subject not to confirm the setting and quit the screen. Red eye is caused by pressing the Right/
Flash button.
2. Basic...screen, then press the Left/Right button to select the functions which need to be set .
3.
Press Up/Down button to be set , press the button to look directly at
the flash and the resulting light reflecting off of the
retina of the camera...
User Manual (English) - Page 24
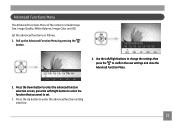
Use the Left/Right buttons to change the settings then press the to set.
3. Advanced Functions Menu
The Advanced Functions Menu of the camera include Image Size, Image Quality, White Balance, Image Color and ISO. Press the Down button to enter the advanced function selection screen, press the Left/Right button to select the...
User Manual (English) - Page 32
... select ASCN mode, press
the button to enter ASCN mode, the LCD screen will automatically adjust the exposure to match the background. The optimum scene mode will be automatically selected. Press the Shutter button...will automatically adjust the exposure and skin tones for more natural lokking pictures.
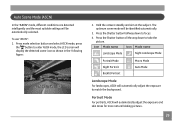
29 Hold the camera steadily and aim at the subject. Auto Scene Mode (ASCN)
In the "ASCN" mode,...
User Manual (English) - Page 33

...several pictures. After the first shot is taken, two target icons will appear on the screen in low light conditions, ASCN will automatically adjust the exposure for close-ups, ASCN will...to right stitching after 2 seconds.
3. Follow these steps to ensure good pictures. Auto Mode The camera automatically adjusts the exposure and focus to create a panoramic picture:
1. left to right or right ...
User Manual (English) - Page 34
... can be adjusted. In Montage mode, up to match your needs.
You just need to the optimal settings for the occasion and the camera will display on LCD screen:
31 4. Manual Scene Mode (SCN)
In Manual Scene mode, you . Press the Mode button, then use the Left/Right button to enter the...
User Manual (English) - Page 38
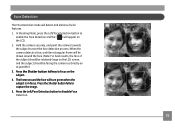
... subject. 4. Press the Left/Face Detection button to focus on the LCD screen, and the subject should be drawn around the face will detect and enhance facial features. 1. Press the Shutter button halfway to dissable Face Detection.
35 When the camera detects a face, a white rectangular frame will appear on as possible.) 3. In...
User Manual (English) - Page 39
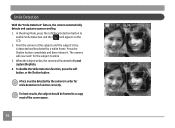
... the subject until the subject's face is detected and bracketed by the camera in order for the subject to occupy most of the screen space.
36 Press the Shutter button completely and then release it. A face must be framed to smile 3. For best results, the subject should be detected ...
User Manual (English) - Page 63
... Up/Down navigation buttons to confirm the setting.
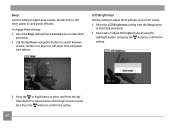
3. Beep
Use this setting to adjust the brightness of your LCD screen. 1. Press the or Right button to enter, and Press the Up/ Down button to adjust volume and change these settings:
1. Select the Beep setting from the Setup menu
as described previously.
2. To...
User Manual (English) - Page 69

... loss and improves image quality.
The resolution and output formats that your camera and TV should be grayed out on ) and your camera to View Videos
HDMI (High Definition Multimedia Interface), is still on the camera's LCD screen.
66 Direct transmission of digital video signals to an HDMI TV
1. Once an output format is selected...
User Manual (English) - Page 72
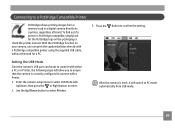
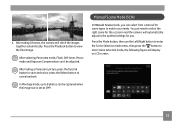
... allow you can be set to connect with either a PC or a Printer, the following steps will switch to PC mode automatically from a memory card in a digital camera directly to a printer, regardless of brand. Press the button to select Printer. Connecting to a PictBridge Compatible Printer
PictBridge allows printing images from USB mode.
69...
User Manual (English) - Page 77
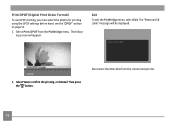
... the PictBridge menu, select Exit. Disconnect the USB cable from the PictBridge menu. Print DPOF (Digital Print Order Format)
To use DPOF printing, you must select the photos for printing using the DPOF settings before hand. Select Print DPOF from the camera and printer. 2. Select Yes to confirm the printing, or Cancel.
Similar Questions


I Have A 12.1 Megapixel A1230 Digital Camera. How Do I Look At Saved Photos?
I do not have a user's guide for my camera. I took some photos. How do I view them? How do I save ph...
I do not have a user's guide for my camera. I took some photos. How do I view them? How do I save ph...
(Posted by Anonymous-140638 9 years ago)


Digital Camera
my ge a1255 digital camera wont stay on and just dies after a few minutes even with brand new batter...
my ge a1255 digital camera wont stay on and just dies after a few minutes even with brand new batter...
(Posted by the1977mikey 11 years ago)

Car Charger For A E1680w Camera
is there a car charger for a E1680W camera
is there a car charger for a E1680W camera
(Posted by gjjolicoeur 11 years ago)