
GE 27956FE1 Support Question
GE 27956FE1 Support Question
Find answers below for this question about GE 27956FE1 - Photophone Cordless Phone.Need a GE 27956FE1 manual? We have 1 online manual for this item!
Question posted by Anonymous-173737 on February 28th, 2023
Where Can I Get Memory Card For This Phone/photo Frame
The person who posted this question about this GE product did not include a detailed explanation. Please use the "Request More Information" button to the right if more details would help you to answer this question.
Current Answers
Answer #1: Posted by SonuKumar on February 28th, 2023 6:53 PM
SonuKumar

Member since:
May 9th, 2021 Points: 16,623,780

Member since:
May 9th, 2021 Points: 16,623,780
scroll down and find various option for memory card brand, I would recommended to go ahead with SanDisk - amazon
Please respond to my effort to provide you with the best possible solution by using the "Acceptable Solution" and/or the "Helpful" buttons when the answer has proven to be helpful.
Regards,
Sonu
Your search handyman for all e-support needs!!
Related GE 27956FE1 Manual Pages
User Guide - Page 5

... System 9
Important Installation Guidelines..........9
Handset Layout 10
Base Layout 11
Installing the Phone 12
Installing the Handset Battery 12
Installing the Base/Photo Frame........ 13
Changing the Photo Frame 14
Wall Mounting 14
Programming the Photo Frame 15
Specifications 15
Frame Setup
15
Adding Photos 15
Picture-Caller ID Setup 17
Add New Picture Caller ID Link...
User Guide - Page 6
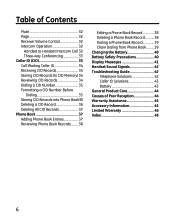
... (In CID Memory) 34 Reviewing CID Records 34 Dialing a CID Number 35 Formatting a CID Number Before
Dialing 35 Storing CID Records into Phone Book 36 Deleting a CID Record 36 Deleting All CID Records 37 Phone Book 37 Adding Phone Book Entries 37 Reviewing Phone Book Records.......... 38
Editing a Phone Book Record 38 Deleting a Phone Book Record 38...
User Guide - Page 7
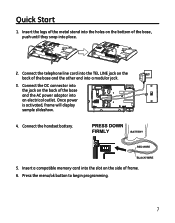
... into place.
2. Connect the telephone line cord into the TEL LINE jack on the bottom of frame. 6. Press the menu/ok button to begin programming.
Connect the DC connector into an electrical outlet. Insert a compatible memory card into the slot on the back of the base and the AC power adaptor into the...
User Guide - Page 8
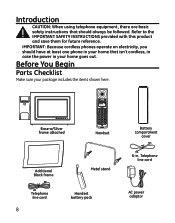
... items shown here. TALK /
AM NEW
Base w/Silver frame attached
Handset
Additional Black frame
Telephone line cord
Metal stand
Handset battery pack
Battery compartment
cover
6-in. Refer to the IMPORTANT SAFETY INSTRUCTIONS provided with this product and save them for future reference. IMPORTANT: Because cordless phones operate on electricity, you should have at least...
User Guide - Page 9
... RJ11C type modular telephone
jack, which might look like the one installed. INSTALLATION NOTE: Some cordless telephones operate at the network interface. • Use caution when installing or modifying telephone lines.
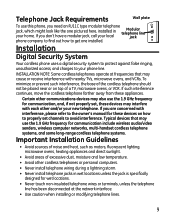
Installation
Digital Security System
Your cordless phone uses a digital security system to protect against false ringing, unauthorized access, and charges to avoid...
User Guide - Page 11
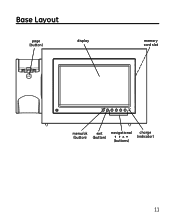
Base Layout
page (button)
display
memory card slot
menu/ok exit navigational charge (button) (button) 3456 (indicator)
(buttons)
11
User Guide - Page 13
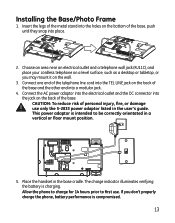
...Photo Frame
1. Insert the legs of the metal stand into the holes on the back of the base. Choose an area near an electrical outlet and a telephone wall jack (RJ11C), and place your cordless telephone on a level surface, such as a desktop or tabletop, or you don't properly charge the phone...a vertical or floor mount position.
5. Allow the phone to charge for 14 hours prior to be correctly ...
User Guide - Page 14

...unit down into the jack on the tabs and sliding each leg out individually. 1. Changing the Photo Frame
Detaching the Photo Frame; Wall Mounting
NOTE: Remove the wire stand, if attached, by pressing on the back of ...on the tabs gently until they pop loose. Attaching the Photo Frame; Connect the AC power adaptor into the electrical outlet and the DC connector into the modular telephone ...
User Guide - Page 15
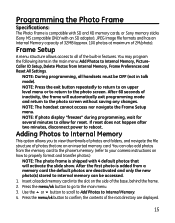
... menu: Add Photos to Internal Memory, PictureCaller ID Setup, Delete Photos from the memory card to the phone's memory. (refer to your camera instructions on the side of the root directory are displayed.
15
NOTE: During programming, all of photos that will automatically exit programming mode and return to properly format and transfer photos.)
NOTE: The photo frame is shipped with...
User Guide - Page 16
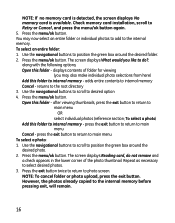
...) Add this folder to main
menu Cancel - Open this folder - press the exit button to return to select desired photos. 3. NOTE: To cancel folder or photo upload, press the exit button. Check memory card installation, scroll to desired option 4. Use the navigational buttons to scroll to Retry or Cancel, and press the menu/ok...
User Guide - Page 17
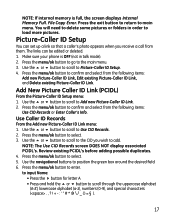
... to position the green box around the desired field. 6. Make sure your phone is full, the screen displays Internal Memory Full.
Use the navigational buttons to Add new Picture-Caller ID Link. 2....to confirm and select from them. The links can set up a link so that a caller's photo appears when you wish to the main menu. 3. Review existing PCIDL's before adding possible duplicates....
User Guide - Page 18
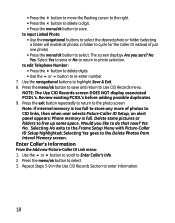
...some space. Selecting Yes goes to the Frame Setup Menu with Picture-Caller ID Setup highlighted; Selecting No exits to the Delete Photos from Interal Memory screen. Yes No. Repeat Steps 5-9 ...alert panel appears: Phone memory is full. to input Linked Photo: • Use the navigational buttons to select the desired photo or folder (selecting
a folder will enable all photos in the Use...
User Guide - Page 19
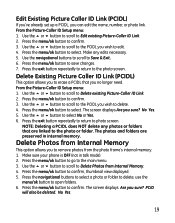
... be deleted. Make sure your phone is OFF (not in internal memory. Press the menu/ok button to confirm. Press the menu/ok button to confirm, thumbnail view displayed. 5. Use the 5 or 6 button to scroll to edit. 4. Use the 5 or 6 button to scroll to Delete Photos from the photo frame's internal memory. 1. Use the 5 or 6 button...
User Guide - Page 20
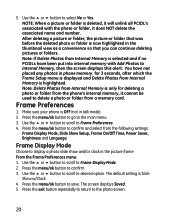
.... 4. Press the menu/ok button to save. Note: Delete Photos from Internal Memory is highlighted. Press the menu/ok button to confirm and select from a memory card. Make sure your phone is only for 3 seconds, after which the Frame Setup menu is displayed and Delete Photos from Internal Memory is selected and if no PCIDLs have been put...
User Guide - Page 21
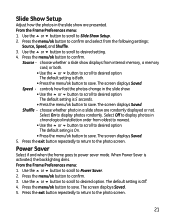
... scroll to Slide Show Setup. 2. The default setting is activated, the backlighting dims. From the Frame Preferences menu: 1. Press the menu/ok button to save . The screen displays Saved. Use the... Saved.
Slide Show Setup
Adjust how the photos in a slide show are presented. Press the menu/ok button to confirm and select from internal memory, a memory card, or both.
• Use the 5...
User Guide - Page 23
...to confirm and you try to enter these two menus. Make sure your phone is OFF (not in talk mode). 2. Use the 5 or 6 .... 3. No Yes. 5. Press the menu/ok button to the photo screen. Press the exit button repeatedly to return to save. You may... Name and Language. NOTE: The handset cannot access nor navigate the Frame Setup menu.
Press the menu button to go to standby screen. ...
User Guide - Page 27
... (not in talk mode). 2. Press the menu button to the base. A cordless handset will override manually set automatically when you subscribe to Registration. 3. press the menu... registration is pressed, the screen displays Unavailable. 1. NOTE: If you receive your phone is set date/time. Up to 4 cordless handsets can ONLY be registered to toggle between "p" (pm) and "a" (am...
User Guide - Page 43
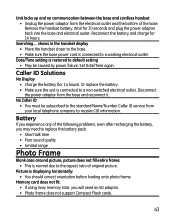
... again. Disconnect the power adaptor from your local telephone company to a non-switched electrical outlet. Memory card does not fit: • If using Sony memory stick, you may need an SD adaptor. • Photo frame does not support Compact Flash cards.
43
Caller ID Solutions
No Display • Charge the battery (for 14 hours.
Wait for...
User Guide - Page 48
...
C
Call Timer 31
Call Waiting Caller ID 34
Caller ID (CID) 33
Caller ID Solutions
43
Causes of Poor Reception
44
Chain Dialing from Phone Book 39
Changing the Battery
40
Changing the Photo Frame
14
Charge Indicator on Base 28
D
Date/Time 26
Delete Existing Picture Caller ID Link
(PCIDL)
19
Delete...
User Guide - Page 49
...Pause in the
Dialing Sequence 29
Installation
9
Installing the Base/Photo Frame
13
Installing the Handset Battery
12
Installing the Phone
12
Intercom Operation 32
Interference Information 3
Introduction
8
l
Language ...Specifications:
15
Storing a Redial Record in Phone Book 30
Storing CID Records (In CID Memory) 34
Storing CID Records into Phone Book 36
T
Table of Contents
5
...
Similar Questions

I Have A Ge 27956fe1 - Photophone Cordless And I Need The Diagram Because I Live
I Live in PERU, there are´nt who repair my phone. Thanks
I Live in PERU, there are´nt who repair my phone. Thanks
(Posted by faliagapea 10 years ago)

How Do I Add Phone Numbers Into Memory?
How do I add phone numbers into Memory?
How do I add phone numbers into Memory?
(Posted by jlaz2002 11 years ago)

Ge 27956fe1 Photo Phone
I have the GE PhotoPhone, Model 27956. Our electricity went out during a storm I cant find the manua...
I have the GE PhotoPhone, Model 27956. Our electricity went out during a storm I cant find the manua...
(Posted by carecvti 12 years ago)

What Can I Do To Reset Photo Phone Screen Is White And U Cant See Anything
(Posted by Aliciagarcia6405 13 years ago)

How Will I Program Phone Numbers Into Memory, Including The 'pause' Feature?
ge cordless 27923ge1
ge cordless 27923ge1
(Posted by richard1la 13 years ago)