Epson LQ 1050 Support Question
Epson LQ 1050 Support Question
Find answers below for this question about Epson LQ 1050 - B/W Dot-matrix Printer.Need a Epson LQ 1050 manual? We have 5 online manuals for this item!
Question posted by Anonymous-58798 on May 9th, 2012
How We Install Wep 1070 Printer In Win 7 64 Bit
how we install wep 1070 printer in win 7 64 bit
Current Answers
Related Epson LQ 1050 Manual Pages
Technical Brief (Impact Printers) - Page 5

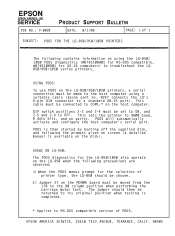
... utility program provides printer status, error conditions, and trouble shooting instructions to the Printer Status Monitor. Simplifies setup when installing multiple printers-just make the ...Utility Ver. 1.22
Copyright (C) SEIKO EPSON CORP. 1992
Printer: FX-2180
Mode: ESC/P
Port: LPT1
Font
: Roman
Pitch
: 10CPI
Print Quality
: LQ
Character Table : PC 437
Continuous Rear : 11 inch...
Product Information Guide - Page 3
...eX^e.eY..lZ1..I 0 ir
6 4 Legal
E3
3
"
',
(,
<
fi
+
n
The zets numbered 8 through 12 and 64 are available only through a software command. s
^
'
Ii ) -
0 Japan
x$e[Y; ^ ' 1 : t -
3 Norway...ABCDEFGHIJK LMNOPPRSTUVWXYZ[\]A-'abcdefg^hi.j_k^lm.
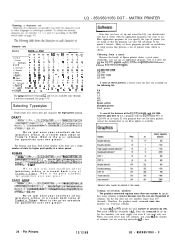
Choosing a character set
LQ - 850/950/1050 DOT - MATRIX PRINTER
Character sets
Country
ASClt coda Ihex)
OUSA 1 France 2 Germany
23...
Product Information Guide - Page 4
...a bit of...
LQ - 850/950/1050 DOT-
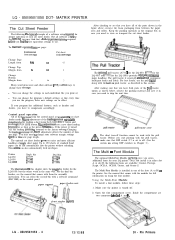
Printer LQ-850 LQ-950 LQ- 1050...Printers Muzro adjustment of the slots (A or B) m the printer.
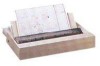
See the manual that you need to store or transport the cut sheet
feeder mode. MATRIX PRINTER...install it in either slot A or slot B, the following IS a typical example of a software setup reqmred for the LQ-1050. or q7312 for the LQ...
Product Information Guide - Page 5
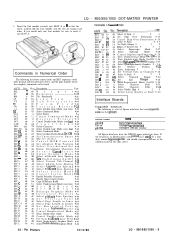
...it . If you install only one line1 9-...60
ESC = 61
ESC ) 62
ESC ?
63
ESC @ 64
ESC A 65
ESC B 66
ESC C 67
ESC C 0... o n t r o l 9-12
24 S e t A b s o l u t e P r i n t P o s i t i o n 9-20
25 S e l e c t U s e r -
LQ - 850/950/1050 - 5 LQ - 850/950/1050 DOT-MATRIX PRINTER
3. Commands in Inches 9-14
44 S e t H o r i z o n t a l T a b s 9-21
45 S e l e c t Emphasized M o d e 9-26
46...
Product Information Guide - Page 6

LQ - 850/950/1050 DOT - To control it through a setup menu. After sending a form feed, do not send it is usually done through the software, send a form feed command at the end of lines/page, single sheets require a shorter page length than does tractor paper. The paper can be checked before using the printer... paper lever. Pin Printers MATRIX PRINTER
Installation/Support Tips
Short Tear...
Product Support Bulletin(s) - Page 10
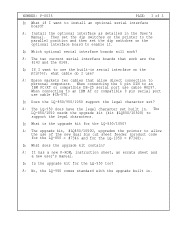
...Install the optional interface as detailed in . Then set the dip switches on the printer to the parallel position and then set the dip switches on the printer, what cable do I use? A: Epson markets two cables that work ?
A: The upgrade kit, #LQ850/1050U, upgrades the printer... kit for the LQ-1050 = #7348).
Q: If I want to use of 3
Q: What if I want to install an optional serial ...
Product Support Bulletin(s) - Page 11
... computer's serial port. This sets the printer to 9600 baud, 8 data bits, and no . 8297 connects the LQ's 6-pin DIN connector to its original position when testing is available on the host computer. USAGE ON LQ-950: The PDOS diagnostics for the LQ-850/1050 also operate on the LQ-950 when the following precautions are observed...
User Manual - Page 3
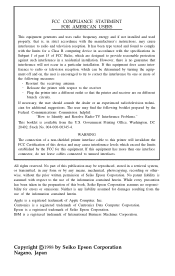
... The connection of a non-shielded printer interface cable to this printer will not occur in any form or... by any liability assumed for additional suggestions. While every precaution has been taken in a residential installation.
FCC COMPLIANCE STATEMENT FOR AMERICAN USERS
This equipment generates and uses radio frequency energy and if not installed...
User Manual - Page 4
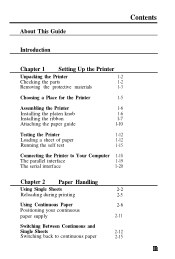
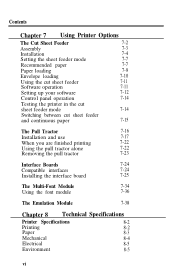
... This Guide
Contents
Introduction
Chapter 1 Setting Up the Printer
Unpacking the Printer
1-2
Checking the parts
1-2
Removing the protective materials
1-3
Choosing a Place for the Printer
1-5
Assembling the Printer
1-6
Installing the platen knob
1-6
Installing the ribbon
l-7
Attaching the paper guide
l-10
Testing the Printer
1-12
Loading a sheet of paper
1-12
Running the...
User Manual - Page 7
...
7-11
Software operation
7-11
Setting up your software
7-12
Control panel operation
7-14
Testing the printer in the cut
sheet feeder mode
7-14
Switching between cut sheet feeder
and continuous paper
7-15
The Pull Tractor
7-16
Installation and use
7-17
When you are finished printing
7-22
Using the pull tractor alone
7-22...
User Manual - Page 12

... Emulation Module for more efficient handling of
single sheet paper. xi It is especially useful with the LQ printers. Pull Tractor Unit This option improves the performance of continuous paper
handling.
For detailed information on the installation and use with continuous multi-part forms.
Optional Interface Boards A number of optional interfaces can automatically...
User Manual - Page 14
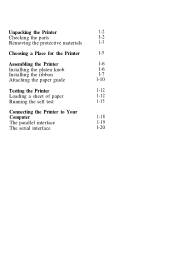
... the parts
l-2
Removing the protective materials
1-3
Choosing a Place for the Printer
l-5
Assembling the Printer
l-6
Installing the platen knob
l-6
Installing the ribbon
l-7
Attaching the paper guide
l-10
Testing the Printer
1-12
Loading a sheet of paper
1-12
Running the self test
1-15
Connecting the Printer to Your
Computer
1-18
The parallel interface
1-19
The serial...
User Manual - Page 19
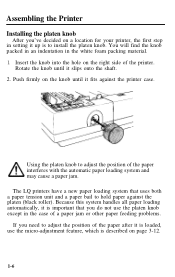
... position of the paper interferes with the automatic paper loading system and may cause a paper jam. The LQ printers have a new paper loading system that you do not use the micro-adjustment feature, which is to install the platen knob. Rotate the knob until it fits against the platen (black roller).
You will...
User Manual - Page 20
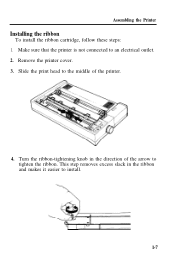
Turn the ribbon-tightening knob in the ribbon and makes it easier to an electrical outlet. 2. Assembling the Printer
Installing the ribbon
To install the ribbon cartridge, follow these steps: 1. Slide the print head to the middle of the arrow to tighten the ribbon. This step removes excess slack ...
User Manual - Page 22
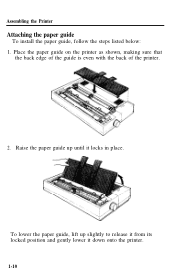
... sure that
the back edge of the guide is even with the back of the printer.
2. Raise the paper guide up slightly to release it from its locked position and gently lower it locks in place. Assembling the Printer
Attaching the paper guide
To install the paper guide, follow the steps listed below: 1.
User Manual - Page 24
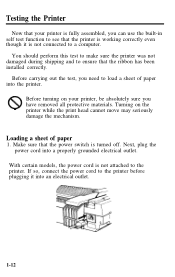
... head cannot move may seriously damage the mechanism. Turning on your printer is fully assembled, you can use the built-in self test function to see that the ribbon has been installed correctly. If so, connect the power cord to the printer before plugging it is not connected to a computer. You should perform...
User Manual - Page 86
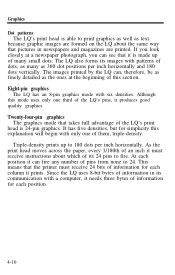
... an inch it can see that the printer must receive instructions about the same way that takes full advantage of this section. It has five densities, but for each position it must receive 24 bits of many as 360 dot positions per inch horizontally. Graphics
Dot patterns The LQ's print head is able to print...
User Manual - Page 117
... or one you turn on the LQ- 1050.
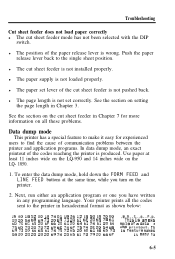
1. Th is not set lever of the cut sheet feeder is not loaded properly. Push the paper release lever back to the printer in any programming language. l The paper supply is not installed properly.
Use paper at the same... 69 73 20 61 6E 20 65 78 61 60 70 6C 65 20 6F 66 20 61 20 64 61 74 61 20 64 75 6D 70 20 70 72 69 6E 74 6F 75 74 2E 20 54 68 69 73 20 ...
Technical Manual - Page 120
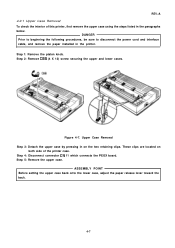
...sure to disconnect the power cord and interface cable, and remove the paper installed in on
both side of this printer, first remove the upper case using the steps listed in the paragraphs
below....
Upper Case Removal Step 3: Detach the upper case by pressing in the printer. These clips are located on the two retaining clips. Step 4: Disconnect connector CN 11 which...
Technical Manual - Page 160
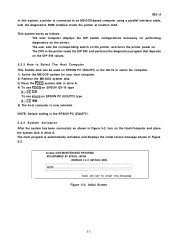
... be used on EPSON PC (EQUITY) or the QX-16 to an MS-DOS-based computer using a parallel interface cable, with the diagnostics ROM installed inside the printer at location IC4A
This system works as shown in Figure 5-2, turn on the Host-Computer and place the system disk in drive A. 4) To use...
Similar Questions

Wep Dotmetric Printer Lq1050 Printer Hed Kha Milega
(Posted by dineshbhaiadvaliya 3 years ago)

How To Install Wep Lq 1050 Dx Driver For Windows 7
(Posted by fcsdbBigba 9 years ago)

How To Run An Epson Lq 1070 On Windows 7 Professional 64 Bit
(Posted by kdssc 9 years ago)

How To Install Lq 2180 For Windows 7 64 Bit
(Posted by COBUSgokid 9 years ago)

Wep Print Head For Lq 1050+dx Super Printer Price
WeP print head for lq 1050+dx super printer price
WeP print head for lq 1050+dx super printer price
(Posted by vkamledba 11 years ago)