Dell XPS 8500 Support Question
Dell XPS 8500 Support Question
Find answers below for this question about Dell XPS 8500.Need a Dell XPS 8500 manual? We have 2 online manuals for this item!
Question posted by timcolastj on November 15th, 2013
Xps 8500 System Information Installed Memory Does Not Equal Total Memory
The person who posted this question about this Dell product did not include a detailed explanation. Please use the "Request More Information" button to the right if more details would help you to answer this question.
Current Answers
Related Dell XPS 8500 Manual Pages
Owner's Manual (PDF) - Page 2
... document to refer to either the entities claiming the marks and names or their products. Information in trademarks and trade names other countries. Reproduction of these materials in this text: Dell™, the DELL logo, and XPS™ are either potential damage to hardware or loss of Dell Inc. A00 Bluetooth®...
Owner's Manual (PDF) - Page 4
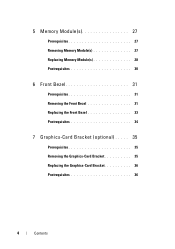
...(s 27
Prerequisites 27 Removing Memory Module(s 27 Replacing Memory Module(s 28 Postrequisites 30
6 Front Bezel 31
Prerequisites 31 Removing the Front Bezel 31 Replacing the Front Bezel 33 Postrequisites 34
7 Graphics-Card Bracket (optional) . . . . . ...
Owner's Manual (PDF) - Page 7
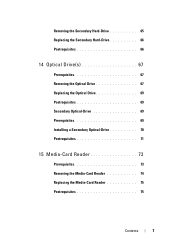
... 66
14 Optical Drive(s 67
Prerequisites 67 Removing the Optical Drive 67 Replacing the Optical Drive 69 Postrequisites 69 Secondary Optical-Drive 69 Prerequisites 69 Installing a Secondary Optical-Drive 70 Postrequisites 71
15 Media-Card Reader 73
Prerequisites 73 Removing the Media-Card Reader 74 Replacing the Media-Card Reader 75...
Owner's Manual (PDF) - Page 13
... avoid touching pins and contacts.
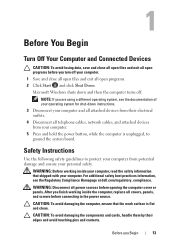
WARNING: Before working inside your computer, read the safety information that the work surface is unplugged, to ground the system board. CAUTION: To avoid ...all open programs. 2 Click Start and click Shut Down. For additional safety best practices information, see the documentation of your operating system for shut-down and then the computer turns off...
Owner's Manual (PDF) - Page 14
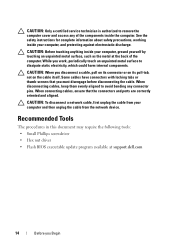
... cables have connectors with locking tabs or thumb-screws that the connectors and ports are correctly oriented and aligned. See the safety instructions for complete information about safety precautions, working inside the computer.
Recommended Tools
The procedures in this document may require the following tools:
• Small Phillips screwdriver
• Hex...
Owner's Manual (PDF) - Page 17
For additional safety best practices information, see the Regulatory Compliance Homepage at dell.com/regulatory_compliance.
Technical Overview
17 3
Technical Overview
WARNING: Before working inside your computer, read the safety information that shipped with your computer and follow the steps in "Before You Begin" on page 13.
Owner's Manual (PDF) - Page 23
... secures the computer cover to support the computer with your computer, read the safety information that shipped with the computer cover removed-at dell.com/regulatory_compliance. 4
Computer Cover
...inside your computer and follow the steps in a secure location. For additional safety best practices information, see the Regulatory Compliance Homepage at least 30 cm (1 ft.) of the computer. ...
Owner's Manual (PDF) - Page 27
... steps in "Before You Begin" on page 23.
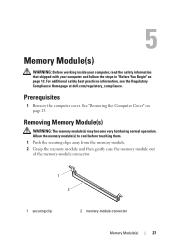
Removing Memory Module(s)
WARNING: The memory module(s) may become very hot during normal operation. For additional safety best practices information, see the Regulatory Compliance Homepage at dell.com/regulatory_compliance.
Prerequisites
1 Remove the computer cover. Allow the memory module(s) to cool before touching them. 1 Push the securing...
Owner's Manual (PDF) - Page 28
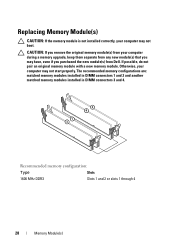
... computer may not boot.
The recommended memory configurations are: matched memory modules installed in DIMM connectors 1 and 2 and another matched memory modules installed in DIMM connectors 3 and 4.
If possible, do not pair an original memory module with a new memory module. Replacing Memory Module(s)
CAUTION: If the memory module is not installed correctly, your computer may not start...
Owner's Manual (PDF) - Page 29

... with the tab on the memory-module connector.
1 2 3 4
1 memory module 3 tab
2 notch 4 cutouts (2)
CAUTION: To avoid damage to the memory module, press the memory module straight down into the connector while you apply equal force to each end of the memory module.
2 Insert the memory module into the memory-module connector until the memory module snaps into position and...
Owner's Manual (PDF) - Page 30

See "Replacing the Computer Cover" on page 25.
2 Follow the steps in "After Working Inside Your Computer" on page 15.
30
Memory Module(s) Postrequisites
1 Replace the computer cover.
Owner's Manual (PDF) - Page 31
For additional safety best practices information, see the Regulatory Compliance Homepage at a time by moving
them outward from the front...See "Removing the Computer Cover" on page 13.
6
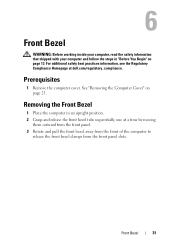
Front Bezel
WARNING: Before working inside your computer, read the safety information that shipped with your computer and follow the steps in an upright position. 2 Grasp and release the front bezel tabs ...
Owner's Manual (PDF) - Page 37
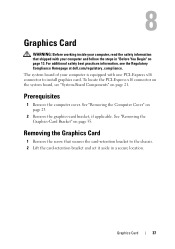
... "System-Board Components" on page 21. The system board of your computer is equipped with your computer, read the safety information that secures the card-retention bracket to install graphics card. See "Removing the Computer Cover" on page 35. 8
Graphics Card
WARNING: Before working inside your computer and follow the steps in...
Owner's Manual (PDF) - Page 49
...
49 CAUTION: When the Mini-Card is already installed. Prerequisites
1 Remove the computer cover. For additional safety best practices information, see "Protecting Against Electrostatic Discharge" in the ... Dell.
10
Wireless Mini-Card
WARNING: Before working inside your computer, read the safety information that shipped with your computer and follow the steps in "Before You Begin" on page...
Owner's Manual (PDF) - Page 107
WARNING: A battery may explode if installed incorrectly. See "Removing the Computer Cover" on the system board.
Replace the battery only with your computer, read the safety information that you note the BIOS settings before removing the coin-cell battery. Removing the Coin-Cell Battery
CAUTION: Removing the coin-cell battery resets the ...
Owner's Manual (PDF) - Page 115
... and heat-sink assembly. See "Removing the Processor" on page 50.
3 Remove the memory module(s). See "Removing the Mini-Card" on page 102. You must enter the service tag in the system board. For additional safety best practices information, see the Regulatory Compliance Homepage at dell.com/regulatory_compliance.
25
System Board
WARNING...
Owner's Manual (PDF) - Page 117
... to enter the service tag manually only when the service tag is absent.
See "Replacing Memory Module(s)" on
page 51. 7 Replace the computer cover.
NOTE: Set Service Tag field ...Computer" on page 46. 5 Replace the memory module(s).
Express x1 Card(s)" on page 15. See "Replacing the Graphics Card" on page 21. NOTE: For information on system board connectors, see "System-Board...
Owner's Manual (PDF) - Page 119
..." on (or restart) your computer. 2 During POST, when the DELL logo is lost. Information on the screen is recommended that the keyboard has initialized. 26
System Setup
Overview
Use the system setup to: • get information about the hardware installed in your computer, such as the
amount of RAM, the size of the...
Owner's Manual (PDF) - Page 120

...in week mm/dd/yyyy format
Displays the service tag of the system setup window and contains information about each option listed in the Setup Item. In this section may appear, or may not... list with the up -arrow and down -arrow keys. This field appears on your computer, including installed hardware, power conservation, and security features. Press the up - Press to make changes to input the...
Owner's Manual (PDF) - Page 121
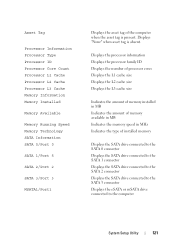
...Type Processor ID Processor Core Count Processor L1 Cache Processor L2 Cache Processor L3 Cache Memory Information Memory Installed
Memory Available
Memory Running Speed Memory Technology SATA Information SATA 0/Port 0
SATA 1/Port 5
SATA 2/Port 2
SATA 3/Port 3
MSATA1/Port1
Displays the asset tag of installed memory
Displays the SATA drive connected to the SATA 0 connector Displays the SATA drive...
Similar Questions


Xps 8500 Cd Drive
How do you open the cd drive on a XPS 8500 computer?
How do you open the cd drive on a XPS 8500 computer?
(Posted by pplus10 11 years ago)