Dell XPS 8500 Support Question
Dell XPS 8500 Support Question
Find answers below for this question about Dell XPS 8500.Need a Dell XPS 8500 manual? We have 2 online manuals for this item!
Question posted by Sataaro on January 19th, 2014
How To Remove Metal Plate On Xps 8500
The person who posted this question about this Dell product did not include a detailed explanation. Please use the "Request More Information" button to the right if more details would help you to answer this question.
Current Answers
Related Dell XPS 8500 Manual Pages
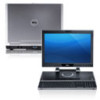
Owner's Manual (PDF) - Page 2
... or their products. Reproduction of these materials in trademarks and trade names other countries. Trademarks used in this text: Dell™, the DELL logo, and XPS™ are either potential damage to hardware or loss of data, and tells you make better use of Microsoft Corporation in this document is used...
Owner's Manual (PDF) - Page 3
...
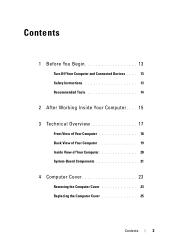
Front View of Your Computer 18 Back View of Your Computer 19 Inside View of Your Computer 20 System-Board Components 21
4 Computer Cover 23
Removing the Computer Cover 23 Replacing the Computer Cover 25
Contents
3
Owner's Manual (PDF) - Page 4
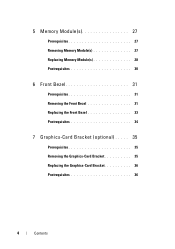
5 Memory Module(s 27
Prerequisites 27 Removing Memory Module(s 27 Replacing Memory Module(s 28 Postrequisites 30
6 Front Bezel 31
Prerequisites 31 Removing the Front Bezel 31 Replacing the Front Bezel 33 Postrequisites 34
7 Graphics-Card Bracket (optional) . . . . . 35
Prerequisites 35 Removing the Graphics-Card Bracket 35 Replacing the Graphics-Card Bracket 36 Postrequisites 36
4
...
Owner's Manual (PDF) - Page 5
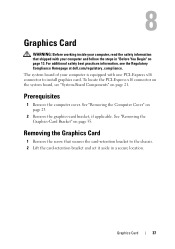
8 Graphics Card 37
Prerequisites 37 Removing the Graphics Card 37 Replacing the Graphics Card 39 Postrequisites 41
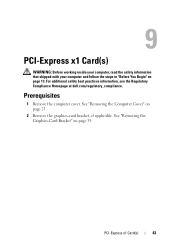
9 PCI-Express x1 Card(s 43
Prerequisites 43 Removing the PCI-Express x1 Card(s 44 Replacing the PCI-Express x1 Card(s 46 Postrequisites 48
10 Wireless Mini-Card 49
Prerequisites 49 Removing the Mini-Card 50 Replacing the Mini-Card 51 Postrequisites 51
Contents
5
Owner's Manual (PDF) - Page 6
... Mini-Card Antennas 53 Replacing the Mini-Card Antennas 55 Postrequisites 55
12 mSATA Drive 57
Prerequisites 57 Removing the mSATA Drive 57 Replacing the mSATA Drive 58 Postrequisites 59
13 Hard Drive(s 61
Prerequisites 61 Removing the Primary Hard-Drive 61 Replacing the Primary Hard-Drive 62 Postrequisites 62 Prerequisites 63...
Owner's Manual (PDF) - Page 7
... 66 Postrequisites 66
14 Optical Drive(s 67
Prerequisites 67 Removing the Optical Drive 67 Replacing the Optical Drive 69 Postrequisites 69 Secondary Optical-Drive 69 Prerequisites 69 Installing a Secondary Optical-Drive 70 Postrequisites 71
15 Media-Card Reader 73
Prerequisites 73 Removing the Media-Card Reader 74 Replacing the Media-Card Reader...
Owner's Manual (PDF) - Page 8
16 Top Cover 77
Prerequisites 77 Removing the Top Cover 77 Replacing the Top Cover 78 Postrequisites 79
17 Top I/O Panel 81
Prerequisites 81 Removing the Top I/O Panel 81 Replacing the Top I/O Panel 83 Postrequisites 83
18 Front USB Panel 85
Prerequisites 85 Removing the Front USB Panel 85 Replacing the Front USB Panel 86 Postrequisites 87
8
Contents
Owner's Manual (PDF) - Page 9
... 90 Replacing the Power Button Module 91 Postrequisites 91
20 Chassis Fan 93
Prerequisites 93 Removing the Chassis Fan 94 Replacing the Chassis Fan 95 Postrequisites 95
21 Processor Fan and Heat-Sink Assembly . 97
Prerequisites 97 Removing the Processor Fan and Heat-Sink Assembly. 97 Replacing the Processor Fan and Heat...
Owner's Manual (PDF) - Page 10

... Processor 102 Replacing the Processor 103 Postrequisites 106
23 Coin-Cell Battery 107
Prerequisites 107 Removing the Coin-Cell Battery 107 Replacing the Coin-Cell Battery 108 Postrequisites 109
24 Power-Supply Unit 111
Prerequisites 111 Removing the Power-Supply Unit 111 Replacing the Power-Supply Unit 112 Postrequisites 113
10
Contents
Owner's Manual (PDF) - Page 14
... anything inside your computer, ground yourself by touching an unpainted metal surface, such as the metal at support.dell.com
14
Before you work, periodically touch an unpainted metal surface to avoid bending any of the computer.
When connecting ...the computer.
CAUTION: Only a certified service technician is authorized to remove the computer cover and access any connector pins.
Owner's Manual (PDF) - Page 15
...: • Replace all screws and ensure no stray screws remain inside your computer • Connect any external devices, cables, cards, and any other part you
removed before working on your computer and all screws and ensure that no stray screws remain in the computer.
After Working Inside Your Computer
15
Owner's Manual (PDF) - Page 23
... a screw driver, if necessary. 3 Release the computer cover by sliding it away from the front of desk top space. Removing the Computer Cover
NOTE: Ensure that shipped with the computer cover removed-at dell.com/regulatory_compliance. Computer Cover
23
For additional safety best practices information, see the Regulatory Compliance Homepage at least...
Owner's Manual (PDF) - Page 27
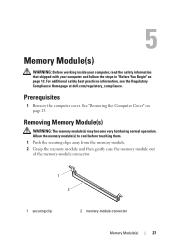
See "Removing the Computer Cover" on page 13. Allow the memory module(s) to cool before touching them. 1 Push the ... 23. For additional safety best practices information, see the Regulatory Compliance Homepage at dell.com/regulatory_compliance. Prerequisites
1 Remove the computer cover.
Removing Memory Module(s)
WARNING: The memory module(s) may become very hot during normal operation.
Owner's Manual (PDF) - Page 28
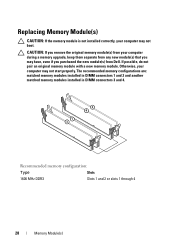
..., your computer may not start properly. Recommended memory configuration:
Type
Slots
1600 MHz DDR3
Slots 1 and 2 or slots 1 through 4
28
Memory Module(s) CAUTION: If you remove the original memory module(s) from your computer during a memory upgrade, keep them separate from any new module(s) that you may have, even if you purchased...
Owner's Manual (PDF) - Page 31
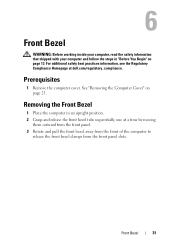
.... 3 Rotate and pull the front bezel away from the front of the computer to
release the front bezel clamps from the front panel slots.
See "Removing the Computer Cover" on page 13. Removing the Front Bezel
1 Place the computer in "Before You Begin" on page 23. Prerequisites...
Owner's Manual (PDF) - Page 35
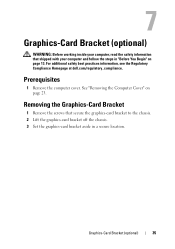
... the chassis. 3 Set the graphics-card bracket aside in "Before You Begin" on page 23. Removing the Graphics-Card Bracket
1 Remove the screws that shipped with your computer and follow the steps in a secure location. See "Removing the Computer Cover" on page 13. Graphics-Card Bracket (optional)
35 For additional safety best practices...
Owner's Manual (PDF) - Page 37
...information that secures the card-retention bracket to install graphics card. Removing the Graphics Card
1 Remove the screw that shipped with one PCI-Express x16 connector to the... see the Regulatory Compliance Homepage at dell.com/regulatory_compliance. See "Removing the Computer Cover" on page 35. Prerequisites
1 Remove the computer cover. 8
Graphics Card
WARNING: Before working inside ...
Owner's Manual (PDF) - Page 43
... graphics-card bracket, if applicable. For additional safety best practices information, see the Regulatory Compliance Homepage at dell.com/regulatory_compliance. Prerequisites
1 Remove the computer cover. PCI-Express x1 Card(s)
43 9
PCI-Express x1 Card(s)
WARNING: Before working inside your computer, read the safety information that shipped with ...
Owner's Manual (PDF) - Page 61
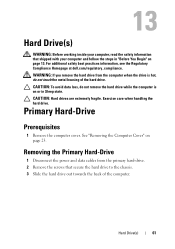
... the chassis. 3 Slide the hard drive out towards the back of the hard drive. CAUTION: To avoid data loss, do not touch the metal housing of the computer. See "Removing the Computer Cover" on or in "Before You Begin" on page 13. CAUTION: Hard drives are extremely fragile.
Exercise care when handling...
Owner's Manual (PDF) - Page 70
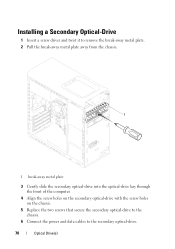
Installing a Secondary Optical-Drive
1 Insert a screw driver and twist it to remove the break-away metal plate. 2 Pull the break-away metal plate away from the chassis.
1
1 break-away metal plate
3 Gently slide the secondary optical-drive into the optical-drive bay through the front of the computer.
4 Align the screw holes on the secondary optical-...
Similar Questions


How To Remove Hdd Password Of My Laptop Inspiron N4050
(Posted by tombBe 10 years ago)


Xps 8500 Cd Drive
How do you open the cd drive on a XPS 8500 computer?
How do you open the cd drive on a XPS 8500 computer?
(Posted by pplus10 11 years ago)

Cd Removal From Dell Xps 1645 Lap Top.
How is the CD disk removed from the dell xps 1645 lap top?
How is the CD disk removed from the dell xps 1645 lap top?
(Posted by zlotoadmin 12 years ago)