
Acer X221 Support Question
Acer X221 Support Question
Find answers below for this question about Acer X221.Need a Acer X221 manual? We have 2 online manuals for this item!
Question posted by hagen1213 on September 1st, 2011
Monitor Settings
Hi,
I cannot get the monitor to respond to a signal from the computer that i am using. How do i change the settings to use the blue monitor cable?
Matthew Loser
Current Answers
Related Acer X221 Manual Pages
User Guide - Page 1
Table of Contents
Precautions ...2 Special notes on LCD monitors 2 Package contents 3 Installation instructions 3
Assembling the monitor 3 Adjusting the viewing angle 4 Connecting the devices 5 Switching the power 6 Adjusting display settings 6 External controls 6 OSD options...7 OSD menu ...7 Troubleshooting 10 General specifications 11
1
User Guide - Page 2
.... y If you use . Turn off for hours on the back or top of 0.01% or less
(caused by yourself. y Do not allow sharp objects such as the monitor requires ventilation. Opening ... can cause electrical shock and/or damage to injury or death through the appropriate agency by changing the image. Please contact a qualified engineer if the troubleshooting section does not solve your problem...
User Guide - Page 3
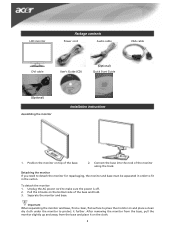
... contents
Power cord
Audio cable
VGA cable
DVI cable
User's Guide (CD)
(Optional) Quick Start Guide
(Optional) Assembling the monitor
Installation instructions
1. Detaching the monitor If you need to detach the monitor for repackaging, the monitor and base must be separated in the carton. Separate the monitor and base.
Important When separating the monitor and base, find a clean...
User Guide - Page 4

Adjusting the viewing angle The viewing angle of the monitor ranges from -5 - 20°.
It may cause damage or break the LCD screen.
•
Careful attention is required not to catch your fingers or hands when you change the angle.
4 NOTES
•
Do not touch the LCD screen when you change the angle.
User Guide - Page 5

... bent or otherwise damaged.
VGA
DVI-D
5 WARNING! Check the VGA card of the audio cable.
Connect the signal cable to the VGA input socket of the monitor, and connect the
2 VGA cable signal cable to the DVI-D output socket of the graphics card on the computer. Make sure the shape of the plug matches the shape of...
User Guide - Page 6

... green light on the power button or a video signal, check the connections. Press again to exit a selection in the OSD.
Adjusting display settings
External controls
1
Auto
If the OSD is active,...seconds for use. If the OSD is inactive, press Auto and the monitor will automatically optimize the position, focus, and clock of monitor, then turn on PC and power button on monitor's control ...
User Guide - Page 7

Use Plus/Minus buttons to toggle between the 10 OSD functions (and also to adjust the controls to select one of... the vertical.
7 Press the Menu button to exit the OSD. When you have finished adjusting the OSD settings, press the Auto button to open the OSD menu. 2. It also changes the size of color relative to "External controls" on Page 6. Focus: This removes any vertical stripes seen...
User Guide - Page 8
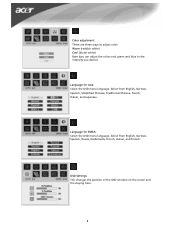
OSD Settings: This changes the position of the OSD window on the screen and the staying time.
8 Select from English, German, Spanish, Simplified Chinese, Traditional Chinese, French,...: There are three ways to adjust color: Warm (reddish white) Cool (bluish white) User (you can adjust the colors red, green and blue to the intensity you desire)
Language for EMEA: Select the OSD menu language.
User Guide - Page 9
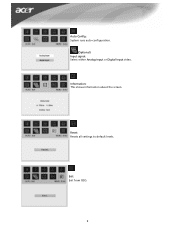
Reset: Resets all settings to default levels.
Auto Config: System runs auto-configuration.
(Optional) Input signal: Select either Analog Input or Digital Input video. Information: This shows information about the screen.
Exit: Exit from OSD.
9
User Guide - Page 10
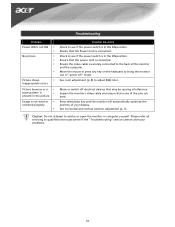
... properly
y
Possible Solutions
Check to see if the power switch is connected. Ensure that the Power Cord is in the ON position.
Inspect the monitor's video cable and ensure that none of "active off electrical devices that the power cord is connected. Caution: Do not attempt to adjust RGB color. Check to...
Service Guide - Page 5
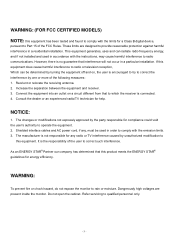
...uses and can be used... more of the following measures: 1.
The changes or modifications not expressly approved by unauthorized modification...These limits are present inside the monitor. The manufacturer is encouraged to try...energy, and if not installed and used in order to comply with the ...or chock hazard, do not expose the monitor to qualified personnel only.
- 5 - However, there...
Service Guide - Page 6
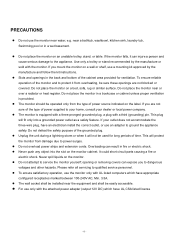
... of the cabinet area provided for long periods of power supplied to the appliance. This will protect the monitor from overheating, be used for ventilation. z The wall socket shall be installed near water, e.g. z For use only with the attached power adapter (output 12V DC) which have appropriate
configured receptacles marked between 100-240V...
Service Guide - Page 7
... the
image, when the same image is recovered slowly by changing the image or turning off the Power Switch for hours.
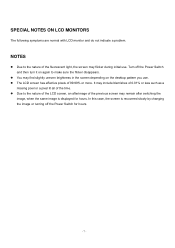
SPECIAL NOTES ON LCD MONITORS
The following symptoms are normal with LCD monitor and do not indicate a problem. NOTES
z Due to ... screen may find slightly uneven brightness in the screen depending on the desktop pattern you use . z Due to make sure the flicker disappears.
Service Guide - Page 8
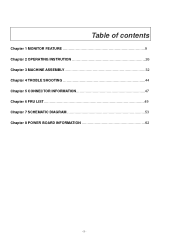
Table of contents
Chapter 1 MONITOR FEATURE 9 Chapter 2 OPERATING INSTRUTION 26 Chapter 3 MACHINE ASSEMBLY 32 Chapter 4 TROBLE SHOOTING 44 Chapter 5 CONNECTOR INFORMATION 47 Chapter 6 FRU LIST 49 Chapter 7 SCHEMATIC DIAGRAM 53 Chapter 8 POWER BOARD INFORMATION 62
- 8 -
Service Guide - Page 9
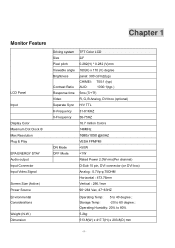
Chapter 1
Monitor Feature
LCD Panel
Input
Display Color Maximum Dot Clock ® Max Resolution Plug & Play
EPA ENERGY STAY Audio output Input Connector Input Video Signal
Screen Size (Active) Power Source Environmental Considerations
Weight (N.W.) Dimension
Driving system Size Pixel pitch Viewable angle Brightness
Contrast Ratio Response time Video Separate Sync H-Frequency V-...
Service Guide - Page 26

...Definition:
There are five keys defined in this system and described bellows. * Adjusting display settings
External Controls
Power on/off
○1
POWER Blue: power on
Orange: in OSD.
If OSD
○3
UP/ PLUS is active,.... If OSD
○4
DOWN / is
○5
AUTO inactive, press and the monitor will automatically optimize the
position, focus and clock of your display.
- 26 -
Service Guide - Page 29
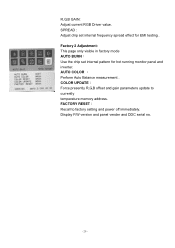
... measurement . Factory 2 Adjustment: This page only visible in factory mode AUTO BURN: Use the chip set internal frequency spread effect for hot running monitor panel and inverter. COLOR UPDATE: Force presently R,G,B offset and gain parameters update to factory setting and power off immediately. FACTORY RESET: Recall to currently temperature memory address...
Service Guide - Page 30
...blue/amber) led to indict system status and defined as bellows:
LED Color Blue
System Status System in normal operation mode
Amber
System in power-saving mode
Dark
System in power-off mode
LOGO:
When the monitor... used, communicate additional information about its identity and, depending on the I2C protocol. HOW TO OPTIMIZE THE DOS-MODE
Plug and play
Plug & play DDC2B feature
This monitor...
Service Guide - Page 31
... RIGHT POWER CORD
The accessory power cord for the Northern American region is no video input signal this monitor, following a time-out period, will automatically switch to an OFF mode. This feature is designed to use a cord set by pressing a key on type connector body, rated 10A, 250V, having standard CEE-22 female configuration...
Service Guide - Page 32

.... 2. The screws for maintenance and trouble shooting NOTE : 1. During the disassembly process, group the
screws with the corresponding to scratching! Therefore, lay the monitor on how to assemble the monitor for the different components vary in size. Front View: ( unit : inch )
- 32 - Chapter 3
Machine assembly
This chapter contains step-by-step procedures...
Similar Questions


Acer S240hl Monitor Unable To Alter Brightness
I have the Acer S240HL monitor. All setup and working with VGA cable connected but unable to alter t...
I have the Acer S240HL monitor. All setup and working with VGA cable connected but unable to alter t...
(Posted by tsrios 10 years ago)


How Do You Adjust Brightness On Acer P236h Monitor Please? Mine Came Set At 77%
(Posted by skyroad 11 years ago)

Problem With Acer Al511 Monitor
The problem is that there is the monitors setting window (blue) popping up whenever it feels like it...
The problem is that there is the monitors setting window (blue) popping up whenever it feels like it...
(Posted by huubdrenth 12 years ago)