Get support for Acer P206HV

Acer P206HV Support Question

Acer P206HV Support Question

Find answers below for this question about Acer P206HV.
Need a Acer P206HV manual? We have 2 online manuals for this item!
Question posted by lvictorlincoln on September 12th, 2018

How To Remove Acer P206hv Monitor Back Cover?

how to remove acer p206hv monitor back cover? the ac power point is burnt and i would like to remove the back cover and replace it. but how do i open the back cover since i don't see any screws?thank you.

Current Answers

Answer #1: Posted by techyagent on September 12th, 2018 10:07 PM
This answer was accepted by the poster of the original question.
techyagent

Member since:
June 17th, 2014

Points: 4,799,810
1,110
points
Step 1: Unplug the power and video cables from the monitor.

Step 2: Set the monitor face-down on a flat surface covered by a towel to prevent scratches to the screen.

Step 3: Remove the plastic hinge cover that covers the hinge between the monitor and the base.

Step 4:Unscrew the four screws that attach the base to the monitor with the Phillips screwdriver. Remove the base from the monitor and set aside.
Video of the Day

Step 5: Unscrew the nine screws that hold the back cover and front bezel together. Insert the tip of the flat blade screwdriver between the back cover and front bezel and gently pry them apart. Gently work your way around the edges of the monitor, loosening as you go.

Step 6: Lift the back cover off of the LCD unit, then flip the monitor over and lift off the front bezel. Flip the screen back over.

Step 7: Unscrew the two screws that hold the metal shield in place with the Phillips screwdriver.

Step 8: Slide the shield toward the base of the monitor until it comes loose, then remove it completely, revealing the main circuit board and connection board. You can access all of the internal components of the Acer LCD monitor from this point.

Thanks


Techygirl

Related Acer P206HV Manual Pages

Quick Start Guide - Page 1

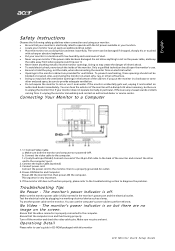
... so may block the ventilation openings in your location. · Locate your monitor is properly connected to a properly grounded AC outlet. 4. If the monitor accidentally gets wet, unplug it and contact an authorized dealer immediately. Power-ON Monitor and Computer Power-ON the monitor first, then power-ON the computer. Ensure that your monitor near an easily accessible electrical outlet...
Quick Start Guide - Page 2

...125/EC with regard to establishing a framework for the setting of Conformity Hereby, Acer Inc., declares that interference will not occur in interference to radio and TV .../television technician for help. Operation with non-certified peripherals is no guarantee that this LCD monitor is subject to the following measures: • Reorient or relocate the receiving antenna. •...
Quick Start Guide - Page 3

English LAMP Disposal /$03 6 ,16,'(7+,6352'8&7&217$,10(5&85
User Manual - Page 1

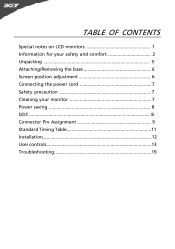
TABLE OF CONTENTS Special notes on LCD monitors 1 Information for your safety and comfort 2 Unpacking 5 Attaching/Removing the base 6 Screen position adjustment 6 Connecting the power cord 7 Safety precaution 7 Cleaning your monitor 7 Power saving 8 DDC 8 Connector Pin Assignment 9 Standard Timing Table 11 Installation 12 User controls 13 Troubleshooting 19
User Manual - Page 2

... the image, when the same image is recovered slowly by changing the image or turning off the Power Switch and then turn it on again to the nature of the fluorescent light, the screen may ...screen depending on the desktop pattern you use . Turn off the Power Switch for hours. SPECIAL NOTES ON LCD MONITORS The following symptoms are normal with LCD monitor and do not indicate a problem.
User Manual - Page 4

... Nevertheless, some pixels may occasionally misfire or appear as opening or removing covers may lead to qualified service person- Incorrect computer usage ...• the product exhibits a distinct change in front of the monitor, using a footrest, or raising your company's health and safety ...points or other recurring or persistent discomfort and/or pain related to computer use .
User Manual - Page 5

...very small typefaces and low-contrast displays could stress your monitor more relaxing and productive: • Take short breaks regularly...display so your eyes point downward when looking at bright light sources, such as open windows, for only ...: Worldwide: http://www.acer-group.com/public/Sustainability/sustainability01.htm http://www.acer-group.com/public/Sustainability/sustainability04...
User Manual - Page 6

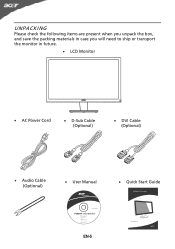
UNPACKING Please check the following items are present when you unpack the box, and save the packing materials in case you will need to ship or transport the monitor in future. · LCD Monitor · AC Power Cord · D-Sub Cable (Optional) · DVI Cable (Optional) · Audio Cable (Optional) · User Manual · Quick Start Guide P206HV LCD monitor EN-5
User Manual - Page 7

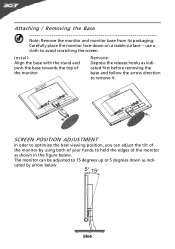
... indicated by using both of your hands to optimize the best viewing position, you can adjust the tilt of the monitor by arrow below . Remove: Depress the release hooks as shown in the figure below . The monitor can be adjusted to 15 degrees up or 5 degrees down on a stable surface -- use a cloth to...
User Manual - Page 8

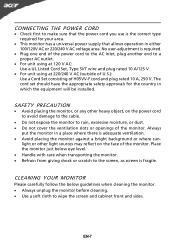
... scratch to the screen, as screen is required. · Plug one end of the power cord to the AC Inlet, plug another end to rain, excessive moisture, or dust. · Do not cover the ventilation slots or openings of the monitor. light or other heavy object, on the face of H05VV-F cord and plug rated...
User Manual - Page 9

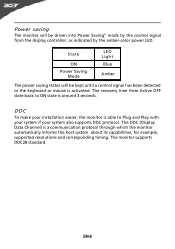
... Active OFF state back to Plug and Play with your system if your system also supports DDC protocol. The monitor supports DDC2B standard. State ON Power Saving Mode LED Light Blue Amber The power saving states will be kept until a control signal has been detected or the keyboard or mouse is activated. DDC...
User Manual - Page 10

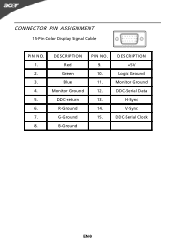
DESCRIPTION +5V Logic Ground Monitor Ground DDC-Serial Data H-Sync V-Sync DDC-Serial Clock EN-9 DESCRIPTION Red Green Blue Monitor Ground DDC-return R-Ground G-Ground B-Ground PIN NO. 9. 10. 11. 12. 13. 14. 15. CONNECTOR PIN ASSIGNMENT 15-Pin Color Display Signal Cable PIN NO. 1. 2. 3. 4. 5. 6. 7. 8.
User Manual - Page 13

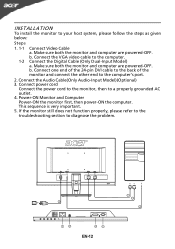
... 24-pin DVI cable to the back of the monitor and connect the other end to a properly grounded AC outlet. 4. b. Power-ON Monitor and Computer Power-ON the monitor first, then power-ON the computer. EN-12 Make sure both the monitor and computer are powered-OFF. INSTALLATION To install the monitor to your host system, please follow the steps...
User Manual - Page 14

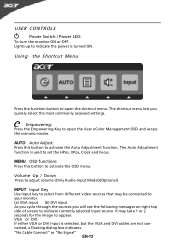
...power is selected ,but the VGA and DVI cables are not connected, a floating dialog box indicates: "No Cable Connect" or "No Signal" EN-13 Empowering: Press the Empowering Key to open the shortcut menu. AUTO Auto Adjust: Press this botton to open the Acer...see the following messages on right top side of screen to your monitor. (a) VGA input (b) DVI input As you cycle through the sources...
User Manual - Page 16

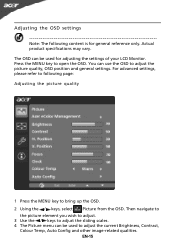
... be used for general reference only. EN-15 Adjusting the OSD settings Note: The following page: Adjusting the picture quality 1 Press the MENU key to open the OSD. For advanced settings, please refer to following content is for adjusting the settings of your LCD...
User Manual - Page 19

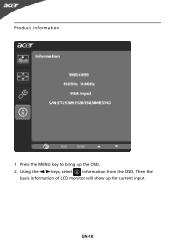
Then the basic information of LCD monitor will show up the OSD. 2 Using the / keys, select Information from the OSD. Product information 1 Press the MENU key to bring up for current input. EN-18
User Manual - Page 20

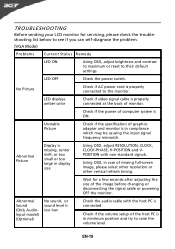
... image before changing or disconnecting the signal cable or powering OFF the monitor. shift, or too POSITION with the host PC is connected. · Check if the volume setup of computer system is properly connected to their default settings. No Picture · Check if AC power cord is ON. LED OFF · Check the...
User Manual - Page 21

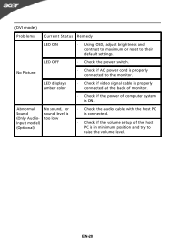
... properly connected at the back of monitor. · Check if the power of the host PC is in minimum position and try to raise the volume level. No Picture · Check if AC power cord is ON. LED OFF · Check the power switch. EN-20 Abnormal Sound (... Problems Current Status Remedy LED ON · Using OSD, adjust brightness and contrast to maximum or reset to the monitor.
User Manual - Page 22

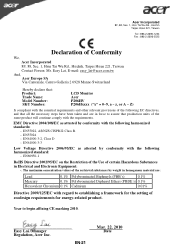
.../EC with regard to establishing a framework for the setting of ecodesign requirements for energy-related product. Acer Incorporated 8F, 88, Sec. 1, Hsin Tai Wu Rd., Hsichih Taipei Hsien 221, Taiwan Tel ...6928 Manno Switzerland Hereby declare that: Product: Trade Name: Model Number: SKU Number: LCD Monitor Acer P206HV P206Hxxxx ("x" = 0~9, a ~ z, or A ~ Z) Is compliant with the essential ...
User Manual - Page 23

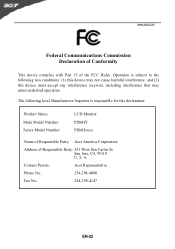
...received, including interference that may cause undesired operation. A. S. www.acer.com Federal Communications Commission Declaration of Conformity This device complies with ...Main Model Number: Series Model Number: LCD Monitor P206HV P206Hxxxx Name of Responsible Party: Acer America Corporation Address of the FCC Rules. Contact Person: Acer Representative Phone No.: 254-298-4000 Fax No...

Similar Questions

Acer Lcd Al 1521 No Power
lcd acer al 1521 no power the power led button is not light-the adabtor is working good
(Posted by ehabma76 11 years ago)
Ask a New Question
Use the box below to post a new question about this Acer product .
Points & Prizes
  • You can earn points for nearly everything you do on HelpOwl.com
  • You can trade in those points for gift cards at leading retailers such as Amazon.com and Walmart
  • It's that simple!
See How it Works
Create a Free Account

Acer Manuals

Find free Acer P206HV manuals and user guides available at ManualOwl.com. Try out our unique manual viewer allowing you to interact with manuals from directly within your browser!

Acer Reviews

View thousands of Acer user reviews and customer ratings available at ReviewOwl.com.

Contact Information

Complete Acer customer service contact information including steps to reach representatives, hours of operation, customer support links and more from ContactHelp.com.

Scoreboard Ratings

See detailed Acer customer service rankings, employee comments and much more from our sister site.

Acer Recalls

Find comprehensive Acer recall information updated hourly on RecallOwl.com.