

User Guide
Page 8
... Restoring Your Original Software 5-1 Chapter 6 Using the PowerDVD About DVD ...6-1 Playing the PowerDVD 6-1 How to Run the PowerDVD 6-1 Buttons of the PowerDVD 6-2 Appendix A. Solving Common Problems Power ...A-1 Hard Disk Drive ...A-1 Optical Drive ...A-2 Audio ...A-2 Floppy Disk Drive A-3 Display & Monitor A-3 Keyboard ...A-4 Mouse ...A-4 Appendix B. Approval Statements Battery Warning Instruction B-1 Fuse Warning Instruction B-1 Laser Product...
... Restoring Your Original Software 5-1 Chapter 6 Using the PowerDVD About DVD ...6-1 Playing the PowerDVD 6-1 How to Run the PowerDVD 6-1 Buttons of the PowerDVD 6-2 Appendix A. Solving Common Problems Power ...A-1 Hard Disk Drive ...A-1 Optical Drive ...A-2 Audio ...A-2 Floppy Disk Drive A-3 Display & Monitor A-3 Keyboard ...A-4 Mouse ...A-4 Appendix B. Approval Statements Battery Warning Instruction B-1 Fuse Warning Instruction B-1 Laser Product...

User Guide
Page 43
... your computer and wait about 10 seconds for complete discharge and re-plug the power cord. The problem is listed first, followed by sudden power failure, it before calling a technician if a problem occurs. Make sure the power cord is not working . If it is firmly plugged into the ... for lost allocation units by running Disk Defragmenter. (For more information,refer to the Windows Help. Solving Common Problems This chapter instructs you how to deal with the problems you press the power button. Read it will not operate if you might experience when using your hard disk may...
... your computer and wait about 10 seconds for complete discharge and re-plug the power cord. The problem is listed first, followed by sudden power failure, it before calling a technician if a problem occurs. Make sure the power cord is not working . If it is firmly plugged into the ... for lost allocation units by running Disk Defragmenter. (For more information,refer to the Windows Help. Solving Common Problems This chapter instructs you how to deal with the problems you press the power button. Read it will not operate if you might experience when using your hard disk may...
User Guide
Page 44
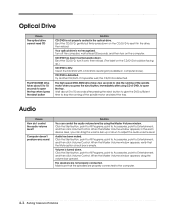
.... Eject the CD/DVD, gently but firmly press down . CD/DVD is not recognized. Wait about 5 to 10 seconds to open the tray. A-2 Solving Common Problems Clean the CD/DVD with a CD/DVD cleaning kit (available in the each device area, you press the eject button, immediately after using the Master...
.... Eject the CD/DVD, gently but firmly press down . CD/DVD is not recognized. Wait about 5 to 10 seconds to open the tray. A-2 Solving Common Problems Clean the CD/DVD with a CD/DVD cleaning kit (available in the each device area, you press the eject button, immediately after using the Master...

User Guide
Page 45
... color depth, follow these steps: 1. Your current screen will reappear. Click Start, click Control Panel, click Appearance and Themes, and then click Display. Solving Common Problems A-3 Remove the diskette and reinsert it. Format the diskette. (Refer to your computer isn't connected properly. You have a screen blanking utility installed or your Windows...
... color depth, follow these steps: 1. Your current screen will reappear. Click Start, click Control Panel, click Appearance and Themes, and then click Display. Solving Common Problems A-3 Remove the diskette and reinsert it. Format the diskette. (Refer to your computer isn't connected properly. You have a screen blanking utility installed or your Windows...
User Guide
Page 46
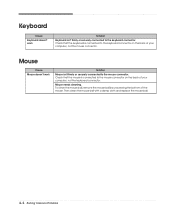
... the mouse ball. To clean the mouse ball, remove the mouse ball by unscrewing the bottom of your computer, not the keyboard connector. A-4 Solving Common Problems Mouse needs cleaning. Check that the mouse is connected to the keyboard connector on the back of your computer, not the mouse connector. Keyboard Cause...
... the mouse ball. To clean the mouse ball, remove the mouse ball by unscrewing the bottom of your computer, not the keyboard connector. A-4 Solving Common Problems Mouse needs cleaning. Check that the mouse is connected to the keyboard connector on the back of your computer, not the mouse connector. Keyboard Cause...

