
User Guide
Page 4
... computer 41 Cleaning the exterior 41 Cleaning the keyboard 42 Cleaning the computer display 42 Cleaning the mouse 42 Cleaning CDs or DVDs 44 Restoring your system 44 Preventing static electricity discharge 45 Opening the case 46 Removing the side panel 46 Removing the front bezel 47 Closing the... the side panel 48 Replacing the front bezel 49 Installing memory 50 Replacing the system battery 52 6 Troubleshooting 55 Safety guidelines 56 First steps 56 Troubleshooting 57 Add-in cards 57 Audio 57 Battery 57 CD or DVD drives 57 Computer 59 Diskette drive 59 DVD drives 60 ...
... computer 41 Cleaning the exterior 41 Cleaning the keyboard 42 Cleaning the computer display 42 Cleaning the mouse 42 Cleaning CDs or DVDs 44 Restoring your system 44 Preventing static electricity discharge 45 Opening the case 46 Removing the side panel 46 Removing the front bezel 47 Closing the... the side panel 48 Replacing the front bezel 49 Installing memory 50 Replacing the system battery 52 6 Troubleshooting 55 Safety guidelines 56 First steps 56 Troubleshooting 57 Add-in cards 57 Audio 57 Battery 57 CD or DVD drives 57 Computer 59 Diskette drive 59 DVD drives 60 ...
User Guide
Page 59
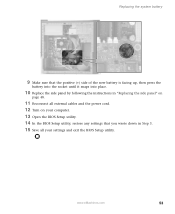
Replacing the system battery 9 Make sure that the positive (+) side of the new battery is facing up, then press the battery into the socket until it snaps into place. 10 Replace the side panel by following the instructions in "Replacing the side panel" on page 48. 11 Reconnect all external cables and the power cord. 12 Turn on your computer. 13 Open the BIOS Setup utility. 14 In the BIOS Setup utility, restore any settings that you wrote down in Step 3. 15 Save all your settings and exit the BIOS Setup utility. www.eMachines.com 53
Replacing the system battery 9 Make sure that the positive (+) side of the new battery is facing up, then press the battery into the socket until it snaps into place. 10 Replace the side panel by following the instructions in "Replacing the side panel" on page 48. 11 Reconnect all external cables and the power cord. 12 Turn on your computer. 13 Open the BIOS Setup utility. 14 In the BIOS Setup utility, restore any settings that you wrote down in Step 3. 15 Save all your settings and exit the BIOS Setup utility. www.eMachines.com 53
NG3 Hardware Reference
Page 137
...and create recovery discs, see "Creating recovery discs" on page 175 or at eMachines.com. If you are still having problems even after you follow troubleshooting steps, you can use Microsoft System Restore to roll back your system to a previous condition when drivers and programs worked ...discs let you recover your device drivers and software that you make a backup of your system to completely restore your computer. Finally, in "Troubleshooting" on page 131. eMachines provides everything , including the operating system, so your computer has its original factory settings. ■ "...
...and create recovery discs, see "Creating recovery discs" on page 175 or at eMachines.com. If you are still having problems even after you follow troubleshooting steps, you can use Microsoft System Restore to roll back your system to a previous condition when drivers and programs worked ...discs let you recover your device drivers and software that you make a backup of your system to completely restore your computer. Finally, in "Troubleshooting" on page 131. eMachines provides everything , including the operating system, so your computer has its original factory settings. ■ "...
NG3 Hardware Reference
Page 141
... and Recovering Your Files and Software www.emachines.com Important Use the correct type of the recovery disc(s). 7 When the disc is complete, remove that disc and insert another. 8 Repeat steps 5-7 for each recovery file until each file is completed, you cannot restore the software from the hard drive" on..." on the front or side of your system from the hard drive, contact eMachines Customer Care for help , you use the marker to complete the burning of blank disc for a DVD, make sure you can restore specific drivers and programs from the drive, use a blank DVD+R or DVD-R...
... and Recovering Your Files and Software www.emachines.com Important Use the correct type of the recovery disc(s). 7 When the disc is complete, remove that disc and insert another. 8 Repeat steps 5-7 for each recovery file until each file is completed, you cannot restore the software from the hard drive" on..." on the front or side of your system from the hard drive, contact eMachines Customer Care for help , you use the marker to complete the burning of blank disc for a DVD, make sure you can restore specific drivers and programs from the drive, use a blank DVD+R or DVD-R...
NG3 Hardware Reference
Page 144
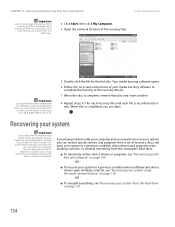
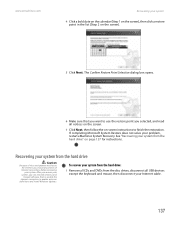
...7 Click Next, then follow the on page 137 for instructions. www.emachines.com Recovering your system 4 Click a bold date on the calendar (Step 1 on the screen), then click a restore point in the list (Step 2 on the Internet, you should disconnect all Internet connections before recovering ...your system. After you recover your problem, restart eMachines System Recovery. Recovering your system from the ...
...7 Click Next, then follow the on page 137 for instructions. www.emachines.com Recovering your system 4 Click a bold date on the calendar (Step 1 on the screen), then click a restore point in the list (Step 2 on the Internet, you should disconnect all Internet connections before recovering ...your system. After you recover your problem, restart eMachines System Recovery. Recovering your system from the ...
NG3 Hardware Reference
Page 157
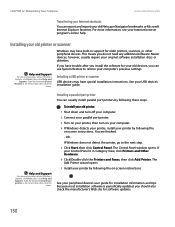
... turn on your computer. 4 If Windows detects your printer, install your Control Panel is periodically updated, you can use System Restore to the next step. 5 Click Start, then click Control Panel. The Control Panel window opens. Installing a USB printer or scanner USB devices may... have special installation instructions. CHAPTER 12: Maintaining Your Computer www.emachines.com Transferring your Internet shortcuts You can export and import your...
... turn on your computer. 4 If Windows detects your printer, install your Control Panel is periodically updated, you can use System Restore to the next step. 5 Click Start, then click Control Panel. The Control Panel window opens. Installing a USB printer or scanner USB devices may... have special installation instructions. CHAPTER 12: Maintaining Your Computer www.emachines.com Transferring your Internet shortcuts You can export and import your...
NG3 Hardware Reference
Page 167
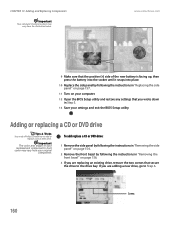
... location may vary from the illustration below. Screws 160 If you wrote down in Step 3. 13 Save your computer. 12 Open the BIOS Setup utility and restore any settings that secure the drive to the drive bay. www.emachines.com 9 Make sure that the positive (+) side of your replacement component's front cover may... a new drive, go to add or replace a CD or DVD drive. Adding or replacing a CD or DVD drive Tips & Tricks You need a Phillips screwdriver to Step 6.
... location may vary from the illustration below. Screws 160 If you wrote down in Step 3. 13 Save your computer. 12 Open the BIOS Setup utility and restore any settings that secure the drive to the drive bay. www.emachines.com 9 Make sure that the positive (+) side of your replacement component's front cover may... a new drive, go to add or replace a CD or DVD drive. Adding or replacing a CD or DVD drive Tips & Tricks You need a Phillips screwdriver to Step 6.


