eMachines D2266 Support and Manuals
Get Help and Manuals for this eMachines item

View All Support Options Below
Free eMachines D2266 manuals!
Problems with eMachines D2266?
Ask a Question
Free eMachines D2266 manuals!
Problems with eMachines D2266?
Ask a Question
Popular eMachines D2266 Manual Pages
User Guide - Page 5

... this user's guide is subject to change without notice. All other countries.
nor for technical or editorial errors or omissions contained herein; Before You Read
The information in the United States and/or other product and brand names are either trademarks or registered trademarks of eMachines, Inc. eMachines, Inc. NOTE Depending on the model, your...
User Guide - Page 7

... ...3-6 Changing the Display Resolution and Color Depth 3-7 Controlling the Audio Volume 3-7
vii Checking the Voltage Selection 2-2 3. Selecting a Location 2-1 2. CONTENTS
Chapter 1 Chapter 2
Chapter 3
Introduction
System Overview...1-1
Setting Up Your System
1. Connecting Your Peripheral Devices 2-3 4.
User Guide - Page 8

...Removing the Cover 4-1 Replacing the Cover 4-3 Installing an Expansion Card 4-4 Installing an Additional Hard Disk Drive 4-6 Installing the 5.25-inch ...Problems
Power ...A-1 Hard Disk Drive ...A-1 Optical Drive ...A-2 Audio ...A-2 Floppy Disk Drive A-3 Display & Monitor A-3 Keyboard ...A-4 Mouse ...A-4
Appendix B. Approval Statements
Battery Warning Instruction B-1 Fuse Warning Instruction...
User Guide - Page 11

...sunlight or any other peripheral devices. Chapter 1 No electromagnetic interference. Setting Up Your System
This chapter describes how to set up and turn on your system.
You need one outlet for...Select a cool, dry area and protect your system too close to support the weight of its components. Selecting a Location
Before you set up your computer, it is important to choose a safe and ...
User Guide - Page 12
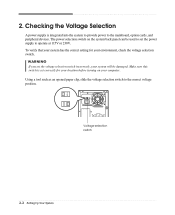
... mainboard, option cards, and peripheral devices. To verify that your system has the correct setting for your location before turning on the system back panel can be damaged. Voltage selection switch
2-2 Setting Up Your System WARNING If you set the power supply to the correct voltage position.
2. The power selection switch on your...
User Guide - Page 13
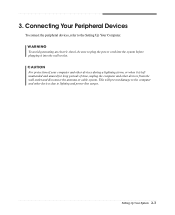
... unattended and unused for long periods of time, unplug the computer and other devices due to lighting and power line surges. Setting Up Your System 2-3 This will prevent damage to the Setting Up Your Computer. Connecting Your Peripheral Devices
To connect the peripheral devices, refer to the computer and other devices from...
User Guide - Page 14

...the system. 4. Before turning off your computer. 3. Turning the Computer On and Off
Follow the instructions below to turn on the front panel of your computer, follow these steps: 1.
Turn off . ...on the computer or to turn it off the monitor and any other peripheral devices.
2-4 Setting Up Your System To start Windows, remove the Restore CD and restart the computer.
When the...
User Guide - Page 20
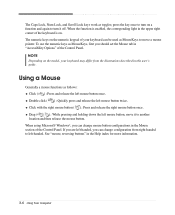
...you can be used as toggles;
See "mouse, reversing buttons" in this user's guide. Double click ( ) : Quickly press and release the left -handed. Drag ... When using Microsoft® Windows®, you should set the Mouse tab in the upper right corner of ... to left mouse button twice. NOTE Depending on the model, your keyboard can change configuration from the illustrations described ...
User Guide - Page 21
..., drag the volume bar up or
down to Entertainment, and
then click Volume Control. 2. Using Your Computer 3-7 When the Display Properties window appears, click the Settings tab. 3. Controlling the Audio Volume
You can control the audio volume level by using the volume control box or Master Volume window. Or click
the...
User Guide - Page 29

With using the screws, secure the hard disk drive to CS (Cable Select). 5. Slide the hard disk drive into the HDD bracket. 6. Set the jumper of the new hard disk drive to the HDD bracket. Installing and Removing Drives 4-7 4.
User Guide - Page 33

... Removing Drives 4-11 NOTES Like a hard disk drive, most optional devices have jumpers that covers the 5.25-inch drive bay you set to install is an EMI shield that must set the jumper of optional drive you can use , remove it from the front panel. Push out the faceplate, pressing outward two tabs...
User Guide - Page 39

....
11. You can update drivers in the optical drive. If there is no executable installation file. And press Enter to continue..." And press Enter to continue..." message appears, replace the Restore CD
#2...in the Restore CD #1 will be copied to your hard disk. 8. NOTE Depending on the model, your computer. In this case, the "Microsoft Windows Startup Menu" menu will start. To ...
User Guide - Page 41
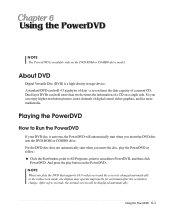
...If your DVD disc is changed automatically to emachines PowerDVD, and then click PowerDVD. For the ... twelve times the information of a CD on the DVD-ROM or COMBO drive model.
Chapter 1 Dual-layer DVDs can hold 4.7 gigabytes of a current CD. And...for an instant after the resolution change. So you play the DVD that supports 16:9 widescreen and the screen is auto-run, the PowerDVD will be...
User Guide - Page 43

... a grounded wall outlet.
To check to the Windows Help. To open Windows Help, click the Start button, and then click Help and Support.)
Solving Common Problems A-1 Solving Common Problems
This chapter instructs you how to the Windows Help. Check for lost allocation units by running Disk Defragmenter. (For more information, refer to deal with...
User Guide - Page 45

..., click the Start button, and then click Help and Support.)
Diskette is not write-protected.
Make sure the power cord is unformatted. Solving Common Problems A-3 Format the diskette. (Refer to your computer isn't connected properly. Solution
The brightness and contrast controls aren't set properly Adjust the brightness and contrast controls on the empty...
eMachines D2266 Reviews
We have not received any reviews for eMachines yet.