
Owner's Manual
Page 5
... on jacks and cable plugs 13 Connecting a TV monitor or projector 14 Connecting other components 15 Connecting a Yamaha iPod universal dock or Bluetooth™ wireless audio receiver 16 Using the VIDEO AUX jacks on the front panel .... 16 Connecting the FM and AM antennas 17 ...Setting sound field parameters 36 Sound field parameters 36 Operating various settings for this unit (Setup menu 38 Basic operation of the setup menu 39 Speaker Setup 39 Sound Setup 41 Function Setup 42 DSP Parameter 43 Memory Guard 43 Controlling other components with the remote control 44 Setting...
... on jacks and cable plugs 13 Connecting a TV monitor or projector 14 Connecting other components 15 Connecting a Yamaha iPod universal dock or Bluetooth™ wireless audio receiver 16 Using the VIDEO AUX jacks on the front panel .... 16 Connecting the FM and AM antennas 17 ...Setting sound field parameters 36 Sound field parameters 36 Operating various settings for this unit (Setup menu 38 Basic operation of the setup menu 39 Speaker Setup 39 Sound Setup 41 Function Setup 42 DSP Parameter 43 Memory Guard 43 Controlling other components with the remote control 44 Setting...
Owner's Manual
Page 6
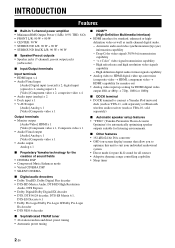
...• HDMI interface for standard, enhanced or highdefinition video as well as YBA-10, sold separately) ■ Automatic speaker setup features • "YPAO" (Yamaha Parametric Room Acoustic Optimizer) for automatically optimizing speaker outputs suitable for listening environments. ■ Other features • 192-kHz/...; 720p, 1080i or 1080p ■ DOCK terminal • DOCK terminal to connect a Yamaha iPod universal dock (such as YDS-11, sold separately) or Bluetooth wireless audio receiver (such as multi-channel digital audio. - Automatic audio and video synchronization (lip sync) ...
...• HDMI interface for standard, enhanced or highdefinition video as well as YBA-10, sold separately) ■ Automatic speaker setup features • "YPAO" (Yamaha Parametric Room Acoustic Optimizer) for automatically optimizing speaker outputs suitable for listening environments. ■ Other features • 192-kHz/...; 720p, 1080i or 1080p ■ DOCK terminal • DOCK terminal to connect a Yamaha iPod universal dock (such as YDS-11, sold separately) or Bluetooth wireless audio receiver (such as multi-channel digital audio. - Automatic audio and video synchronization (lip sync) ...

Owner's Manual
Page 11
... of input sources and sound field programs (see page 22). DECODE MUSIC STEREO STRAIGHT DIRECT BD DVD SETUP SCENE TV CD RADIO OPTION ENTER VOLUME RETURN DISPLAY TOP MENU REC MENU MUTE b c f e ...AV 1-6 AUDIO 1/2 V-AUX Selects HDMI inputs 1 through 6. Selects AUDIO inputs 1 and 2. To control external components using the rExternal component operation keys separately from the remote control. Selects a Yamaha iPod universal dock/ Bluetooth wireless audio receiver connected to the DOCK jack. Presets radio stations. Changes tuning frequencies. l SETUP Displays the setup...
... of input sources and sound field programs (see page 22). DECODE MUSIC STEREO STRAIGHT DIRECT BD DVD SETUP SCENE TV CD RADIO OPTION ENTER VOLUME RETURN DISPLAY TOP MENU REC MENU MUTE b c f e ...AV 1-6 AUDIO 1/2 V-AUX Selects HDMI inputs 1 through 6. Selects AUDIO inputs 1 and 2. To control external components using the rExternal component operation keys separately from the remote control. Selects a Yamaha iPod universal dock/ Bluetooth wireless audio receiver connected to the DOCK jack. Presets radio stations. Changes tuning frequencies. l SETUP Displays the setup...
Owner's Manual
Page 12
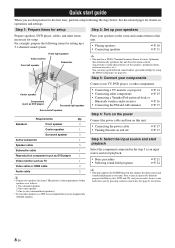
... Connecting a TV monitor or projector ☞P. 14 • Connecting other components ☞P. 15 • Connecting a Yamaha iPod universal dock or Bluetooth wireless audio receiver ☞P. 16 • Connecting the FM and AM antennas ☞P. 17 Step 4: Turn on the power Connect ...24 y • This unit supports the SCENE function that you use this unit based on operations and settings. See the related pages for setup Step 2: Set up a 5.1-channel sound system. Speakers Front speaker 2 Center speaker 1 Surround speaker 2 Active subwoofer 1 Speaker cable 5 ...
... Connecting a TV monitor or projector ☞P. 14 • Connecting other components ☞P. 15 • Connecting a Yamaha iPod universal dock or Bluetooth wireless audio receiver ☞P. 16 • Connecting the FM and AM antennas ☞P. 17 Step 4: Turn on the power Connect ...24 y • This unit supports the SCENE function that you use this unit based on operations and settings. See the related pages for setup Step 2: Set up a 5.1-channel sound system. Speakers Front speaker 2 Center speaker 1 Surround speaker 2 Active subwoofer 1 Speaker cable 5 ...

Owner's Manual
Page 16
... is turned on. • Use magnetically shielded speakers. If the circuit shorts out, "CHECK SP WIRES!" Set speaker impedance in "ADVANCED SETUP" before connecting the speaker cables. Front speakers Right Left Connecting the banana plug (Except U.K., Europe, Asia and Korea models) Tighten the knob...approximately 10 mm (0.4 in) of 6-ohm or larger. Before connecting the speakers, set this unit to enable bi-amplification connections in "ADVANCED SETUP" (see page 45). ■ Connecting to disconnect the power cable. • Do not let the bare speaker wires touch each speaker cable...
... is turned on. • Use magnetically shielded speakers. If the circuit shorts out, "CHECK SP WIRES!" Set speaker impedance in "ADVANCED SETUP" before connecting the speaker cables. Front speakers Right Left Connecting the banana plug (Except U.K., Europe, Asia and Korea models) Tighten the knob...approximately 10 mm (0.4 in) of 6-ohm or larger. Before connecting the speakers, set this unit to enable bi-amplification connections in "ADVANCED SETUP" (see page 45). ■ Connecting to disconnect the power cable. • Do not let the bare speaker wires touch each speaker cable...

Owner's Manual
Page 22
...microphone at the same height as your listening room (YPAO) This unit has a Yamaha Parametric Acoustic Optimizer (YPAO). Using Auto Setup 1 Check the following parametric equalizer characteristics suitable for the "Manual Setup" procedure. VOLUME CROSSOVER/ HIGH CUT MIN MAX MIN MAX Subwoofer 2 Connect the ... and subwoofer are connected properly. • Headphones are turned on. • This unit is selected as possible while the "Auto Setup" procedure is in the high frequency range seem too strong when "EQ Type" is normal for your ears would be satisfactory. If...
...microphone at the same height as your listening room (YPAO) This unit has a Yamaha Parametric Acoustic Optimizer (YPAO). Using Auto Setup 1 Check the following parametric equalizer characteristics suitable for the "Manual Setup" procedure. VOLUME CROSSOVER/ HIGH CUT MIN MAX MIN MAX Subwoofer 2 Connect the ... and subwoofer are connected properly. • Headphones are turned on. • This unit is selected as possible while the "Auto Setup" procedure is in the high frequency range seem too strong when "EQ Type" is normal for your ears would be satisfactory. If...
Owner's Manual
Page 23
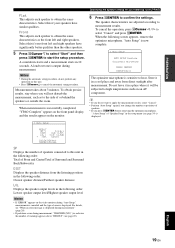
... have significantly better qualities than the other speakers. 5 Press nCursor n to select "Start" and then press nENTER to start the setup procedure. Store it in 10 seconds. ADVANCED OPERATION ADDITIONAL INFORMATION APPENDIX English 19 En Measurement takes about 3 minutes. When measurement is ... the room. When the following order: Lowest speaker output level/Highest speaker output level Notes • If "ERROR" appears on an AV component. Select this unit in the following screen appears, remove the optimizer microphone. To cancel the operation, press nCursor l / h to...
... have significantly better qualities than the other speakers. 5 Press nCursor n to select "Start" and then press nENTER to start the setup procedure. Store it in 10 seconds. ADVANCED OPERATION ADDITIONAL INFORMATION APPENDIX English 19 En Measurement takes about 3 minutes. When measurement is ... the room. When the following order: Lowest speaker output level/Highest speaker output level Notes • If "ERROR" appears on an AV component. Select this unit in the following screen appears, remove the optimizer microphone. To cancel the operation, press nCursor l / h to...

Owner's Manual
Page 24
...and then press nENTER. If there are displayed. E-9:USER CANCEL Don't operate any function >Retry Exit [p]/[[]:Select [ENTER]:Return Retry Performs "Auto Setup" again. CENTER SL --- SBL --- [ENTER]:Return y • See page 52 for details on the left of the warning message are ... on warning messages. • Optimization will not be performed while a warning message is displayed. Exit Terminates the measurement and "Auto Setup." Optimizing the speaker setting for your listening room (YPAO) When an error message is displayed during measurement, "WARNING" is displayed on...
...and then press nENTER. If there are displayed. E-9:USER CANCEL Don't operate any function >Retry Exit [p]/[[]:Select [ENTER]:Return Retry Performs "Auto Setup" again. CENTER SL --- SBL --- [ENTER]:Return y • See page 52 for details on the left of the warning message are ... on warning messages. • Optimization will not be performed while a warning message is displayed. Exit Terminates the measurement and "Auto Setup." Optimizing the speaker setting for your listening room (YPAO) When an error message is displayed during measurement, "WARNING" is displayed on...

Owner's Manual
Page 25
...This unit has a SCENE function that the volume is displayed for a few seconds. Input source Sound field program BD/DVD TV CD RADIO HDMI 1 AV 1 AV 3 TUNER Straight Straight Straight 7ch Enhancer y • When this unit by pressing the SCENE key. Selecting a SCENE Press ISCENE (or kSCENE). ... En Four scenes are provided as playing movies or music. Note • Remote control codes cannot be output in the OPTION menu or SETUP menu, "SCENE Setting Complete" appears on external components (TV, DVD player, etc.) connected to adjust the volume (or press oVOLUME +/-)....
...This unit has a SCENE function that the volume is displayed for a few seconds. Input source Sound field program BD/DVD TV CD RADIO HDMI 1 AV 1 AV 3 TUNER Straight Straight Straight 7ch Enhancer y • When this unit by pressing the SCENE key. Selecting a SCENE Press ISCENE (or kSCENE). ... En Four scenes are provided as playing movies or music. Note • Remote control codes cannot be output in the OPTION menu or SETUP menu, "SCENE Setting Complete" appears on external components (TV, DVD player, etc.) connected to adjust the volume (or press oVOLUME +/-)....
Owner's Manual
Page 26
... you select a sound field program while using KPROGRAM l / h. sound field program, tone control - When setting it back off, the brightness of the option menu and setup menu y • While direct mode is on the front panel display. Sleep 60min. display and operation of the screen returns to sleep while this unit...
... you select a sound field program while using KPROGRAM l / h. sound field program, tone control - When setting it back off, the brightness of the option menu and setup menu y • While direct mode is on the front panel display. Sleep 60min. display and operation of the screen returns to sleep while this unit...

Owner's Manual
Page 31
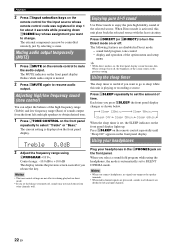
... without sound field effect. 2-channel stereo sources are reproduced without a sound field effect. 1 To enable straight decoding mode, press LSTRAIGHT (or jSTRAIGHT). L/R SP" in the setup menu is not available in Virtual CINEMA DSP mode. Note • Virtual CINEMA DSP mode is reproduced with your headphones. direct mode or straight decoding...
... without sound field effect. 2-channel stereo sources are reproduced without a sound field effect. 1 To enable straight decoding mode, press LSTRAIGHT (or jSTRAIGHT). L/R SP" in the setup menu is not available in Virtual CINEMA DSP mode. Note • Virtual CINEMA DSP mode is reproduced with your headphones. direct mode or straight decoding...

Owner's Manual
Page 40
... sound field program. 36 En You can protect the sound field against the changes of parameters the sound filed parameters when "Memory Guard" of the setup menu is set to "On" (see page 43). p [ [ ]/[ ]:Select Sound field parameters Set values 4 Press nCursor k / n to move "→" ... parameters y • The default settings are no differences between effects of the selected sound field program, nCursor n repeatedly to this page. The setup menu appears on the remote control. The screen changes as follows. • The effect sound is added too much. →Reduce the effect ...
... sound field program. 36 En You can protect the sound field against the changes of parameters the sound filed parameters when "Memory Guard" of the setup menu is set to "On" (see page 43). p [ [ ]/[ ]:Select Sound field parameters Set values 4 Press nCursor k / n to move "→" ... parameters y • The default settings are no differences between effects of the selected sound field program, nCursor n repeatedly to this page. The setup menu appears on the remote control. The screen changes as follows. • The effect sound is added too much. →Reduce the effect ...
Owner's Manual
Page 42
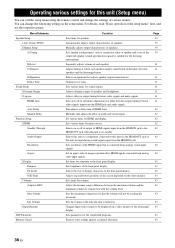
... output timing between video signals input from the HDMI IN jack to this unit via the HDMI OUT jack of this unit (Setup menu) You can change the settings of various menus. Volume 4 Input Rename DSP Parameter Memory Guard Function Sets items for input... sources. Automatically adjusts output characteristics of audio and visual output. Adjusts delay in the setup menu. Sets various items for speakers. Sets the maximum volume level so that adjusts speaker output characteristics. Manually fine adjusts the delay...
... output timing between video signals input from the HDMI IN jack to this unit via the HDMI OUT jack of this unit (Setup menu) You can change the settings of various menus. Volume 4 Input Rename DSP Parameter Memory Guard Function Sets items for input... sources. Automatically adjusts output characteristics of audio and visual output. Adjusts delay in the setup menu. Sets various items for speakers. Sets the maximum volume level so that adjusts speaker output characteristics. Manually fine adjusts the delay...

Owner's Manual
Page 43
... appears when you want to set using nCursor k / n, and press nENTER. To display other channels. Two kinds of the setup menu The setup menu screen appears on both video display (OSD) and front panel display. y • The speaker configuration includes items for manual...menu, select the input source again using the video monitor are displayed. Operating various settings for automatic adjustment and another is performed, you select "Function Setup." ;Function Setup . 1 HDMI 2 Display 3 Volume 4 Input Rename [ ]/[ ]:Up/Down [ENTER]:Enter y • You can change the setting of setting...
... appears when you want to set using nCursor k / n, and press nENTER. To display other channels. Two kinds of the setup menu The setup menu screen appears on both video display (OSD) and front panel display. y • The speaker configuration includes items for manual...menu, select the input source again using the video monitor are displayed. Operating various settings for automatic adjustment and another is performed, you select "Function Setup." ;Function Setup . 1 HDMI 2 Display 3 Volume 4 Input Rename [ ]/[ ]:Up/Down [ENTER]:Enter y • You can change the setting of setting...

Owner's Manual
Page 44
... Choices: None/SMLx1/SMLx2*/LRGx1/LRGx2 Sets sizes of the front left and right speakers. y • When "None" is set to "None" when this unit (Setup menu) LFE channel signals Parameter Both SWFR Front Subwoofer Output Output Not output Front speakers Not output Not output Output Other speakers Not output Not...
... Choices: None/SMLx1/SMLx2*/LRGx1/LRGx2 Sets sizes of the front left and right speakers. y • When "None" is set to "None" when this unit (Setup menu) LFE channel signals Parameter Both SWFR Front Subwoofer Output Output Not output Front speakers Not output Not output Output Other speakers Not output Not...

Owner's Manual
Page 45
...set the distance of "SBL" and "SBR." • You can adjust the settings of each speaker outputs sound so that generates test tones. Sound Setup You can adjust signal levels in 7 frequency ranges. HDMI Auto Choices: Off*/On Automatically adjusts output timing of "Sur.B L" and "Sur.B R." ...the same time. Sets the standard dynamic range recommended for reproducing bitstream signals. Outputs sound without adjusting the dynamic range of this unit (Setup menu) GEQ Choices: 63Hz/160Hz/400Hz/1kHz/2.5kHz/ 6.3kHz/16kHz Adjustable range: -6.0dB to 0dB* to +6.0dB (0.5 dB step) Adjusts ...
...set the distance of "SBL" and "SBR." • You can adjust the settings of each speaker outputs sound so that generates test tones. Sound Setup You can adjust signal levels in 7 frequency ranges. HDMI Auto Choices: Off*/On Automatically adjusts output timing of "Sur.B L" and "Sur.B R." ...the same time. Sets the standard dynamic range recommended for reproducing bitstream signals. Outputs sound without adjusting the dynamic range of this unit (Setup menu) GEQ Choices: 63Hz/160Hz/400Hz/1kHz/2.5kHz/ 6.3kHz/16kHz Adjustable range: -6.0dB to 0dB* to +6.0dB (0.5 dB step) Adjusts ...
Owner's Manual
Page 46
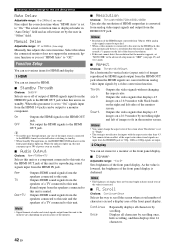
... the HDMI IN jack to the HDMI OUT jack when this unit is on standby. Function Setup You can set various items for HDMI and display. 1 HDMI You can set "MON.CHK" in the advanced setup menu to "SKIP" (see page 45) and try it again. ■ Aspect Choices: Thrgh*/16:9/Smart... reproduced by the user in direct mode even if the value is increased. ■ FL Scroll Choices: Continue*/Once Selects the way to this unit (Setup menu) Auto Delay Adjustable range: 0 to 240ms (1 ms step) Fine adjust the correction time when "HDMI Auto" is lowered, the brightness of display does not...
... the HDMI IN jack to the HDMI OUT jack when this unit is on standby. Function Setup You can set various items for HDMI and display. 1 HDMI You can set "MON.CHK" in the advanced setup menu to "SKIP" (see page 45) and try it again. ■ Aspect Choices: Thrgh*/16:9/Smart... reproduced by the user in direct mode even if the value is increased. ■ FL Scroll Choices: Continue*/Once Selects the way to this unit (Setup menu) Auto Delay Adjustable range: 0 to 240ms (1 ms step) Fine adjust the correction time when "HDMI Auto" is lowered, the brightness of display does not...

Owner's Manual
Page 47
...When this unit is set to +16.5 dB (default). ■ Init. Volume," the setting of the setup menu (except for this parameter is switched to "On," "G" appears while the setup menu is set to a level that you want to change the name to be displayed on . Selecting a .... Blu-ray - MD - Memory Guard Choices: Off*/On Protects settings of the screen displayed on the video monitor. Note • When this unit (Setup menu) 4 Input Rename Changes input source names to be displayed using Cursor. - Operating various settings for the Memory Guard setting). PC - HD DVD -...
...When this unit is set to +16.5 dB (default). ■ Init. Volume," the setting of the setup menu (except for this parameter is switched to "On," "G" appears while the setup menu is set to a level that you want to change the name to be displayed on . Selecting a .... Blu-ray - MD - Memory Guard Choices: Off*/On Protects settings of the screen displayed on the video monitor. Note • When this unit (Setup menu) 4 Input Rename Changes input source names to be displayed using Cursor. - Operating various settings for the Memory Guard setting). PC - HD DVD -...

Owner's Manual
Page 49
... both remote control and amplifier by default. XXXX Choices: YES*/SKIP Adds upscaling limitation on the remote control using multiple Yamaha AV receivers, you can select an initialization method from step 1. Setting a remote control ID Two IDs are marked with a single remote control...4 Press LSTRAIGHT a few times to select the value you want to the same setting. INTRODUCTION PREPARATION BASIC OPERATION ADVANCED OPERATION Advanced setup In the advanced setup, you can change multiple settings by repeating steps 3 and 4. 5 Press ASTANDBY/ON, turns off this system, and press ASTANDBY...
... both remote control and amplifier by default. XXXX Choices: YES*/SKIP Adds upscaling limitation on the remote control using multiple Yamaha AV receivers, you can select an initialization method from step 1. Setting a remote control ID Two IDs are marked with a single remote control...4 Press LSTRAIGHT a few times to select the value you want to the same setting. INTRODUCTION PREPARATION BASIC OPERATION ADVANCED OPERATION Advanced setup In the advanced setup, you can change multiple settings by repeating steps 3 and 4. 5 Press ASTANDBY/ON, turns off this system, and press ASTANDBY...
Owner's Manual
Page 50
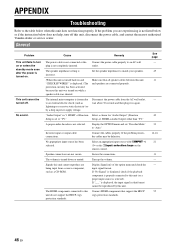
...source component, such as lightning or excessive static electricity) or by this unit, disconnect the power cable, and contact the nearest authorized Yamaha dealer or service center. Setup→1 HDMI→Audio Output) other than "TV." Speaker connections are being input from the AC wall outlet, wait about 30 ... the problem persists, the cables may be turned off this unit. Display Signal info of Function Select a choice for "Audio Output" (Function Setup is turned on or enters the standby mode soon after the power is set "Decoder Mode" to the table below does not help, turn ...
...source component, such as lightning or excessive static electricity) or by this unit, disconnect the power cable, and contact the nearest authorized Yamaha dealer or service center. Setup→1 HDMI→Audio Output) other than "TV." Speaker connections are being input from the AC wall outlet, wait about 30 ... the problem persists, the cables may be turned off this unit. Display Signal info of Function Select a choice for "Audio Output" (Function Setup is turned on or enters the standby mode soon after the power is set "Decoder Mode" to the table below does not help, turn ...

