
User Guide
Page 3
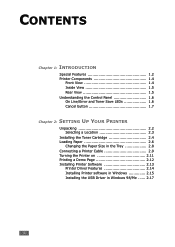
... Panel 1.6 On Line/Error and Toner Save LEDs 1.6 Cancel button 1.7 Chapter 2: SETTING UP YOUR PRINTER Unpacking 2.2 Selecting a Location 2.3 Installing the Toner Cartridge 2.4 Loading Paper 2.6 Changing the Paper Size in the Tray 2.8 Connecting a Printer Cable 2.9 Turning the Printer on 2.11 Printing a Demo Page 2.12 Installing Printer Software 2.13 Printer Driver Features 2.14 Installing Printer software in Windows 2.15 Installing...
... Panel 1.6 On Line/Error and Toner Save LEDs 1.6 Cancel button 1.7 Chapter 2: SETTING UP YOUR PRINTER Unpacking 2.2 Selecting a Location 2.3 Installing the Toner Cartridge 2.4 Loading Paper 2.6 Changing the Paper Size in the Tray 2.8 Connecting a Printer Cable 2.9 Turning the Printer on 2.11 Printing a Demo Page 2.12 Installing Printer Software 2.13 Printer Driver Features 2.14 Installing Printer software in Windows 2.15 Installing...

User Guide
Page 4
... 3.15 Printing on Preprinted Paper 3.16 Chapter 4: PRINTING TASKS Printing a Document 4.2 Canceling a Print Job 4.4 Using a Favorite Setting 4.5 Using Help 4.5 Setting Paper Properties 4.6 Using the Toner Save Mode 4.8 Scaling Your Document 4.10 Fitting Your Document to a Selected Paper Size ...... 4.11 Printing Multiple Pages on One Sheet of Paper (N-Up Printing 4.12... Overlay 4.22 Creating a New Page Overlay 4.22 Using a Page Overlay 4.24 Deleting a Page Overlay 4.25 Using Output Options 4.26 Setting Up Locally Shared Printer 4.28 Windows 9x/Me 4.28 Windows NT/2000/XP 4.29 iii
... 3.15 Printing on Preprinted Paper 3.16 Chapter 4: PRINTING TASKS Printing a Document 4.2 Canceling a Print Job 4.4 Using a Favorite Setting 4.5 Using Help 4.5 Setting Paper Properties 4.6 Using the Toner Save Mode 4.8 Scaling Your Document 4.10 Fitting Your Document to a Selected Paper Size ...... 4.11 Printing Multiple Pages on One Sheet of Paper (N-Up Printing 4.12... Overlay 4.22 Creating a New Page Overlay 4.22 Using a Page Overlay 4.24 Deleting a Page Overlay 4.25 Using Output Options 4.26 Setting Up Locally Shared Printer 4.28 Windows 9x/Me 4.28 Windows NT/2000/XP 4.29 iii

User Guide
Page 5
Chapter 5: MAINTAINING YOUR PRINTER Maintaining the Toner Cartridge 5.2 Redistributing Toner 5.3 Replacing the Toner Cartridge 5.4 Cleaning the Printer 5.5 Cleaning the Outside 5.5 Cleaning the Inside 5.5 Consumables and Replacement Parts 5.8 Chapter 6: SOLVING PROBLEMS Troubleshooting Checklist 6.2 Solving General Printing Problems 6.3 Clearing Paper Jams 6.7 In the Paper Exit Area 6.7 In the Paper Feed Area 6.9 Around the Toner Cartridge 6.10 Tips for Avoiding...
Chapter 5: MAINTAINING YOUR PRINTER Maintaining the Toner Cartridge 5.2 Redistributing Toner 5.3 Replacing the Toner Cartridge 5.4 Cleaning the Printer 5.5 Cleaning the Outside 5.5 Cleaning the Inside 5.5 Consumables and Replacement Parts 5.8 Chapter 6: SOLVING PROBLEMS Troubleshooting Checklist 6.2 Solving General Printing Problems 6.3 Clearing Paper Jams 6.7 In the Paper Exit Area 6.7 In the Paper Feed Area 6.9 Around the Toner Cartridge 6.10 Tips for Avoiding...

User Guide
Page 15
...access. See page 4.16. • Prints 17 pages-per-minute (Letter size), 16 pages-per inch (dpi). Tape the sheets together to save toner. See page 4.8. • Allows you to print multiple pages on one single sheet of paper to form a poster. select either the top output ... your documents using Watermarks, such as "Confidential." Save your time and money • Allows you a competitive edge. Special Features Your new printer is equipped with excellent quality and high speed • You can customize your document are magnified and printed across the selected sheet of paper.
...access. See page 4.16. • Prints 17 pages-per-minute (Letter size), 16 pages-per inch (dpi). Tape the sheets together to save toner. See page 4.8. • Allows you to print multiple pages on one single sheet of paper to form a poster. select either the top output ... your documents using Watermarks, such as "Confidential." Save your time and money • Allows you a competitive edge. Special Features Your new printer is equipped with excellent quality and high speed • You can customize your document are magnified and printed across the selected sheet of paper.

User Guide
Page 19
... this button once again, this LED is on page 6.18. Understanding the Control Panel On Line/Error( ) and Toner Save( ) LEDs LED Description If the lights green, the printer is ready to cancel printing. Load paper into the Manual Feeder and the LED stops blinking. LED slowly blinks If ... in Ready mode, this LED is off and the Toner Save mode is disabled. 1.6 INTRODUCTION If you press the button while the printer is experiencing an error, such as jammed paper, the open cover or the empty toner cartridge. If the printer is printing the received data, the LED blinks green ...
... this button once again, this LED is on page 6.18. Understanding the Control Panel On Line/Error( ) and Toner Save( ) LEDs LED Description If the lights green, the printer is ready to cancel printing. Load paper into the Manual Feeder and the LED stops blinking. LED slowly blinks If ... in Ready mode, this LED is off and the Toner Save mode is disabled. 1.6 INTRODUCTION If you press the button while the printer is experiencing an error, such as jammed paper, the open cover or the empty toner cartridge. If the printer is printing the received data, the LED blinks green ...

User Guide
Page 20
... button Function Description Printing demo page In Ready mode, press and hold this button for about 2 seconds until all LEDs turn the Toner Save mode on or off In Ready mode, press this button to Ready mode. For detailed information, see "Troubleshooting Error Messages" ...Manual Feeder" on page 3.8. For detailed information, see page 4.8. LED Description If the and LEDs blink, your software application. Cleaning inside printer In Ready mode, press and hold this button during printing. Printing In Ready mode, press and hold this button. Canceling print job ...
... button Function Description Printing demo page In Ready mode, press and hold this button for about 2 seconds until all LEDs turn the Toner Save mode on or off In Ready mode, press this button to Ready mode. For detailed information, see "Troubleshooting Error Messages" ...Manual Feeder" on page 3.8. For detailed information, see page 4.8. LED Description If the and LEDs blink, your software application. Cleaning inside printer In Ready mode, press and hold this button during printing. Printing In Ready mode, press and hold this button. Canceling print job ...

User Guide
Page 22
2 SETTING UP YOUR PRINTER This chapter provides step by step information on • Printing a Demo Page • Installing Printer Software This chapter includes: • Unpacking • Installing the Toner Cartridge • Loading Paper • Connecting a Printer Cable • Turning the Printer on setting up your printer.
2 SETTING UP YOUR PRINTER This chapter provides step by step information on • Printing a Demo Page • Installing Printer Software This chapter includes: • Unpacking • Installing the Toner Cartridge • Loading Paper • Connecting a Printer Cable • Turning the Printer on setting up your printer.

User Guide
Page 23
Unpacking 1 Remove the Printer and all of packing tapes from the packing carton. Make sure that the printer has been packed with the following items: Toner Cartridge Power Cord USB Cable CD-ROM Setup Guide Notes: • If any items are missing or damaged, notify your dealer immediately. • Components may differ from one country to another. • The CD-ROM contains the printer driver, the User's Guide, and the Adobe Acrobat Reader program. 2 Carefully remove all accessories from the printer. Tape 2.2 SETTING UP YOUR PRINTER
Unpacking 1 Remove the Printer and all of packing tapes from the packing carton. Make sure that the printer has been packed with the following items: Toner Cartridge Power Cord USB Cable CD-ROM Setup Guide Notes: • If any items are missing or damaged, notify your dealer immediately. • Components may differ from one country to another. • The CD-ROM contains the printer driver, the User's Guide, and the Adobe Acrobat Reader program. 2 Carefully remove all accessories from the printer. Tape 2.2 SETTING UP YOUR PRINTER

User Guide
Page 25
... more than a few minutes. CAUTIONS: • To prevent damage, do not expose the toner cartridge to distribute the toner evenly inside the cartridge. Be careful not to move the printer. 2 Remove the toner cartridge from its bag and remove the paper covering the cartridge. 3 Gently shake the cartridge from... side to side to light for more than a few minutes. • If toner gets on your clothing, wipe it with a...
... more than a few minutes. CAUTIONS: • To prevent damage, do not expose the toner cartridge to distribute the toner evenly inside the cartridge. Be careful not to move the printer. 2 Remove the toner cartridge from its bag and remove the paper covering the cartridge. 3 Gently shake the cartridge from... side to side to light for more than a few minutes. • If toner gets on your clothing, wipe it with a...

User Guide
Page 26
4 Locate the cartridge slots inside the printer, one on each side. 2 5 Grasp the handle and insert the cartridge in the printer until it snaps into place. 6 Close the front cover. If the cover is securely closed , printing errors may occur when you can expect a toner cartridge life of approximately 3,000 pages. SETTING UP YOUR PRINTER 2.5 Note: When printing text at 5% coverage, you print. Make sure that the cover is not firmly closed .
4 Locate the cartridge slots inside the printer, one on each side. 2 5 Grasp the handle and insert the cartridge in the printer until it snaps into place. 6 Close the front cover. If the cover is securely closed , printing errors may occur when you can expect a toner cartridge life of approximately 3,000 pages. SETTING UP YOUR PRINTER 2.5 Note: When printing text at 5% coverage, you print. Make sure that the cover is not firmly closed .

User Guide
Page 27
Be careful not to move the printer. 2 Push down the pressure plate until it ; Note: Because the printer is very light, it may be moved when you use it locks in the tray. 1 Pull the tray out of paper for example, when opening/closing the tray or installing/ removing the toner cartridge. for loading by flexing or fanning them back and forth. Straighten the edges on a level surface. 2.6 SETTING UP YOUR PRINTER Loading Paper You can load approximately 250 sheets of paper in position. 3 Prepare a stack of the printer.
Be careful not to move the printer. 2 Push down the pressure plate until it ; Note: Because the printer is very light, it may be moved when you use it locks in the tray. 1 Pull the tray out of paper for example, when opening/closing the tray or installing/ removing the toner cartridge. for loading by flexing or fanning them back and forth. Straighten the edges on a level surface. 2.6 SETTING UP YOUR PRINTER Loading Paper You can load approximately 250 sheets of paper in position. 3 Prepare a stack of the printer.

User Guide
Page 35
Feature Printer Driver Win9x/Me Win2000/XP NT4.0 Toner Save Y Y Y Print quality option Y Y Y Poster printing Y Y Y Multiple pages per sheet (N-up) Y Y Y Fit to page printing Y Y Y Scale printing Y Y Y Watermark Y Y Y Overlay Y Y Y 2.14 SETTING UP YOUR PRINTER Printer Driver Features Your printer drivers will support the following standard features: • Paper source selection • Paper size, orientation and media type • number of copies Table below lists a general overview of features supported by your printer drivers.
Feature Printer Driver Win9x/Me Win2000/XP NT4.0 Toner Save Y Y Y Print quality option Y Y Y Poster printing Y Y Y Multiple pages per sheet (N-up) Y Y Y Fit to page printing Y Y Y Scale printing Y Y Y Watermark Y Y Y Overlay Y Y Y 2.14 SETTING UP YOUR PRINTER Printer Driver Features Your printer drivers will support the following standard features: • Paper source selection • Paper size, orientation and media type • number of copies Table below lists a general overview of features supported by your printer drivers.

User Guide
Page 58
This chapter includes: • Printing a Document • Setting Paper Properties • Using the Toner Save Mode • Scaling Your Document • Fitting Your Document to a Selected Paper Size • Printing Multiple Pages on One Sheet of Paper (N- Up Printing) • Printing Posters • Setting Graphic Properties • Printing Watermarks • Printing Overlays • Using Output Options • Setting Up Locally Shared Printer 4 Printing Tasks This chapter explains the printing options and common printing tasks.
This chapter includes: • Printing a Document • Setting Paper Properties • Using the Toner Save Mode • Scaling Your Document • Fitting Your Document to a Selected Paper Size • Printing Multiple Pages on One Sheet of Paper (N- Up Printing) • Printing Posters • Setting Graphic Properties • Printing Watermarks • Printing Overlays • Using Output Options • Setting Up Locally Shared Printer 4 Printing Tasks This chapter explains the printing options and common printing tasks.

User Guide
Page 65
... be in the normal mode. 4.8 PRINTING TASKS Using the Toner Save Mode Toner Save mode allows the printer to use less toner on , the mode is enabled and the printer uses less toner to enable the Toner Save mode: From the Control Panel Press the button on the control panel. Selecting this option ...will extend the life of your toner cartridge and reduce your cost per page...
... be in the normal mode. 4.8 PRINTING TASKS Using the Toner Save Mode Toner Save mode allows the printer to use less toner on , the mode is enabled and the printer uses less toner to enable the Toner Save mode: From the Control Panel Press the button on the control panel. Selecting this option ...will extend the life of your toner cartridge and reduce your cost per page...

User Guide
Page 66
PRINTING TASKS 4.9 From the software application 1 To change the print settings from : •Printer Setting: If you select this option, this feature is determined by the setting you've made on the control panel of the printer. •On: Select this option to allow the printer to use less toner on each page. •Off: If you don't need to save toner to print a document, select this option. 4 3 Click OK. You can select from your software application, access the printer properties. See page 4.2. 2 Click the Graphics tab, and select the Toner Save Mode.
PRINTING TASKS 4.9 From the software application 1 To change the print settings from : •Printer Setting: If you select this option, this feature is determined by the setting you've made on the control panel of the printer. •On: Select this option to allow the printer to use less toner on each page. •Off: If you don't need to save toner to print a document, select this option. 4 3 Click OK. You can select from your software application, access the printer properties. See page 4.2. 2 Click the Graphics tab, and select the Toner Save Mode.

User Guide
Page 74
...quality of your toner cartridge and reduce your text and image, and make the characters and images appear smoother. PRINTING TASKS 4.17 Both the Text Enhance and Image Enhance option are available: • Printer Setting: This setting is the printer default, which is set from the printer's control panel....on the angles and curves of each character. • Image Enhance: This setting refines the print quality of photo images. ➂ Toner Save Mode Selecting this option will extend the life of your cost per page without a significant reduction in the Resolution option. For ...
...quality of your toner cartridge and reduce your text and image, and make the characters and images appear smoother. PRINTING TASKS 4.17 Both the Text Enhance and Image Enhance option are available: • Printer Setting: This setting is the printer default, which is set from the printer's control panel....on the angles and curves of each character. • Image Enhance: This setting refines the print quality of photo images. ➂ Toner Save Mode Selecting this option will extend the life of your cost per page without a significant reduction in the Resolution option. For ...

User Guide
Page 88
This chapter includes: • Maintaining the Toner Cartridge • Cleaning the Printer • Consumables and Replacement Parts 5 Maintaining Your Printer This chapter provides suggestions for maintaining the toner cartridge and the printer.
This chapter includes: • Maintaining the Toner Cartridge • Cleaning the Printer • Consumables and Replacement Parts 5 Maintaining Your Printer This chapter provides suggestions for maintaining the toner cartridge and the printer.

User Guide
Page 89
...The button will extend the life of toner that print jobs require. Refer to light for use. • Do not refill the toner cartridge. Toner cartridge life expectancy The life of the toner cartridge depends on the printer control panel. Saving toner To save toner, press the button on the amount... of the toner cartridge and reduce your cost per page, but will ...
...The button will extend the life of toner that print jobs require. Refer to light for use. • Do not refill the toner cartridge. Toner cartridge life expectancy The life of the toner cartridge depends on the printer control panel. Saving toner To save toner, press the button on the amount... of the toner cartridge and reduce your cost per page, but will ...

User Guide
Page 90
... Avoid reaching too far into the printer. The fusing area may appear on a printed page. MAINTAINING YOUR PRINTER 5.3 Redistributing Toner When toner is low, faded or light areas may be able to open. 5 2 Push the toner cartridge down and remove it from the printer. You may allow you to finish... the current print job before replacing the toner cartridge. 1 Grasp the...
... Avoid reaching too far into the printer. The fusing area may appear on a printed page. MAINTAINING YOUR PRINTER 5.3 Redistributing Toner When toner is low, faded or light areas may be able to open. 5 2 Push the toner cartridge down and remove it from the printer. You may allow you to finish... the current print job before replacing the toner cartridge. 1 Grasp the...

User Guide
Page 91
Note: If the toner gets on page 2.4. 5.4 MAINTAINING YOUR PRINTER Hot water sets toner into fabric. 4 Reinsert the toner cartridge into place. 5 Close the front cover. Make sure that the toner cartridge snaps into the printer. Remove the old cartridge and install a new toner cartridge. See "Installing the Toner Cartridge" on your clothing, wipe it is securely closed , printing...
Note: If the toner gets on page 2.4. 5.4 MAINTAINING YOUR PRINTER Hot water sets toner into fabric. 4 Reinsert the toner cartridge into place. 5 Close the front cover. Make sure that the toner cartridge snaps into the printer. Remove the old cartridge and install a new toner cartridge. See "Installing the Toner Cartridge" on your clothing, wipe it is securely closed , printing...


