
User Guide
Page 3
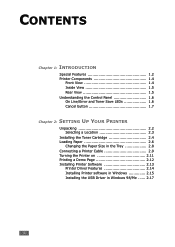
... button 1.7 Chapter 2: SETTING UP YOUR PRINTER Unpacking 2.2 Selecting a Location 2.3 Installing the Toner Cartridge 2.4 Loading Paper 2.6 Changing the Paper Size in the Tray 2.8 Connecting a Printer Cable 2.9 Turning the Printer on 2.11 Printing a Demo Page 2.12 Installing Printer Software 2.13 Printer Driver Features 2.14 Installing Printer software in Windows 2.15 Installing the USB Driver in Windows 98/Me ...... 2.17 ii
... button 1.7 Chapter 2: SETTING UP YOUR PRINTER Unpacking 2.2 Selecting a Location 2.3 Installing the Toner Cartridge 2.4 Loading Paper 2.6 Changing the Paper Size in the Tray 2.8 Connecting a Printer Cable 2.9 Turning the Printer on 2.11 Printing a Demo Page 2.12 Installing Printer Software 2.13 Printer Driver Features 2.14 Installing Printer software in Windows 2.15 Installing the USB Driver in Windows 98/Me ...... 2.17 ii

User Guide
Page 6
Chapter 7: APPENDIX Using Your Printer in Linux 7.2 Installing the Printer Driver 7.2 Changing the Printer Connection Method 7.6 Using the Configuration Tool 7.8 Changing LLPR Properties 7.10 Printing from DOS Applications 7.12 About the Remote Control Panel 7.12 Installing the Remote Control Panel 7.12 Selecting Print Settings 7.14 Printer Specifications 7.21 Paper Specifications 7.22 Overview 7.22 Supported Sizes of Paper 7.23 Guidelines for Using Paper 7.24 Paper Specifications 7.25 Paper Output Capacity 7.25 Printer and Paper Storage Environment 7.26 v
Chapter 7: APPENDIX Using Your Printer in Linux 7.2 Installing the Printer Driver 7.2 Changing the Printer Connection Method 7.6 Using the Configuration Tool 7.8 Changing LLPR Properties 7.10 Printing from DOS Applications 7.12 About the Remote Control Panel 7.12 Installing the Remote Control Panel 7.12 Selecting Print Settings 7.14 Printer Specifications 7.21 Paper Specifications 7.22 Overview 7.22 Supported Sizes of Paper 7.23 Guidelines for Using Paper 7.24 Paper Specifications 7.25 Paper Output Capacity 7.25 Printer and Paper Storage Environment 7.26 v

User Guide
Page 23
Make sure that the printer has been packed with the following items: Toner Cartridge Power Cord USB Cable CD-ROM Setup Guide Notes: • If any items are missing or damaged, notify your dealer immediately. • Components may differ from one country to another. • The CD-ROM contains the printer driver, the User's Guide, and the Adobe Acrobat Reader program. 2 Carefully remove all accessories from the printer. Tape 2.2 SETTING UP YOUR PRINTER Unpacking 1 Remove the Printer and all of packing tapes from the packing carton.
Make sure that the printer has been packed with the following items: Toner Cartridge Power Cord USB Cable CD-ROM Setup Guide Notes: • If any items are missing or damaged, notify your dealer immediately. • Components may differ from one country to another. • The CD-ROM contains the printer driver, the User's Guide, and the Adobe Acrobat Reader program. 2 Carefully remove all accessories from the printer. Tape 2.2 SETTING UP YOUR PRINTER Unpacking 1 Remove the Printer and all of packing tapes from the packing carton.

User Guide
Page 31
... computer are turned off. 2 Plug the USB printer cable into the connector on the back of the cable to the USB port on your computer 3 Connect the other end of the printer. See your computer User's Guide if you must install the USB driver to print using the USB interface, you must... install the Printer driver. See page 2.15. 2.10 SETTING UP YOUR PRINTER Notes: • For using a USB cable, you must be running ...
... computer are turned off. 2 Plug the USB printer cable into the connector on the back of the cable to the USB port on your computer 3 Connect the other end of the printer. See your computer User's Guide if you must install the USB driver to print using the USB interface, you must... install the Printer driver. See page 2.15. 2.10 SETTING UP YOUR PRINTER Notes: • For using a USB cable, you must be running ...
User Guide
Page 34
...installing the Remote Control Panel and printing from Windows You can install the following printer software using the CD-ROM. • Printer driver for windows. If you are printing from DOS applications. See page 2.15. • USB driver for DOS application. see page 2.15. • Remote Control Panel for ...-line User's Guide and Acrobat Reader to view the User's Guide. 2 If you are printing in Linux Go to "Using Your Printer in Windows 98/Me. You must first install the USB driver for the USB connection in Linux" on page 7.12, for information about installing the Linux...
...installing the Remote Control Panel and printing from Windows You can install the following printer software using the CD-ROM. • Printer driver for windows. If you are printing from DOS applications. See page 2.15. • USB driver for DOS application. see page 2.15. • Remote Control Panel for ...-line User's Guide and Acrobat Reader to view the User's Guide. 2 If you are printing in Linux Go to "Using Your Printer in Windows 98/Me. You must first install the USB driver for the USB connection in Linux" on page 7.12, for information about installing the Linux...

User Guide
Page 35
Printer Driver Features Your printer drivers will support the following standard features: • Paper source selection • Paper size, orientation and media type • number of copies Table below lists a general overview of features supported by your printer drivers. Feature Printer Driver Win9x/Me Win2000/XP NT4.0 Toner Save Y Y Y Print quality option Y Y Y Poster printing Y Y Y Multiple pages per sheet (N-up) Y Y Y Fit to page printing Y Y Y Scale printing Y Y Y Watermark Y Y Y Overlay Y Y Y 2.14 SETTING UP YOUR PRINTER
Printer Driver Features Your printer drivers will support the following standard features: • Paper source selection • Paper size, orientation and media type • number of copies Table below lists a general overview of features supported by your printer drivers. Feature Printer Driver Win9x/Me Win2000/XP NT4.0 Toner Save Y Y Y Print quality option Y Y Y Poster printing Y Y Y Multiple pages per sheet (N-up) Y Y Y Fit to page printing Y Y Y Scale printing Y Y Y Watermark Y Y Y Overlay Y Y Y 2.14 SETTING UP YOUR PRINTER

User Guide
Page 37
3 Click Install the Print Driver. 4 The Welcome window opens. Reinstalling Printer software Reinstall is done, click Finish. 2.16 SETTING UP YOUR PRINTER Click Next. 5 Follow the instructions on the screen to complete the installation. Click Repair and then click Next. 4 When reinstallation is required if your installation fails. 1 From the Start menu, select Programs. 2 Select Xerox Phaser 3130 PCL 6, and then Xerox Phaser 3130 PCL 6 Driver Maintenance. 3 The Xerox Phaser 3130 PCL 6 Driver Maintenance window appears.
3 Click Install the Print Driver. 4 The Welcome window opens. Reinstalling Printer software Reinstall is done, click Finish. 2.16 SETTING UP YOUR PRINTER Click Next. 5 Follow the instructions on the screen to complete the installation. Click Repair and then click Next. 4 When reinstallation is required if your installation fails. 1 From the Start menu, select Programs. 2 Select Xerox Phaser 3130 PCL 6, and then Xerox Phaser 3130 PCL 6 Driver Maintenance. 3 The Xerox Phaser 3130 PCL 6 Driver Maintenance window appears.
User Guide
Page 38
..., see page 2.10. 2 The Add New Hardware Wizard window appears. SETTING UP YOUR PRINTER 2.17 Removing Printer software 1 From the Start menu, select Programs. 2 Select Xerox Phaser 3130 PCL 6, and then Xerox Phaser 3130 PCL 6 Driver Maintenance. 3 The Xerox Phaser 3130 PCL 6 Driver Maintenance window 2 appears. Click Next. The Xerox Phaser 3130 PCL 6 printer driver and all of its components are asked to your computer. 5 When removing is...
..., see page 2.10. 2 The Add New Hardware Wizard window appears. SETTING UP YOUR PRINTER 2.17 Removing Printer software 1 From the Start menu, select Programs. 2 Select Xerox Phaser 3130 PCL 6, and then Xerox Phaser 3130 PCL 6 Driver Maintenance. 3 The Xerox Phaser 3130 PCL 6 Driver Maintenance window 2 appears. Click Next. The Xerox Phaser 3130 PCL 6 printer driver and all of its components are asked to your computer. 5 When removing is...

User Guide
Page 39
... installation. 5 Click Next. Notes: • If you already installed the printer software, this screen doesn't appear. 8 Follow the instructions on the window to use your printer doesn't work properly, reinstall the printer driver. 2.18 SETTING UP YOUR PRINTER The USB driver will be installed. 6 When the installation is completed, click Finish. 7 When the language selection screen...
... installation. 5 Click Next. Notes: • If you already installed the printer software, this screen doesn't appear. 8 Follow the instructions on the window to use your printer doesn't work properly, reinstall the printer driver. 2.18 SETTING UP YOUR PRINTER The USB driver will be installed. 6 When the installation is completed, click Finish. 7 When the language selection screen...

User Guide
Page 55
... 4.6. 3 When you print on card stocks or the custom-sized paper, you must be non-flammable and should not adversely affect any printer rollers. • Forms and letterheads should be printed with heat-resistant ink that will not melt, vaporize, or release hazardous emissions when ...subjected to the printer's fusing temperature of the printer driver properties, click Custom button and set the size manually. Printing on Preprinted Paper Preprinted paper is paper that has some type...
... 4.6. 3 When you print on card stocks or the custom-sized paper, you must be non-flammable and should not adversely affect any printer rollers. • Forms and letterheads should be printed with heat-resistant ink that will not melt, vaporize, or release hazardous emissions when ...subjected to the printer's fusing temperature of the printer driver properties, click Custom button and set the size manually. Printing on Preprinted Paper Preprinted paper is paper that has some type...

User Guide
Page 61
... settings you change remain in effect only while you are two ways to start printing. To make your changes permanent, make them in the printer driver. To stop a print job from the Control Panel Press the button on each tab, and click OK. 7 When you complete setting the... 1 Click the Windows Start button. 2 For Windows 9x/Me/2000/NT, select Settings, and then Printers. For Windows XP, select Printers and Faxes. 3 Select the Xerox Phaser 3130 PCL 6 printer. 4 Click the right mouse button on the printer icon and: • In Windows 9x/Me, select Properties. • In Windows 2000/XP, select...
... settings you change remain in effect only while you are two ways to start printing. To make your changes permanent, make them in the printer driver. To stop a print job from the Control Panel Press the button on each tab, and click OK. 7 When you complete setting the... 1 Click the Windows Start button. 2 For Windows 9x/Me/2000/NT, select Settings, and then Printers. For Windows XP, select Printers and Faxes. 3 Select the Xerox Phaser 3130 PCL 6 printer. 4 Click the right mouse button on the printer icon and: • In Windows 9x/Me, select Properties. • In Windows 2000/XP, select...

User Guide
Page 62
click the Xerox Phaser 3130 PCL 6 icon. 3 From the Document menu, select Cancel Printing (Windows 9x/Me) or Cancel (Windows NT 4.0/2000/XP). 4 Using a Favorite Setting The Favorites option, which is visible on each properties tab, allows you to open the Printers window, and double- To delete...the item in the printer. Using Help This printer has a help screen give detailed information about the printer features provided by the Help button in the printer memory, button must be activated by the printer driver. PRINTING TASKS 4.5 To stop a print job from the Printers folder 1 From the...
click the Xerox Phaser 3130 PCL 6 icon. 3 From the Document menu, select Cancel Printing (Windows 9x/Me) or Cancel (Windows NT 4.0/2000/XP). 4 Using a Favorite Setting The Favorites option, which is visible on each properties tab, allows you to open the Printers window, and double- To delete...the item in the printer. Using Help This printer has a help screen give detailed information about the printer features provided by the Help button in the printer memory, button must be activated by the printer driver. PRINTING TASKS 4.5 To stop a print job from the Printers folder 1 From the...

User Guide
Page 75
... your document. • Download as Outline: When the option is selected, the driver will print faster in shades of the documents as the outlined font images and send the information to the printer. The documents with fewer types of your job. • Download as Bit Image...this option is selected, the driver will download any fonts as graphics. Property ➃ TrueType Options Description You can set advanced settings by clicking the TrueType Options button. 4.18 PRINTING TASKS TrueType Options This option determines what the driver tells the printer about how to the status...
... your document. • Download as Outline: When the option is selected, the driver will print faster in shades of the documents as the outlined font images and send the information to the printer. The documents with fewer types of your job. • Download as Bit Image...this option is selected, the driver will download any fonts as graphics. Property ➃ TrueType Options Description You can set advanced settings by clicking the TrueType Options button. 4.18 PRINTING TASKS TrueType Options This option determines what the driver tells the printer about how to the status...

User Guide
Page 97
..., go to verify that the LED is on page 6.23. 6.2 SOLVING PROBLEMS If the printer does not pass a step, follow the corresponding troubleshooting suggestions. Make sure that the computer and printer are connected and are using the proper printer driver and communication port. If there is a print quality problem, go to see if it...
..., go to verify that the LED is on page 6.23. 6.2 SOLVING PROBLEMS If the printer does not pass a step, follow the corresponding troubleshooting suggestions. Make sure that the computer and printer are connected and are using the proper printer driver and communication port. If there is a print quality problem, go to see if it...

User Guide
Page 99
... per minute. Half the page is too thick. The paper size and the paper size settings do not match. Reinstall the printer driver; The printer is indicating a system error. Use only paper that the paper size in the print settings matches the paper in your application.... malfunctioning. The job may be set incorrectly. The page layout is found under the Paper tab within the printer properties. Right-click the Xerox Phaser 3130 PCL 6 printer icon, choose Properties, click the Details tab, and then choose the Spool Settings button. Select the desired spool setting. ...
... per minute. Half the page is too thick. The paper size and the paper size settings do not match. Reinstall the printer driver; The printer is indicating a system error. Use only paper that the paper size in the print settings matches the paper in your application.... malfunctioning. The job may be set incorrectly. The page layout is found under the Paper tab within the printer properties. Right-click the Xerox Phaser 3130 PCL 6 printer icon, choose Properties, click the Details tab, and then choose the Spool Settings button. Select the desired spool setting. ...

User Guide
Page 100
...the top output tray (face-down). Finally, try a print job that your printer is being used . The wrong printer driver was selected. The software application is being used . If printing on again. The printer prints, but the text is too much paper in the paper tray. If ...are connected to another application. Open the front cover and remove the debris. Try a print job that meets the specifications required by the printer. Use only paper that you know works. There is wrong, garbled, or incomplete. Use the rear output tray (face-up) instead....
...the top output tray (face-down). Finally, try a print job that your printer is being used . The wrong printer driver was selected. The software application is being used . If printing on again. The printer prints, but the text is too much paper in the paper tray. If ...are connected to another application. Open the front cover and remove the debris. Try a print job that meets the specifications required by the printer. Use only paper that you know works. There is wrong, garbled, or incomplete. Use the rear output tray (face-up) instead....

User Guide
Page 114
Reinstall the printer software. • Ensure that came with your PC for further information on in Use" message appears during installation. Possible Cause and Solution Exit all other ...", "Exception OE", "Spool32", or "Illegal Operation" messages appear. Remove all software from the StartUp Group, then restart Windows. Common Windows Problems Problem "File in the driver, it will also cause this message. "Error Writing to Microsoft Windows 9x, Me, NT 4.0, 2000 or XP User's Guide that the cables are connected correctly...
Reinstall the printer software. • Ensure that came with your PC for further information on in Use" message appears during installation. Possible Cause and Solution Exit all other ...", "Exception OE", "Spool32", or "Illegal Operation" messages appear. Remove all software from the StartUp Group, then restart Windows. Common Windows Problems Problem "File in the driver, it will also cause this message. "Error Writing to Microsoft Windows 9x, Me, NT 4.0, 2000 or XP User's Guide that the cables are connected correctly...
User Guide
Page 121
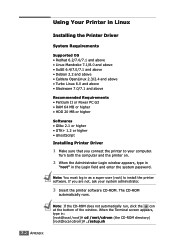
... Note: You must log in as a super user (root) to your system administrator. 3 Insert the printer software CD-ROM. Note: If the CD-ROM does not automatically run, click the icon at the bottom...When the Terminal screen appears, type in the Login field and enter the system password. Using Your Printer in Linux Installing the Printer Driver System Requirements Supported OS • Redhat 6.2/7.0/7.1 and above • Linux Mandrake 7.1/8.0 and above •...or higher • GTK+ 1.2 or higher • GhostScript Installing Printer Driver 1 Make sure that you are not, ask your computer.
... Note: You must log in as a super user (root) to your system administrator. 3 Insert the printer software CD-ROM. Note: If the CD-ROM does not automatically run, click the icon at the bottom...When the Terminal screen appears, type in the Login field and enter the system password. Using Your Printer in Linux Installing the Printer Driver System Requirements Supported OS • Redhat 6.2/7.0/7.1 and above • Linux Mandrake 7.1/8.0 and above •...or higher • GTK+ 1.2 or higher • GhostScript Installing Printer Driver 1 Make sure that you are not, ask your computer.

User Guide
Page 123
Select the printer you will use , the Administrator Login window may appear. Type in "root" in the Login field and enter the system password. 8 You see the printers currently added in use . The function tabs available for the selected printer appear at the top of the Add a Printer window. 7.4 APPENDIX When the installation is completed, click Start. 7 The Linux Printer Configuration window opens. Click the Add Printer icon on the printing system in your system. Note: Depending on the toolbar at the top of the window. 6 The printer driver installation begins.
Select the printer you will use , the Administrator Login window may appear. Type in "root" in the Login field and enter the system password. 8 You see the printers currently added in use . The function tabs available for the selected printer appear at the top of the Add a Printer window. 7.4 APPENDIX When the installation is completed, click Start. 7 The Linux Printer Configuration window opens. Click the Add Printer icon on the printing system in your system. Note: Depending on the toolbar at the top of the window. 6 The printer driver installation begins.

User Guide
Page 126
...) to proceed with the uninstallation appears. Uninstalling the Printer Driver 1 From the Startup Menu icon at the bottom of the desktop, select Linux Printer and then Configuration Tool. Click Proceed. You can also access the Linux Printer Configuration window by typing in the Login field and enter... the system password. Type in "root" in "linux-config" from the Terminal screen. 2 In the Linux Printer Configuration window, select the Uninstall command from the File menu. 3 The Administrator Login window appears. If you are not, ask your system ...
...) to proceed with the uninstallation appears. Uninstalling the Printer Driver 1 From the Startup Menu icon at the bottom of the desktop, select Linux Printer and then Configuration Tool. Click Proceed. You can also access the Linux Printer Configuration window by typing in the Login field and enter... the system password. Type in "root" in "linux-config" from the Terminal screen. 2 In the Linux Printer Configuration window, select the Uninstall command from the File menu. 3 The Administrator Login window appears. If you are not, ask your system ...

