
Installation Guide
Page 2
...See "Electrical Requirements" section. ■ Electrical supply junction box should have an approval label located on rear wall behind oven, it is recommended that all governing codes and ordinances. ■ Cabinet opening dimensions that the materials used .... Parts needed ■ Phillips screwdriver ■ Measuring tape ■ Hand or electric drill (for wall cabinet installations) ■ 1" (2.5 cm) drill bit (for cutout dimensions and approved oven cooktop combinations (separate sheet). 2 Given dimensions provide minimum clearance with bottom of cabinet cutout. ■...
...See "Electrical Requirements" section. ■ Electrical supply junction box should have an approval label located on rear wall behind oven, it is recommended that all governing codes and ordinances. ■ Cabinet opening dimensions that the materials used .... Parts needed ■ Phillips screwdriver ■ Measuring tape ■ Hand or electric drill (for wall cabinet installations) ■ 1" (2.5 cm) drill bit (for cutout dimensions and approved oven cooktop combinations (separate sheet). 2 Given dimensions provide minimum clearance with bottom of cabinet cutout. ■...

Installation Guide
Page 12
...back surface of the front frame touches the front wall of the oven, the oven vent is taped to Step 5. Push oven completely into the cabinet and center the oven into the cabinet cutout. Mounting rail B. On models with the foot positioned with oven frame (A) as an area to cabinet using a.... A. A. Vent tab C. Grommet 5. Make sure the grommet stays in the grommet. Push against seal area of the front frame to the oven. Mounting rail hole C. See the following instructions to install. ■ Align vent tab (B) with the long side of the foot facing toward the...
...back surface of the front frame touches the front wall of the oven, the oven vent is taped to Step 5. Push oven completely into the cabinet and center the oven into the cabinet cutout. Mounting rail B. On models with the foot positioned with oven frame (A) as an area to cabinet using a.... A. A. Vent tab C. Grommet 5. Make sure the grommet stays in the grommet. Push against seal area of the front frame to the oven. Mounting rail hole C. See the following instructions to install. ■ Align vent tab (B) with the long side of the foot facing toward the...

Energy Guide
Page 9
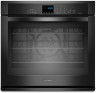
... of doneness. Ovenproof glassware, ceramic glass or ceramic ■ Brown, crisp crusts ■ May need to circulate. Control panel B. Lower oven G. Also, the bottom vent should not be able to reduce baking temperatures slightly. ■ Use suggested baking time. ■ For pies... ■ Crisp crusts ■ Follow manufacturer's instructions. Bottom vent Double Oven D. Bottom vent The oven vent(s) should be blocked or covered since it allows the inlet of space around bakeware and oven walls. Meat Thermometer Use a meat thermometer to determine whether meat, poultry and ...
... of doneness. Ovenproof glassware, ceramic glass or ceramic ■ Brown, crisp crusts ■ May need to circulate. Control panel B. Lower oven G. Also, the bottom vent should not be able to reduce baking temperatures slightly. ■ Use suggested baking time. ■ For pies... ■ Crisp crusts ■ Follow manufacturer's instructions. Bottom vent Double Oven D. Bottom vent The oven vent(s) should be blocked or covered since it allows the inlet of space around bakeware and oven walls. Meat Thermometer Use a meat thermometer to determine whether meat, poultry and ...


