
Owners Manual
Page 5
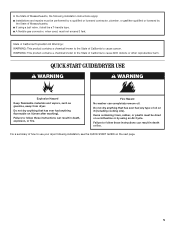
Fire Hazard No washer can result in death or fire. Failure to follow these instructions can result in death, explosion, or fire. For a summary of how to follow these ...
Fire Hazard No washer can result in death or fire. Failure to follow these instructions can result in death, explosion, or fire. For a summary of how to follow these ...
Installation Instructions
Page 4
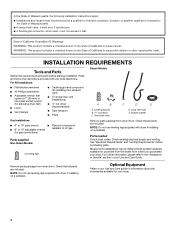
... for gas connections) Parts supplied Non-Steam Models 4 Leveling legs Remove parts package from dryer drum. Check that all parts are included. Leveling legs (4) B. Rubber washer Gas Installations: ■ 8" or 10" pipe wrench ■ Pipe-joint compound ■ 8" or 10" adjustable wrench resistant to 1" (25 mm) or hex-head socket wrench...
... for gas connections) Parts supplied Non-Steam Models 4 Leveling legs Remove parts package from dryer drum. Check that all parts are included. Leveling legs (4) B. Rubber washer Gas Installations: ■ 8" or 10" pipe wrench ■ Pipe-joint compound ■ 8" or 10" adjustable wrench resistant to 1" (25 mm) or hex-head socket wrench...
Installation Instructions
Page 5
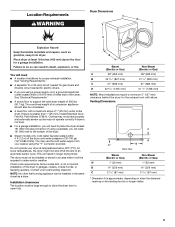
... at the end of an automatic sensor cycle. Clothes may not tumble properly and automatic sensor cycles may use the cold water supply from your washer using a pedestal, you will be installed in an area where it will need to water and/or weather. Do not operate your local building inspector...
... at the end of an automatic sensor cycle. Clothes may not tumble properly and automatic sensor cycles may use the cold water supply from your washer using a pedestal, you will be installed in an area where it will need to water and/or weather. Do not operate your local building inspector...
Installation Instructions
Page 7
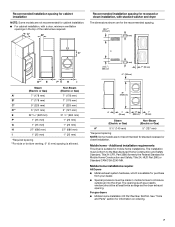
... air into the dryer. Recommended installation spacing for cabinet installation NOTE: Some models are not recommended for cabinet installation. ■ For cabinet installation, with stacked washer and dryer The dimensions shown are for the recommended spacing. 48 in.2 * (310 cm2) 3"* (76 mm) C* D** E F* G H I Steam (Electric or Gas) Non-Steam (Electric or Gas...
... air into the dryer. Recommended installation spacing for cabinet installation NOTE: Some models are not recommended for cabinet installation. ■ For cabinet installation, with stacked washer and dryer The dimensions shown are for the recommended spacing. 48 in.2 * (310 cm2) 3"* (76 mm) C* D** E F* G H I Steam (Electric or Gas) Non-Steam (Electric or Gas...

Installation Instructions
Page 13
... the vent to secure vent, because they can result in the flexible gas line. 4. Turn cold water faucet off and remove washer inlet hose. 2. Remove old rubber washer from dryer packaging under the entire back edge of the dryer. 2. Attach short hose to dryer location. See illustration. 3. Find...faucet. Avoid 90º turns. Use a wrench to finish turning the legs until the diamond marking is secured to exhaust hood with new rubber washer provided. Stand the dryer up. If space permits, attach the brass female end of the dryer (not the console panel). NOTE: If "Y" ...
... the vent to secure vent, because they can result in the flexible gas line. 4. Turn cold water faucet off and remove washer inlet hose. 2. Remove old rubber washer from dryer packaging under the entire back edge of the dryer. 2. Attach short hose to dryer location. See illustration. 3. Find...faucet. Avoid 90º turns. Use a wrench to finish turning the legs until the diamond marking is secured to exhaust hood with new rubber washer provided. Stand the dryer up. If space permits, attach the brass female end of the dryer (not the console panel). NOTE: If "Y" ...

Installation Instructions
Page 14
... water system, which step was skipped. 2. Excessive scale buildup may clog different parts of your tools. 3. Do not select the Air Only Temperature setting. Attach washer cold inlet hose to other end of "Y" connector. Screw on connector. 6. Attach other end of long hose to the coupling can result. 5. NOTE: Do not...
... water system, which step was skipped. 2. Excessive scale buildup may clog different parts of your tools. 3. Do not select the Air Only Temperature setting. Attach washer cold inlet hose to other end of "Y" connector. Screw on connector. 6. Attach other end of long hose to the coupling can result. 5. NOTE: Do not...


