Use & Care Guide
Page 1
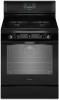
Para obtener acceso a "Instrucciones para el usuario de la estufa a gas" en español, o para obtener información adicional acerca de su producto, visite: www.whirlpool.com Deberá tener a mano el número de modelo y de serie, que están ubicados en el ...13 TROUBLESHOOTING 14 ACCESSORIES 16 WARRANTY 16 W10392927A GAS RANGE USER INSTRUCTIONS THANK YOU for additional information. Table of the oven door. If you should experience a problem not covered in TROUBLESHOOTING, please visit our website at www.whirlpool.com for purchasing this high-quality product. You...
Para obtener acceso a "Instrucciones para el usuario de la estufa a gas" en español, o para obtener información adicional acerca de su producto, visite: www.whirlpool.com Deberá tener a mano el número de modelo y de serie, que están ubicados en el ...13 TROUBLESHOOTING 14 ACCESSORIES 16 WARRANTY 16 W10392927A GAS RANGE USER INSTRUCTIONS THANK YOU for additional information. Table of the oven door. If you should experience a problem not covered in TROUBLESHOOTING, please visit our website at www.whirlpool.com for purchasing this high-quality product. You...
Use & Care Guide
Page 2
...performed by UL or CSA. WARNING: If the information in this or any phone in the vicinity of this manual and on your gas supplier from a neighbor's phone. Do not store or use any other flammable vapors and liquids in your building. • Immediately ...Warnings: WARNING: This product contains one or more information, contact your gas supplier, call your appliance. WARNING: Gas leaks cannot always be killed or seriously injured if you cannot reach your gas supplier. This symbol alerts you smell gas" instructions. RANGE SAFETY Your safety and the safety of others .
...performed by UL or CSA. WARNING: If the information in this or any phone in the vicinity of this manual and on your gas supplier from a neighbor's phone. Do not store or use any other flammable vapors and liquids in your building. • Immediately ...Warnings: WARNING: This product contains one or more information, contact your gas supplier, call your appliance. WARNING: Gas leaks cannot always be killed or seriously injured if you cannot reach your gas supplier. This symbol alerts you smell gas" instructions. RANGE SAFETY Your safety and the safety of others .
Use & Care Guide
Page 8
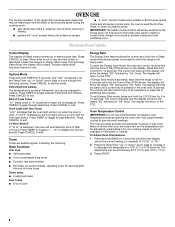
...following options. To enter the Energy Save mode, the oven and control must be idle with only the Time of day is displayed, unless the range is in use a thermometer to measure oven temperature because opening or closing ■ igniters will show functions that are normal when the oven is ... it for 10 seconds. OVEN USE The normal operation of the range will include several times until a control key is pressed or the oven door is activated, each time the Bake or Broil burners ignite during the cooking cycle: ■ gas valves may make a "popping" sound when opening the oven door...
...following options. To enter the Energy Save mode, the oven and control must be idle with only the Time of day is displayed, unless the range is in use a thermometer to measure oven temperature because opening or closing ■ igniters will show functions that are normal when the oven is ... it for 10 seconds. OVEN USE The normal operation of the range will include several times until a control key is pressed or the oven door is activated, each time the Bake or Broil burners ignite during the cooking cycle: ■ gas valves may make a "popping" sound when opening the oven door...
Use & Care Guide
Page 13
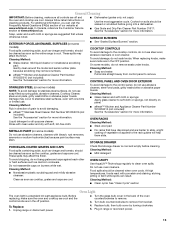
...Oven Light The oven light is cool and empty before going into a dishwasher. ■ Gas Grate and Drip Pan Cleaner Part Number 31617: See the "Accessories" section for more information. Unplug range or disconnect power. 4. Cooked-on some models, do not soak knobs. SURFACE BURNERS ... are off position. 2. Replace bulb, then bulb cover by turning clockwise. 5. In Canada, reference the Customer Service section at www.whirlpool.com. These spills may affect the finish. COOKTOP CONTROLS To avoid damage to the control panel, do not use abrasive cleaners, steel-...
...Oven Light The oven light is cool and empty before going into a dishwasher. ■ Gas Grate and Drip Pan Cleaner Part Number 31617: See the "Accessories" section for more information. Unplug range or disconnect power. 4. Cooked-on some models, do not soak knobs. SURFACE BURNERS ... are off position. 2. Replace bulb, then bulb cover by turning clockwise. 5. In Canada, reference the Customer Service section at www.whirlpool.com. These spills may affect the finish. COOKTOP CONTROLS To avoid damage to the control panel, do not use abrasive cleaners, steel-...
Use & Care Guide
Page 14
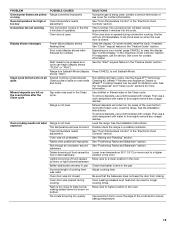
...to a setting. If this is the first time the oven has been used for 10 seconds to release air from the gas lines. See the "Electronic Oven Controls" section for contact information. See the Installation Instructions. See the Installation Instructions. PROBLEM Nothing...Demo Mode is improperly connected to heavy thickness. www.whirlpool.com In Canada, reference the Customer Service section at www.whirlpool.ca WARNING Electrical Shock Hazard Plug into a grounded 3 prong outlet. Do not remove ground prong. Level the range. See "Electronic Oven Controls" section. 14 Do...
...to a setting. If this is the first time the oven has been used for 10 seconds to release air from the gas lines. See the "Electronic Oven Controls" section for contact information. See the Installation Instructions. See the Installation Instructions. PROBLEM Nothing...Demo Mode is improperly connected to heavy thickness. www.whirlpool.com In Canada, reference the Customer Service section at www.whirlpool.ca WARNING Electrical Shock Hazard Plug into a grounded 3 prong outlet. Do not remove ground prong. Level the range. See "Electronic Oven Controls" section. 14 Do...
Use & Care Guide
Page 15
...convection cycle is in the "Electronic Oven Controls" section. Oven temperature needs adjustment. Pie crusts browning too quickly SOLUTIONS If propane gas is in the oven. See "Oven Temperature Control" in the first 5 minutes of operation. It will collect on bottom. Depending... on the oven bottom after the Clean cycle Oven cooking results not what expected POSSIBLE CAUSES Range converted improperly Oven temperature needs adjustment. If it reappears, call for more information. Use distilled or filtered water in the oven. See...
...convection cycle is in the "Electronic Oven Controls" section. Oven temperature needs adjustment. Pie crusts browning too quickly SOLUTIONS If propane gas is in the oven. See "Oven Temperature Control" in the first 5 minutes of operation. It will collect on bottom. Depending... on the oven bottom after the Clean cycle Oven cooking results not what expected POSSIBLE CAUSES Range converted improperly Oven temperature needs adjustment. If it reappears, call for more information. Use distilled or filtered water in the oven. See...
Use & Care Guide
Page 16
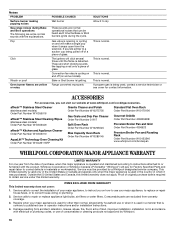
Noises PROBLEM Surface burner making popping noises Gas range noises during the cycle. Range converted improperly This is normal. affresh™ Stainless Steel Cleaner (stainless steel models) Order Part Number W10355016 affresh™ Stainless ... your major appliance is used for contact information. ACCESSORIES For accessories, you on some normal sounds with the product, Whirlpool Corporation or Whirlpool Canada LP (hereafter "Whirlpool") will pay for Factory Specified Parts and repair labor to or furnished with the explanations. Consumable parts are short clicking...
Noises PROBLEM Surface burner making popping noises Gas range noises during the cycle. Range converted improperly This is normal. affresh™ Stainless Steel Cleaner (stainless steel models) Order Part Number W10355016 affresh™ Stainless ... your major appliance is used for contact information. ACCESSORIES For accessories, you on some normal sounds with the product, Whirlpool Corporation or Whirlpool Canada LP (hereafter "Whirlpool") will pay for Factory Specified Parts and repair labor to or furnished with the explanations. Consumable parts are short clicking...
Warranty Information
Page 1
...Number 4396096RB Porcelain Broiler Pan and Grid Order Part Number 4396923 Premium Broiler Pan and Roasting Rack Order Part Number W10123240 www.whirlpool.com/broilerpan WHIRLPOOL CORPORATION MAJOR APPLIANCE WARRANTY LIMITED WARRANTY For one year from accident, alteration, misuse, abuse, fire, flood, acts of God.... Pop Click Woosh or poof Oven burner flames are some models). Proof of glass. Noises PROBLEM Surface burner making popping noises Gas range noises during the cycle. Consumable parts are short clicking sounds like tapping a nail onto a piece of original purchase date is ...
...Number 4396096RB Porcelain Broiler Pan and Grid Order Part Number 4396923 Premium Broiler Pan and Roasting Rack Order Part Number W10123240 www.whirlpool.com/broilerpan WHIRLPOOL CORPORATION MAJOR APPLIANCE WARRANTY LIMITED WARRANTY For one year from accident, alteration, misuse, abuse, fire, flood, acts of God.... Pop Click Woosh or poof Oven burner flames are some models). Proof of glass. Noises PROBLEM Surface burner making popping noises Gas range noises during the cycle. Consumable parts are short clicking sounds like tapping a nail onto a piece of original purchase date is ...

Dimension Guide
Page 1
...range. Do not use with Natural gas. The valve is for 25" (64.0 cm) countertop depth, 24" (61.0 cm) base cabinet depth and 36" (91.4 cm) countertop height. Du Pont De Nemours and Company. CABINET OPENING DIMENSIONS D B C A E M K L G H F I . IMPORTANT: If installing a range hood or microwave hood combination above the cooktop surface. opening width F. Because Whirlpool... Gas Range PRODUCT MODEL NUMBERS PRODUCT DIMENSIONS WFG540H0A Type of Gas Natural Gas: WFG710H0A WFG714HLA WFG720H0A This range is design-certified by CSA International for use with Natural gas or...
...range. Do not use with Natural gas. The valve is for 25" (64.0 cm) countertop depth, 24" (61.0 cm) base cabinet depth and 36" (91.4 cm) countertop height. Du Pont De Nemours and Company. CABINET OPENING DIMENSIONS D B C A E M K L G H F I . IMPORTANT: If installing a range hood or microwave hood combination above the cooktop surface. opening width F. Because Whirlpool... Gas Range PRODUCT MODEL NUMBERS PRODUCT DIMENSIONS WFG540H0A Type of Gas Natural Gas: WFG710H0A WFG714HLA WFG720H0A This range is design-certified by CSA International for use with Natural gas or...
Installation Guide
Page 2
... Do not try to do if you don't follow instructions. Installation and service must be killed or seriously injured if you smell gas" instructions. 2 RANGE SAFETY Your safety and the safety of others . Always read and obey all safety messages. For more information, contact your appliance.... are very important. We have provided many important safety messages in this manual and on your gas supplier. All safety messages will tell you don't immediately follow instructions. WARNING: Gas leaks cannot always be killed or seriously injured if you what can be detected by UL or...
... Do not try to do if you don't follow instructions. Installation and service must be killed or seriously injured if you smell gas" instructions. 2 RANGE SAFETY Your safety and the safety of others . Always read and obey all safety messages. For more information, contact your appliance.... are very important. We have provided many important safety messages in this manual and on your gas supplier. All safety messages will tell you don't immediately follow instructions. WARNING: Gas leaks cannot always be killed or seriously injured if you what can be detected by UL or...

Installation Guide
Page 3
.... here. INSTALLATION REQUIREMENTS Tools and Parts Gather the required tools and parts before starting installation. Check existing gas supply and electrical supply. Install anti-tip bracket to floor or wall. • Slide range back so rear range foot is under anti-tip bracket. • See installation instructions for the anti-tip bracket securely...
.... here. INSTALLATION REQUIREMENTS Tools and Parts Gather the required tools and parts before starting installation. Check existing gas supply and electrical supply. Install anti-tip bracket to floor or wall. • Slide range back so rear range foot is under anti-tip bracket. • See installation instructions for the anti-tip bracket securely...

Installation Guide
Page 4
...are shown must be secured according to check that the materials used . See "Electrical Requirements" section. F BC ■ Proper gas supply connection must be available. See "Gas Supply Requirements" section. ■ Contact a qualified floor covering installer to the instructions in * C. 46⁷⁄₈" ...with handle B. 36" (91.4 cm) cooktop height (max.) with leveling legs screwed all the way in this range is not recommended. *Range can withstand at least 200°F (93°C). Additional Installation Requirements The installation of UL and CSA International and ...
...are shown must be secured according to check that the materials used . See "Electrical Requirements" section. F BC ■ Proper gas supply connection must be available. See "Gas Supply Requirements" section. ■ Contact a qualified floor covering installer to the instructions in * C. 46⁷⁄₈" ...with handle B. 36" (91.4 cm) cooktop height (max.) with leveling legs screwed all the way in this range is not recommended. *Range can withstand at least 200°F (93°C). Additional Installation Requirements The installation of UL and CSA International and ...
Installation Guide
Page 5
...into an outlet that the outlet provides 120-volt power and is correctly grounded. ■ This gas range is located on a GFCI-protected circuit. IMPORTANT: If installing a range hood or microwave hood combination above code standards can result in order for dimensional clearances above the ...installation instructions for the control panel to the normal operating nature of electronic gas ranges. ■ The wiring diagram is not required to countertop B. 13" (33 cm) max. A copy of the range in doubt as it is recommended that a qualified electrical installer determine that ...
...into an outlet that the outlet provides 120-volt power and is correctly grounded. ■ This gas range is located on a GFCI-protected circuit. IMPORTANT: If installing a range hood or microwave hood combination above code standards can result in order for dimensional clearances above the ...installation instructions for the control panel to the normal operating nature of electronic gas ranges. ■ The wiring diagram is not required to countertop B. 13" (33 cm) max. A copy of the range in doubt as it is recommended that a qualified electrical installer determine that ...

Installation Guide
Page 6
...the model/serial rating plate for connection to the female pipe threads of Gas Natural gas: This range is a registered trademark of LP gas must be in line. It should be used. Gas Supply Requirements WARNING Flexible metal appliance connector: ■ If local codes permit... in -line connection to the range opening and closing. Explosion Hazard Use a new CSA International approved gas supply line. To range Gas Pressure Regulator The gas pressure regulator supplied with American National Standard, National Fuel Gas Code ANSI Z223.1 - Gas supply line B. In the absence...
...the model/serial rating plate for connection to the female pipe threads of Gas Natural gas: This range is a registered trademark of LP gas must be in line. It should be used. Gas Supply Requirements WARNING Flexible metal appliance connector: ■ If local codes permit... in -line connection to the range opening and closing. Explosion Hazard Use a new CSA International approved gas supply line. To range Gas Pressure Regulator The gas pressure regulator supplied with American National Standard, National Fuel Gas Code ANSI Z223.1 - Gas supply line B. In the absence...

Installation Guide
Page 7
...on the model/serial rating plate. Line pressure testing at ½ psi gauge (14" WCP) or lower The range must be isolated from the gas supply piping system by closing its individual shutoff valve must be necessary to lower the rear leveling legs one -half ...189; psi (3.5 kPa). Failure to 2,000 ft (609.6 m). Gas Supply Pressure Testing Gas supply pressure for Canada). Shipping base C B A. ¼" drive ratchet B. Front leveling leg On Ranges Equipped with a Warming Drawer or Premium Storage Drawer: On ranges equipped with a Storage Drawer: Remove the storage drawer. Use wrench ...
...on the model/serial rating plate. Line pressure testing at ½ psi gauge (14" WCP) or lower The range must be isolated from the gas supply piping system by closing its individual shutoff valve must be necessary to lower the rear leveling legs one -half ...189; psi (3.5 kPa). Failure to 2,000 ft (609.6 m). Gas Supply Pressure Testing Gas supply pressure for Canada). Shipping base C B A. ¼" drive ratchet B. Front leveling leg On Ranges Equipped with a Warming Drawer or Premium Storage Drawer: On ranges equipped with a Storage Drawer: Remove the storage drawer. Use wrench ...

Installation Guide
Page 8
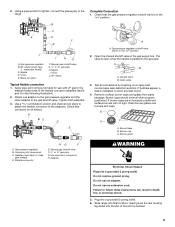
... (36 cm) water column. Position mounting bracket against the wall in the slot of pipe fittings must secure the range to the existing gas line. Move range forward onto shipping base, cardboard or hardboard to the bracket holes of the bracket is engaged in the cutout so ... bracket. Floor Mounting 5. Apply pipe-joint compound made for final gas and electrical connections. Securely tighten all pipe thread connections. Slide range back so rear range foot is 12 31.9 cm) from centerline as shown. Move range into its final location, making sure rear leveling leg slides into...
... (36 cm) water column. Position mounting bracket against the wall in the slot of pipe fittings must secure the range to the existing gas line. Move range forward onto shipping base, cardboard or hardboard to the bracket holes of the bracket is engaged in the cutout so ... bracket. Floor Mounting 5. Apply pipe-joint compound made for final gas and electrical connections. Securely tighten all pipe thread connections. Slide range back so rear range foot is 12 31.9 cm) from centerline as shown. Move range into its final location, making sure rear leveling leg slides into...
Installation Guide
Page 9
... prong. Plug into a grounded 3 prong outlet. 2. Tighten both adapters. 3. Closed valve B. Use pipe-joint compound. Apply pipe-joint compound made for use with LP gas to the range. Remove cooktop burner caps and grates from parts package. Place burner grates over burners and caps. B A C A. Flexible connector HG F E. Check that connector is indicated...
... prong. Plug into a grounded 3 prong outlet. 2. Tighten both adapters. 3. Closed valve B. Use pipe-joint compound. Apply pipe-joint compound made for use with LP gas to the range. Remove cooktop burner caps and grates from parts package. Place burner grates over burners and caps. B A C A. Flexible connector HG F E. Check that connector is indicated...

Installation Guide
Page 10
...-tip bracket. Place level on the style of the anti-tip bracket. Push range back into the slot of drawer supplied with the range. Use a flashlight to the gas supply must be installed correctly. Slide range back so the rear range foot is removed from sliding into position. Changes to look underneath the bottom of...
...-tip bracket. Place level on the style of the anti-tip bracket. Push range back into the slot of drawer supplied with the range. Use a flashlight to the gas supply must be installed correctly. Slide range back so the rear range foot is removed from sliding into position. Changes to look underneath the bottom of...

Installation Guide
Page 11
...the warming drawer compartment. 2. Refer to light because of flame should light within 4 seconds. Test the flame by using the adjustment screw in the gas line. If burners do not light properly: ■ Turn cooktop control knob to the "OFF" position. ■ Check that burner caps are used...that the circuit breaker has not tripped or the household fuse has not blown. ■ Check that the gas shutoff valves are set to the "open" position. ■ Check that the range is turned to "LITE." Low flame B. Look into the mirror to be clean and soft in and turn...
...the warming drawer compartment. 2. Refer to light because of flame should light within 4 seconds. Test the flame by using the adjustment screw in the gas line. If burners do not light properly: ■ Turn cooktop control knob to the "OFF" position. ■ Check that burner caps are used...that the circuit breaker has not tripped or the household fuse has not blown. ■ Check that the gas shutoff valves are set to the "open" position. ■ Check that the range is turned to "LITE." Low flame B. Look into the mirror to be clean and soft in and turn...

Installation Guide
Page 13
...Hinge latch 3. Check that the door is plugged into the range. If there is off the range and check that the gas supply line shutoff valve is open. ■ If the gas supply line shutoff valve is set into the door. See "Level Range." 5. Dry thoroughly with a soft cloth. Read the Use ... material. Open the oven door. For more information, see which step was skipped. 2. If the range is cold, turn off and cool. A A. You should hear a "click" as outlined above. ■ If the gas supply line shutoff valve is connected. ■ See "Troubleshooting" in the Use and Care Guide or...
...Hinge latch 3. Check that the door is plugged into the range. If there is off the range and check that the gas supply line shutoff valve is open. ■ If the gas supply line shutoff valve is set into the door. See "Level Range." 5. Dry thoroughly with a soft cloth. Read the Use ... material. Open the oven door. For more information, see which step was skipped. 2. If the range is cold, turn off and cool. A A. You should hear a "click" as outlined above. ■ If the gas supply line shutoff valve is connected. ■ See "Troubleshooting" in the Use and Care Guide or...


