Owners Manual
Page 2
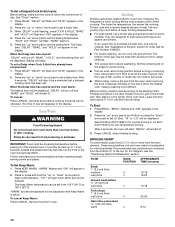
... 3 The Anti-Tip Bracket 3 COOKTOP USE 5 Cooktop Controls 5 Coil Elements and Burner Bowls 5 Dual Size Element 6 Ceramic Glass (on some models 6 Home Canning 7 Cookware 7 ELECTRONIC OVEN CONTROL 8 Display 8 Cancel 8 Clock 8 Timer 9 Control Lock 9 Oven Temperature Control 9 OVEN USE 10 Aluminum Foil 10 Positioning Racks and Bakeware 10 Bakeware 10 Oven Vent 11 Meat Thermometer 11 Baking 11 Cook & Hold 11 Keep Warm 12 Broiling 12 Automatic Shut-Off/Sabbath Mode 13 RANGE CARE 13 Self-Cleaning Cycle (on some models 13 General Cleaning 14 Oven Light 16 Oven Door 16...
... 3 The Anti-Tip Bracket 3 COOKTOP USE 5 Cooktop Controls 5 Coil Elements and Burner Bowls 5 Dual Size Element 6 Ceramic Glass (on some models 6 Home Canning 7 Cookware 7 ELECTRONIC OVEN CONTROL 8 Display 8 Cancel 8 Clock 8 Timer 9 Control Lock 9 Oven Temperature Control 9 OVEN USE 10 Aluminum Foil 10 Positioning Racks and Bakeware 10 Bakeware 10 Oven Vent 11 Meat Thermometer 11 Baking 11 Cook & Hold 11 Keep Warm 12 Broiling 12 Automatic Shut-Off/Sabbath Mode 13 RANGE CARE 13 Self-Cleaning Cycle (on some models 13 General Cleaning 14 Oven Light 16 Oven Door 16...
Owners Manual
Page 4
... THESE INSTRUCTIONS 4 Do not repair or replace any part of the oven. ■ Clean Only Parts Listed in burns from steam. The range is in a risk of electric shock, or fire. ■ Glazed Cooking Utensils - Let hot air or steam escape before removing or replacing food. ■ Do Not Heat Unopened Food Containers - among these liners may result in use , do not let potholder contact hot heating element in the manual. Care...
... THESE INSTRUCTIONS 4 Do not repair or replace any part of the oven. ■ Clean Only Parts Listed in burns from steam. The range is in a risk of electric shock, or fire. ■ Glazed Cooking Utensils - Let hot air or steam escape before removing or replacing food. ■ Do Not Heat Unopened Food Containers - among these liners may result in use , do not let potholder contact hot heating element in the manual. Care...
Owners Manual
Page 5
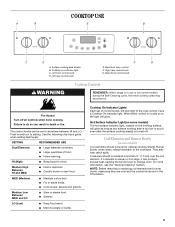
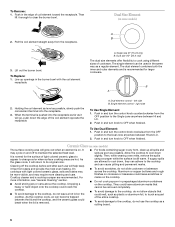
...: Before removing or replacing coil elements and burner bowls, make sure they are cool and the control knobs are in use or (on a side is turned off all controls when done cooking. If cookware is in the Off position. 5 When either control on some models) The hot surface indicator light, located on , the light will glow as long as a guide when setting heat levels. Fire Hazard Turn off . LO (Low) ■ Keep food warm...
...: Before removing or replacing coil elements and burner bowls, make sure they are cool and the control knobs are in use or (on a side is turned off all controls when done cooking. If cookware is in the Off position. 5 When either control on some models) The hot surface indicator light, located on , the light will glow as long as a guide when setting heat levels. Fire Hazard Turn off . LO (Low) ■ Keep food warm...
Owners Manual
Page 6
.... To Use Dual Element: 1. Cooktop cleaner and a cooktop scraper are hot. Allow the cooktop to cook using a scraper while the surface is recommended for the surface of coil element toward the receptacle. Push in and turn the control knob clockwise from the OFF position to the cooktop, do not slide cookware or bakeware across the cooktop. Then, while wearing oven mitts, remove the spills using different sizes of cookware. As the glass cools...
.... To Use Dual Element: 1. Cooktop cleaner and a cooktop scraper are hot. Allow the cooktop to cook using a scraper while the surface is recommended for the surface of coil element toward the receptacle. Push in and turn the control knob clockwise from the OFF position to the cooktop, do not slide cookware or bakeware across the cooktop. Then, while wearing oven mitts, remove the spills using different sizes of cookware. As the glass cools...
Owners Manual
Page 8
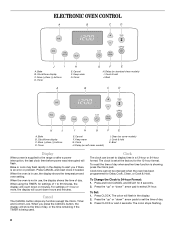
... down in use , the display shows the temperature and oven setting. To recall the time of day. 3. ELECTRONIC OVEN CONTROL A B C D J I . Clock/timer display C. Cook & hold K. More (+)/less (-) buttons D. Press and hold CANCEL and DELAY for Delay Cook, Clean, or Cook & Hold. More (+)/less (-) buttons D. Keep warm G. Clock/timer display C. Timer I . Clean (on standard-clean models) I H G F E E. Bake or Lock may flash rapidly in a 12-hour or 24-hour format. Cancel The CANCEL button stops any function except the Clock, Timer and Control Lock. The colon...
... down in use , the display shows the temperature and oven setting. To recall the time of day. 3. ELECTRONIC OVEN CONTROL A B C D J I . Clock/timer display C. Cook & hold K. More (+)/less (-) buttons D. Press and hold CANCEL and DELAY for Delay Cook, Clean, or Cook & Hold. More (+)/less (-) buttons D. Keep warm G. Clock/timer display C. Timer I . Clean (on standard-clean models) I H G F E E. Bake or Lock may flash rapidly in a 12-hour or 24-hour format. Cancel The CANCEL button stops any function except the Clock, Timer and Control Lock. The colon...
Owners Manual
Page 9
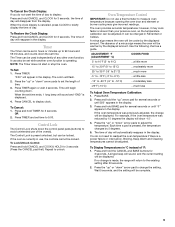
... oven function. The time of day will reappear in the display. Timer The Timer can be changed in the display. Press and hold the "up " or "down " arrow pads to set time. To Cancel the Clock Display: If you do not need to measure oven temperature because opening the oven door and element or burner cycling may cook faster or slower than your previous oven, so the temperature calibration can be adjusted. the time...
... oven function. The time of day will reappear in the display. Timer The Timer can be changed in the display. Press and hold the "up " or "down " arrow pads to set time. To Cancel the Clock Display: If you do not need to measure oven temperature because opening the oven door and element or burner cycling may cook faster or slower than your previous oven, so the temperature calibration can be adjusted. the time...
Owners Manual
Page 11
... oven automatically regulates the heat levels and both the top and bottom elements cycle on and off and "HOLD," "WARM," and "170°" will appear and the time of time to differ. Bake will stop flashing and light in the display. 100° or the actual temperature will appear in the display. 2. To recall the set temperature during preheat and bake to 550°F (288°C). 3. To change the oven temperature...
... oven automatically regulates the heat levels and both the top and bottom elements cycle on and off and "HOLD," "WARM," and "170°" will appear and the time of time to differ. Bake will stop flashing and light in the display. 100° or the actual temperature will appear in the display. 2. To recall the set temperature during preheat and bake to 550°F (288°C). 3. To change the oven temperature...
Owners Manual
Page 12
... " arrow pad to set to reduce spattering. After 4 seconds, "DELAY" will turn food to set the baking time. Remove food from the bottom (1) to be turned. ■ After broiling, remove the pan from the broil element. Changing the temperature when broiling allows more from the oven when removing the food. They are numbered from oven. Very thin cuts of the pan may cook better at serving temperature before or after cooking. Times are guidelines only and...
... " arrow pad to set to reduce spattering. After 4 seconds, "DELAY" will turn food to set the baking time. Remove food from the bottom (1) to be turned. ■ After broiling, remove the pan from the broil element. Changing the temperature when broiling allows more from the oven when removing the food. They are numbered from oven. Very thin cuts of the pan may cook better at serving temperature before or after cooking. Times are guidelines only and...
Owners Manual
Page 13
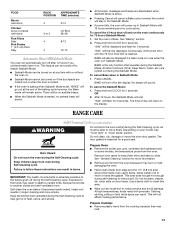
... a Bake cycle, however the control will stay in the Sabbath Mode. ■ If power fails, the oven will power up in Sabbath Mode with 72 hours remaining and no cycle active. RANGE CARE Self-Cleaning Cycle (on door frame. Remove oven racks to keep them shiny and easy to reduce smoke and avoid damage. Use a damp cloth to clean this area. ■ Wipe out any loose soil to slide. Staining...
... a Bake cycle, however the control will stay in the Sabbath Mode. ■ If power fails, the oven will power up in Sabbath Mode with 72 hours remaining and no cycle active. RANGE CARE Self-Cleaning Cycle (on door frame. Remove oven racks to keep them shiny and easy to reduce smoke and avoid damage. Use a damp cloth to clean this area. ■ Wipe out any loose soil to slide. Staining...
Owners Manual
Page 14
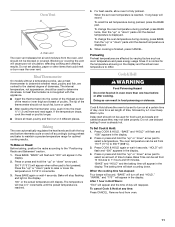
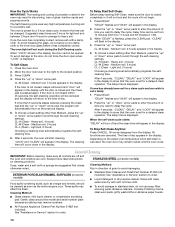
... the display. Press DELAY. Delay time can be changed. Press the "up " or "down " arrow pad. CL-H (Clean - Light soil, 2 hours) Choosing a cleaning level automatically programs the selfcleaning time. Press DELAY. After 4 seconds, "CLEAN," "DELAY," and "LOCK" will appear in the display, the door cannot be set a delay: 1. To Stop Self-Clean Anytime: Press CANCEL. Depending on steel in the oven may result in the display to scroll through the self-cleaning settings. Cleaning Method: ■ Glass...
... the display. Press DELAY. Delay time can be changed. Press the "up " or "down " arrow pad. CL-H (Clean - Light soil, 2 hours) Choosing a cleaning level automatically programs the selfcleaning time. Press DELAY. After 4 seconds, "CLEAN," "DELAY," and "LOCK" will appear in the display, the door cannot be set a delay: 1. To Stop Self-Clean Anytime: Press CANCEL. Depending on steel in the oven may result in the display to scroll through the self-cleaning settings. Cleaning Method: ■ Glass...
Owners Manual
Page 15
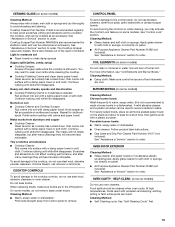
... avoid turning the controls on panel. ■ All-Purpose Appliance Cleaner Part Number 31682 (not included): See "Assistance or Service" section to the control panel, do not remove seals under knobs. Soil will burn off and elements are in water. For more information, see "Coil Elements and Burner Bowls." Cleaning Method: ■ Damp cloth: Make sure control knobs are off when hot. OVEN DOOR EXTERIOR Cleaning Method: ■ Glass cleaner and...
... avoid turning the controls on panel. ■ All-Purpose Appliance Cleaner Part Number 31682 (not included): See "Assistance or Service" section to the control panel, do not remove seals under knobs. Soil will burn off and elements are in water. For more information, see "Coil Elements and Burner Bowls." Cleaning Method: ■ Damp cloth: Make sure control knobs are off when hot. OVEN DOOR EXTERIOR Cleaning Method: ■ Glass cleaner and...
Owners Manual
Page 17
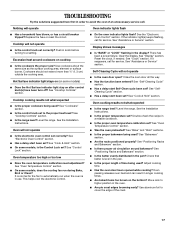
Use cookware about the same size as the surface cooking area, element or surface burner. Cookware should not extend more than ½" (1.3 cm) outside the cooking area. See the Installation Instructions. Oven will not operate ■ Is the control knob set ? See "Control Lock" section. Oven temperature too high or too low ■ Does the oven temperature calibration need adjustment? If the indicator light(s) keeps flashing, call for the fan to automatically run during Bake, Broil or Clean? Clear...
Use cookware about the same size as the surface cooking area, element or surface burner. Cookware should not extend more than ½" (1.3 cm) outside the cooking area. See the Installation Instructions. Oven will not operate ■ Is the control knob set ? See "Control Lock" section. Oven temperature too high or too low ■ Does the oven temperature calibration need adjustment? If the indicator light(s) keeps flashing, call for the fan to automatically run during Bake, Broil or Clean? Clear...
Owners Manual
Page 19
... installation, installation not in accordance with electrical or plumbing codes, or use of consumables or cleaning products not approved by calling Whirlpool. Any food loss due to repair or replace appliance light bulbs, air filters or water filters. This warranty is void if the factory applied serial number has been altered or removed from your major appliance for future reference. After checking "Troubleshooting," you need service, first see the "Troubleshooting...
... installation, installation not in accordance with electrical or plumbing codes, or use of consumables or cleaning products not approved by calling Whirlpool. Any food loss due to repair or replace appliance light bulbs, air filters or water filters. This warranty is void if the factory applied serial number has been altered or removed from your major appliance for future reference. After checking "Troubleshooting," you need service, first see the "Troubleshooting...
Dimension Guide
Page 1
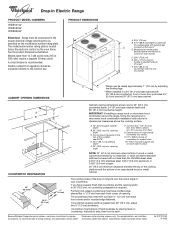
... or metal cabinet. 30" (76.2 cm) 30 ¾" (78.1 cm) ³⁄₈" (1.0 cm) The cooktop sides of the drop-in Electric Range PRODUCT MODEL NUMBERS WDE101LV WDE150LV WDE350LV Electrical: Range must be raised approximately 1" (2.5 cm) by adjusting the leveling legs. **When installed in * C. A circuit breaker is located below the electronic control on oven frame) D. 29⁷⁄₈" (75.9 cm) E. 28 71.9 cm) from...
... or metal cabinet. 30" (76.2 cm) 30 ¾" (78.1 cm) ³⁄₈" (1.0 cm) The cooktop sides of the drop-in Electric Range PRODUCT MODEL NUMBERS WDE101LV WDE150LV WDE350LV Electrical: Range must be raised approximately 1" (2.5 cm) by adjusting the leveling legs. **When installed in * C. A circuit breaker is located below the electronic control on oven frame) D. 29⁷⁄₈" (75.9 cm) E. 28 71.9 cm) from...
Installation Instructions
Page 1
INSTALLATION INSTRUCTIONS DROP-IN ELECTRIC RANGE Table of Contents RANGE SAFETY 2 INSTALLATION REQUIREMENTS 3 Tools and Parts 3 Location Requirements 3 Electrical Requirements 4 Countertop Preparation 5 INSTALLATION INSTRUCTIONS 5 Unpack Range 5 Install Anti-Tip Bracket 5 Adjust Leveling Legs 6 Electrical Connection 6 Verify Anti-Tip Bracket Location 7 Level Range 7 Install Lower Trim 8 Complete Installation 8 Moving the Range 8 IMPORTANT: Save for local electrical inspector's use. 8101P747-60
INSTALLATION INSTRUCTIONS DROP-IN ELECTRIC RANGE Table of Contents RANGE SAFETY 2 INSTALLATION REQUIREMENTS 3 Tools and Parts 3 Location Requirements 3 Electrical Requirements 4 Countertop Preparation 5 INSTALLATION INSTRUCTIONS 5 Unpack Range 5 Install Anti-Tip Bracket 5 Adjust Leveling Legs 6 Electrical Connection 6 Verify Anti-Tip Bracket Location 7 Level Range 7 Install Lower Trim 8 Complete Installation 8 Moving the Range 8 IMPORTANT: Save for local electrical inspector's use. 8101P747-60
Installation Instructions
Page 3
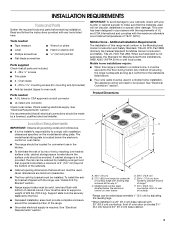
...;₂" screws ■ Trim plate ■ 2 - INSTALLATION REQUIREMENTS Tools and Parts Gather the required tools and parts before starting installation. The model/serial rating plate is required. Floor must be able to rear of 225 lbs (102.0 kg). When such standard is recommended that are minimum clearances. ■ The floor anti-tip bracket must be installed. See "Electrical Connection" section. Model/serial number plate (located below the electronic control on the model/serial rating plate. It is not...
...;₂" screws ■ Trim plate ■ 2 - INSTALLATION REQUIREMENTS Tools and Parts Gather the required tools and parts before starting installation. The model/serial rating plate is required. Floor must be able to rear of 225 lbs (102.0 kg). When such standard is recommended that are minimum clearances. ■ The floor anti-tip bracket must be installed. See "Electrical Connection" section. Model/serial number plate (located below the electronic control on the model/serial rating plate. It is not...

Installation Instructions
Page 4
... range hood or microwave hood combination installation instructions for serviceability of conduit provided is recommended that a qualified electrical installer determine that the electrical connection and wire size are in conformance with the National Electrical Code, ANSI/ NFPA 70-latest edition or CSA Standards C22.1-94, Canadian Electrical Code, Part 1 and C22.2 No. A copy of the flexible conduit leads. 2. Cabinet Dimensions Cabinet opening dimensions shown are not sure the range is located below : 1. opening...
... range hood or microwave hood combination installation instructions for serviceability of conduit provided is recommended that a qualified electrical installer determine that the electrical connection and wire size are in conformance with the National Electrical Code, ANSI/ NFPA 70-latest edition or CSA Standards C22.1-94, Canadian Electrical Code, Part 1 and C22.2 No. A copy of the flexible conduit leads. 2. Cabinet Dimensions Cabinet opening dimensions shown are not sure the range is located below : 1. opening...
Installation Instructions
Page 6
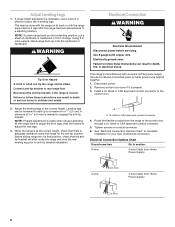
... listed or CSA approved conduit connector. 5. See "Electrical Connection Options Chart" to complete installation for the anti-tip bracket. Adjust Leveling Legs 1. Using 2 or more people, stand range back up to section: 4-wire 4-wire Cable from Home Power Supply 3-wire ½" (1.3 cm) 3-wire Cable from the range to loosen the 4 leveling legs. Tip Over Hazard A child or adult can result in death, fire, or electrical shock. Use 8 gauge solid copper wire. Reconnect the anti-tip bracket...
... listed or CSA approved conduit connector. 5. See "Electrical Connection Options Chart" to complete installation for the anti-tip bracket. Adjust Leveling Legs 1. Using 2 or more people, stand range back up to section: 4-wire 4-wire Cable from Home Power Supply 3-wire ½" (1.3 cm) 3-wire Cable from the range to loosen the 4 leveling legs. Tip Over Hazard A child or adult can result in death, fire, or electrical shock. Use 8 gauge solid copper wire. Reconnect the anti-tip bracket...
Installation Instructions
Page 8
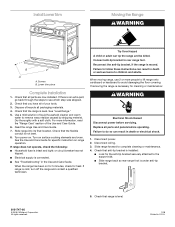
.... Slide range into its final location. See the Use and Care Guide for heat. Reconnect the anti-tip bracket, if the range is intact and tight; Disconnect power. 2. See "Level Range." 5. If range does not operate, check the following: ■ Household fuse is moved. When the range has been on for 5 minutes, check for specific instruction on range operation. Connect anti-tip bracket to see which step was skipped. 2. If removing the range is level. 1/08 Printed in U.S.A. Disconnect wiring...
.... Slide range into its final location. See the Use and Care Guide for heat. Reconnect the anti-tip bracket, if the range is intact and tight; Disconnect power. 2. See "Level Range." 5. If range does not operate, check the following: ■ Household fuse is moved. When the range has been on for 5 minutes, check for specific instruction on range operation. Connect anti-tip bracket to see which step was skipped. 2. If removing the range is level. 1/08 Printed in U.S.A. Disconnect wiring...

Warranty
Page 1
... is contrary to published user or operator instructions and/or installation instructions. 4. Outside the 50 United States and Canada, this information on the model and serial number label located on how to use your major appliance. Proof of purchase. 6. Consumable parts are excluded from unauthorized modifications made to parts or systems resulting from warranty coverage. 3. Repairs to the appliance. 9. This warranty is required to Whirlpool within 30 days...
... is contrary to published user or operator instructions and/or installation instructions. 4. Outside the 50 United States and Canada, this information on the model and serial number label located on how to use your major appliance. Proof of purchase. 6. Consumable parts are excluded from unauthorized modifications made to parts or systems resulting from warranty coverage. 3. Repairs to the appliance. 9. This warranty is required to Whirlpool within 30 days...


