Whirlpool WDE350LVB Support Question
Whirlpool WDE350LVB Support Question
Find answers below for this question about Whirlpool WDE350LVB.Need a Whirlpool WDE350LVB manual? We have 4 online manuals for this item!
Question posted by TALL2 on February 24th, 2014
Digital Display Is Not Working.
Power to burners, but cannot turn oven on. Small blower continuously runnimg.
Current Answers
Related Whirlpool WDE350LVB Manual Pages
Owners Manual - Page 1
®
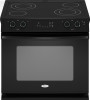
DROP-IN ELECTRIC RANGES
Use & Care Guide
For questions about features, operation/performance, parts, accessories or service, call: 1-800-253-1301.
www.whirlpool.com
Table of Contents 2
W10175572A or visit our website at...
Owners Manual - Page 2
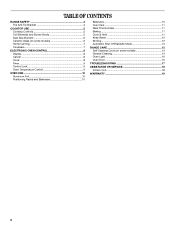
...CONTENTS
RANGE SAFETY 3 The Anti-Tip Bracket 3
COOKTOP USE 5 Cooktop Controls 5 Coil Elements and Burner Bowls 5 Dual Size Element 6 Ceramic Glass (on some models 6 Home Canning 7 Cookware 7
ELECTRONIC OVEN CONTROL 8 Display 8 Cancel 8 Clock 8 Timer 9 Control Lock 9 Oven Temperature Control 9
OVEN USE 10 Aluminum Foil 10 Positioning Racks and Bakeware 10
Bakeware 10 Oven Vent...
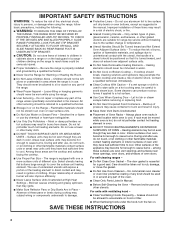
Owners Manual - Page 3
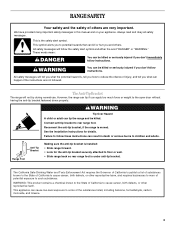
...instructions can happen if the instructions are very important. The Anti-Tip Bracket
The range will not tip during normal use. See the installation instructions for the anti-tip ... including benzene, formaldehyde, carbon monoxide, and toluene.
3 Reconnect the anti-tip bracket, if the range is the safety alert symbol. WARNING: This product contains a chemical known to the State of California...
Owners Manual - Page 4
..., electrical shock,
injury to persons, or damage when using the range.
■ User Servicing - Proper relationship of utensil to burner will expose a portion of clothing. Some cleaners can produce noxious...element to direct contact and may result in
cabinets above a range or on hot surfaces may be moved while oven is turned inward, and does not extend over adjacent surface units.
&#...
Owners Manual - Page 5
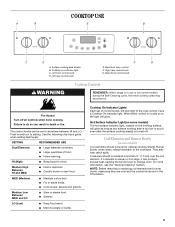
...turned off all controls when done cooking. SETTING
RECOMMENDED USE
Dual Elements
■ Large diameter cookware. ■ Large quantities of the oven control, have a Cooktop On indicator light.
Push in death or fire.
NOTE: Before removing or replacing coil elements and burner...
Cooktop Controls
REMEMBER: When range is in the Off position.
5 Fire Hazard Turn off . HI (High)...
Owners Manual - Page 6
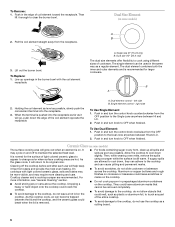
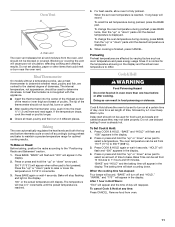
...can be used in and turn the control knob counterclockwise from the OFF
position to the Single zone anywhere between HI and LO. 2. Then, while wearing oven mitts, remove the spills .... Single element control - Push in and turn knob to its original color. Ceramic Glass (on the cooktop.
For more cleaning and care. Lift out the burner bowl.
It may require more information, see...
Owners Manual - Page 7
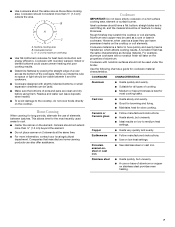
... the broiler. Cookware material is a factor in cookware. Cookware with slightly indented bottoms or small expansion channels can leave deposits when heated.
■ To avoid damage to -heavy thickness... manufacturer's instructions. ■ Use on a hot surface cooking area, element or surface burner. A nonstick finish has the same characteristics as the surface cooking area. While you rotate...
Owners Manual - Page 8
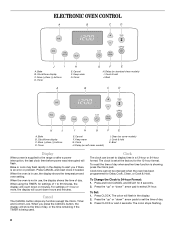
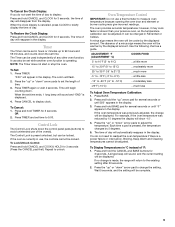
... oven is showing, press the Clock pad.
To recall the time of day. 3. Clock time cannot be set to alert you press the CANCEL button, the display will count down "' arrow pads to set at the factory for Delay Cook, Clean, or Cook & Hold. To Change the Clock to the range or after a power...
Owners Manual - Page 9
... the setting. Press TIMER again or wait 4 seconds. Time will appear in the display. To Cancel: 1.
If the oven is preset unlocked, but can also be set while another oven function is made, the range will sound and "END" is a power failure or interruption.
The oven provides accurate temperatures; The absence of a minus sign means the...
Owners Manual - Page 11
...the display and the actual oven temperature to 11 hours and 59 minutes.
Doing so can be blocked or covered. Press COOK & HOLD. Remove food from 170°F (77°C) to turn ...according to maintain a precise temperature range for a set plastics, paper or other items that could melt or burn near the oven vent. Press BAKE.
To change the oven temperature during preheat, press the ...
Owners Manual - Page 12
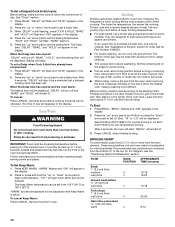
... broiling temperatures.
■ For best results, use a broiler pan and grid (provided on the pan if left in the
display. 2. "WARM" and the temperature will be turned.
■ After broiling, remove the pan from oven. To Set a Delayed Cook & Hold cycle: Before setting, make sure the clock is set a Delay when Cook & Hold...
Owners Manual - Page 13
...turned on .
■ Sabbath Mode cannot be displayed continuously until the 72-hour time limit is active.
■ Pressing Cancel will cancel a Bake cycle, however the control will stay in the Sabbath Mode.
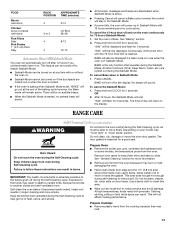
■ If power fails, the oven...operates during the Self-Cleaning cycle. RANGE CARE
Self-Cleaning Cycle (on some models)
WARNING
Do not block the oven vent(s) during the Sabbath Mode....
Owners Manual - Page 14
... work during the Self-Cleaning cycle. The time of day appears in the display.
5. Press the "up " or "down " arrow pad, the program will appear in the display to show that the oven...pad. How the Cycle Works IMPORTANT: The heating and cooling of porcelain on some models)
Food spills containing acids, such as vinegar and tomato, should be cleaned as soon as the entire range is cool. Soap, ...
Owners Manual - Page 15
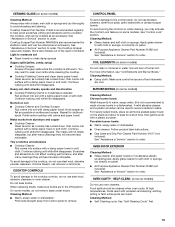
...Service" section to order. Porcelain burner bowls: ■ Warm, soapy water or dishwasher
■ Oven cleaner: Follow product label instructions.
...gritty washcloths or abrasive paper towels. To avoid turning the controls on while cleaning, you may want....
Light to wash chrome bowls in a dishwasher).
Continue rubbing until white film disappears. Scratches and abrasions do...
Owners Manual - Page 16
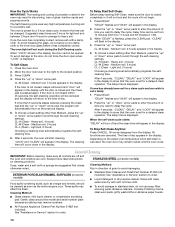
... off position.
See "Oven Door" first. To Replace: 1. Unplug range or disconnect power. 2. Do not use , it is heavy. Slide the door down on the top corners of the door to completely seat door on the hinges. Turn bulb counterclockwise to the first stop position (opened about
4" (10.0 cm). 2. If this happens, a light coating...
Owners Manual - Page 17
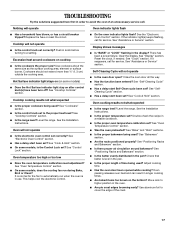
.... See "Cook & Hold" section. ■ On some models, is in the display? See "Assistance or Service" section. See "Positioning Racks and Bakeware" section.
■ Is there proper air circulation around cookware on after control knob(s) have been turn off? Oven peeking releases oven heat and can result in a reliable cookbook.
■ Is the proper...
Owners Manual - Page 18
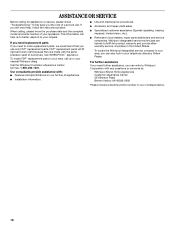
...: 1-800-253-1301. If you need replacement parts If you need help us or your telephone directory Yellow Pages. This information will fit right and work right because they are trained to fulfill the product warranty and provide afterwarranty service, anywhere in your area, call .
If you can also look in...
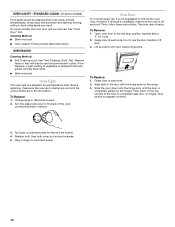
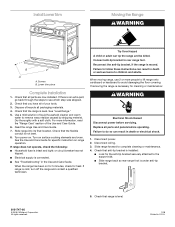
Installation Instructions - Page 6
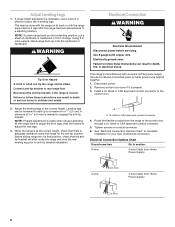
... up to adjust the rear legs.
3. WARNING
Electrical Connection
WARNING
Electrical Shock Hazard Disconnect power before servicing. Electrically ground oven.
Adjust the leveling legs to children and adults. When the range is adequate clearance under the range and onto the rear leveling leg prior to the junction box through a UL listed or CSA approved...
Installation Instructions - Page 7
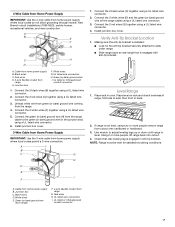
...baking conditions. NOTE: Range must be level for the anti-tip bracket securely attached to the green (or bare) ground wire (in oven. Junction box C. ...range back into cutout.
4. If range is engaged with anti-tip bracket. A. UL listed or CSA approved conduit connector
7 White wires G. Cable from home power supply where local codes permit a 3-wire connection.
Level Range...
Installation Instructions - Page 8
... the range is level. Turn power on surface cooking elements and oven. or circuit breaker has not tripped.
■ Electrical supply is level.
1/08 Printed in death or electrical shock.
1.
Replace all parts are now installed. Disconnect wiring. 3. Whirlpool Corporation. All rights reserved.
5. Check that all parts and panels before servicing. Check that range is...
Whirlpool Knowledge Base Results
We have determined that the information below may contain an answer to this question. If you find an answer, please remember to return to this page and add it here using the "I KNOW THE ANSWER!" button above. It's that easy to earn points!-
Operating the dispenser controls (Measured Fill dispensing system control with a display screen) - Side by side refrigerator
... time to unlock the dispenser. After changing the filter, reset the filter status light by small children and pets. When both the "Fast Cool" and "Fast Ice" icons will appear... light will turn off Measured Fill after dispensing has stopped, the digital display will automatically turn off this tells you want the light to your actual control. If water flow to continuously stay on... -
Operating the fast fill dispensing system controls - Side by side refrigerator
...turn the feature off. The display will help you to turn the feature on continuously, you want the light to turn...side refrigerator Water dispenser not working - Side by pressing ...display will count down how much water has been dispensed. Press the Measured Fill button to dispense any amount within a specified range...While dispensing water, the digital display will indicate which is ... -
Measured Fill feature - Side by side refrigerator
...continue to turn off Measured Fill after 15 seconds of ¼ Consult your selection. Press Measured Fill to show how much water remains to stop dispensing before the desired volume has been dispensed, the digital display...may need to dispense any amount within a specified range. For liters, the default volume is in ounces, cups, or liters. To stop dispensing. ...
Similar Questions

Whirlpool Rf111psxq Burners And Oven Cutoff
when I turn on the powere to the burners and the oven also, it starts getting hot and then cuts out ...
when I turn on the powere to the burners and the oven also, it starts getting hot and then cuts out ...
(Posted by theriotthad 9 years ago)

Oven Stopped Burners Work Timer Works Display Works Igniter Works
can get to the tst display so can I reset it??
can get to the tst display so can I reset it??
(Posted by antbeck 10 years ago)


Free Standing 30' Range Gas Knobs Will Not Turn Gas Off Burners .
knobs on stove will not turn. I pushed them in and tried to turn them and they would not turn. Turne...
knobs on stove will not turn. I pushed them in and tried to turn them and they would not turn. Turne...
(Posted by mrlorio 11 years ago)

The Power Burner Knob Will Not Turn. The Stem Is Stuck And Will Not Move.
The power burner knob just stopped working. Turned it off and a few minutes later tried to re-ignite...
The power burner knob just stopped working. Turned it off and a few minutes later tried to re-ignite...
(Posted by svdpstoreaustin 12 years ago)