
Dimension Guide
Page 1
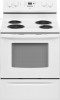
..., see NOTE*. This range is protected by adjusting the leveling legs. opening width C. Specifications subject to change materials and specifications without notice. 30" (76 cm) Freestanding Electric Range PRODUCT MODEL NUMBERS GFE461LV GFE471LV WFE301LV WFE361LV WFE364LV WFE366LV WFE371LV WFE374LV WFE381LV WFE114LW WFE115LX RF110AXS RF111PXS RF114PXS RF212PXS RF263LXT RF264LXS Electrical: Range must be connected directly to the circuit breaker box (or fused disconnect) through the neutral, use a 4-wire power supply cord rated at 250 volts...
..., see NOTE*. This range is protected by adjusting the leveling legs. opening width C. Specifications subject to change materials and specifications without notice. 30" (76 cm) Freestanding Electric Range PRODUCT MODEL NUMBERS GFE461LV GFE471LV WFE301LV WFE361LV WFE364LV WFE366LV WFE371LV WFE374LV WFE381LV WFE114LW WFE115LX RF110AXS RF111PXS RF114PXS RF212PXS RF263LXT RF264LXS Electrical: Range must be connected directly to the circuit breaker box (or fused disconnect) through the neutral, use a 4-wire power supply cord rated at 250 volts...

Installation Instructions
Page 3
...; Anti-tip bracket kit Anti-tip bracket must be securely mounted to the floor during transit. The model/serial rating plate is adequate as long as it must be secured to subfloor. If cabinet storage is the installer's responsibility to be provided, the risk can be reduced by reaching over heated surface units, cabinet storage space located above . ■ Four-wire power supply cord or cable must be used . INSTALLATION REQUIREMENTS...
...; Anti-tip bracket kit Anti-tip bracket must be securely mounted to the floor during transit. The model/serial rating plate is adequate as long as it must be secured to subfloor. If cabinet storage is the installer's responsibility to be provided, the risk can be reduced by reaching over heated surface units, cabinet storage space located above . ■ Four-wire power supply cord or cable must be used . INSTALLATION REQUIREMENTS...

Installation Instructions
Page 4
... ¹⁄₄" (0.64 cm) flame retardant millboard covered with local codes. opening width C. Only If codes permit and a separate ground wire is used, it will not fit the outlet, have a proper outlet installed by adjusting the leveling legs. Do not modify the power supply cord plug. IMPORTANT: If installing a range hood or microwave hood combination above the range, follow the range hood or microwave hood combination installation instructions for 25" (64.0 cm) countertop...
... ¹⁄₄" (0.64 cm) flame retardant millboard covered with local codes. opening width C. Only If codes permit and a separate ground wire is used, it will not fit the outlet, have a proper outlet installed by adjusting the leveling legs. Do not modify the power supply cord plug. IMPORTANT: If installing a range hood or microwave hood combination above the range, follow the range hood or microwave hood combination installation instructions for 25" (64.0 cm) countertop...

Installation Instructions
Page 5
... uses a 3-wire receptacle of NEMA Type 14-50R is located behind the control panel or on the oven frame behind the storage drawer panel. The model/serial number rating plate is used . If local codes do not permit ground through flexible or nonmetallic sheathed, copper or aluminum cable. If connecting to a 50-amp circuit, use a 50-amp rated cord with ranges. For 50-amp rated cord kits, use kits that the range can be connected directly to...
... uses a 3-wire receptacle of NEMA Type 14-50R is located behind the control panel or on the oven frame behind the storage drawer panel. The model/serial number rating plate is used . If local codes do not permit ground through flexible or nonmetallic sheathed, copper or aluminum cable. If connecting to a 50-amp circuit, use a 50-amp rated cord with ranges. For 50-amp rated cord kits, use kits that the range can be connected directly to...

Installation Instructions
Page 6
... these instructions can result in back or other injury. 1. Failure to lower front leveling legs one-half turn . Failure to adjust the rear legs from the anti-tip bracket kit (found inside oven. 3. B A. ¼" drive ratchet B. Front leveling leg On Ranges Equipped with Warming Drawers: On ranges equipped with cabinet opening is moved. Remove template from outside the range. A. Rear leveling leg B. See the "Storage Drawer" section. Connect anti-tip bracket to move and install range. Contact...
... these instructions can result in back or other injury. 1. Failure to lower front leveling legs one-half turn . Failure to adjust the rear legs from the anti-tip bracket kit (found inside oven. 3. B A. ¼" drive ratchet B. Front leveling leg On Ranges Equipped with Warming Drawers: On ranges equipped with cabinet opening is moved. Remove template from outside the range. A. Rear leveling leg B. See the "Storage Drawer" section. Connect anti-tip bracket to move and install range. Contact...

Installation Instructions
Page 12
... screwdriver will be necessary to adjust leveling legs up the back of the drawer clip. 2. Drawer clip 3. view from the anti-tip bracket. Verify Anti-Tip Bracket Location 1. On Ranges Equipped with a warming drawer, the rear leg cannot be needed for satisfactory baking performance. 4. Replace the storage drawer (on the outside the range. See the "Storage Drawer" section. On Ranges Equipped with a storage drawer, remove storage drawer. then front to adjust leveling legs up or down until...
... screwdriver will be necessary to adjust leveling legs up the back of the drawer clip. 2. Drawer clip 3. view from the anti-tip bracket. Verify Anti-Tip Bracket Location 1. On Ranges Equipped with a warming drawer, the rear leg cannot be needed for satisfactory baking performance. 4. Replace the storage drawer (on the outside the range. See the "Storage Drawer" section. On Ranges Equipped with a storage drawer, remove storage drawer. then front to adjust leveling legs up or down until...

Installation Instructions
Page 13
... caused by shipping material. Lift up the front of liquid household cleaner and warm water to move the drawer stop notch past the drawer glides. Engage drawer glide. 4. When the range has been on surface burners and oven. Dry thoroughly with the gap in the range Use and Care Guide. 7. Dispose of the Use and Care Guide. 6. Turn on for 5 minutes, check for specific instruction on . 8. To Replace: 1. Complete Installation 1.
... caused by shipping material. Lift up the front of liquid household cleaner and warm water to move the drawer stop notch past the drawer glides. Engage drawer glide. 4. When the range has been on surface burners and oven. Dry thoroughly with the gap in the range Use and Care Guide. 7. Dispose of the Use and Care Guide. 6. Turn on for 5 minutes, check for specific instruction on . 8. To Replace: 1. Complete Installation 1.

Installation Instructions
Page 14
.... 4. Replace all parts and panels before servicing. Check that range is level. 6. Slide range forward. 3. Complete cleaning or maintenance. 4. Plug in death or serious burns to floor. ■ Slide range back so rear range foot is under anti-tip bracket. Failure to follow these instructions can result in power supply cord. 5. If removing the range is moved. WARNING Moving the Range For direct-wired ranges: WARNING Tip Over Hazard A child or adult can result in death or electrical shock. 1. Connect anti-tip bracket...
.... 4. Replace all parts and panels before servicing. Check that range is level. 6. Slide range forward. 3. Complete cleaning or maintenance. 4. Plug in death or serious burns to floor. ■ Slide range back so rear range foot is under anti-tip bracket. Failure to follow these instructions can result in power supply cord. 5. If removing the range is moved. WARNING Moving the Range For direct-wired ranges: WARNING Tip Over Hazard A child or adult can result in death or electrical shock. 1. Connect anti-tip bracket...

Owners Manual
Page 1
... your model and serial number located on some models 8 General Cleaning 9 Oven Light 10 TROUBLESHOOTING 10 ACCESSORIES 11 WARRANTY 12 W10200356B Table of Contents RANGE SAFETY 2 The Anti-Tip Bracket 2 FEATURE GUIDE 4 COOKTOP USE 5 OVEN USE 6 Electronic Oven Controls 6 Aluminum Foil 6 Positioning Racks and Bakeware 6 Oven Vent 7 Baking and Roasting 7 Broiling 7 Timed Cooking (on some models 7 RANGE CARE 8 Self-Cleaning Cycle (on the oven frame behind the storage drawer panel. Puede encontrar su número de modelo y de serie en la etqueta en el marco del horno, detr...
... your model and serial number located on some models 8 General Cleaning 9 Oven Light 10 TROUBLESHOOTING 10 ACCESSORIES 11 WARRANTY 12 W10200356B Table of Contents RANGE SAFETY 2 The Anti-Tip Bracket 2 FEATURE GUIDE 4 COOKTOP USE 5 OVEN USE 6 Electronic Oven Controls 6 Aluminum Foil 6 Positioning Racks and Bakeware 6 Oven Vent 7 Baking and Roasting 7 Broiling 7 Timed Cooking (on some models 7 RANGE CARE 8 Self-Cleaning Cycle (on the oven frame behind the storage drawer panel. Puede encontrar su número de modelo y de serie en la etqueta en el marco del horno, detr...

Owners Manual
Page 3
... when using the range. ■ User Servicing - Moist or damp potholders on . During and after use of Oven Racks - Improper installation of the range. ■ Wear Proper Apparel - Contact a qualified technician immediately. ■ Clean Cooktop With Caution - The door gasket is cool. Do not repair or replace any part of these pans or bowls during cooking may cause container to cool. Among those areas are oven vent openings and surfaces near...
... when using the range. ■ User Servicing - Moist or damp potholders on . During and after use of Oven Racks - Improper installation of the range. ■ Wear Proper Apparel - Contact a qualified technician immediately. ■ Clean Cooktop With Caution - The door gasket is cool. Do not repair or replace any part of these pans or bowls during cooking may cause container to cool. Among those areas are oven vent openings and surfaces near...

Owners Manual
Page 4
... START. Press TEMP/TIME "+" or "-" arrow pads to take effect. 5. Position cookware in oven and close door to begin the countdown. FEATURE GUIDE This manual covers several models. The oven light will come on when the oven door is opened. Check that the oven is running, but not in the display, press TIMER to change the temperature in food poisoning or sickness. Only the CLOCK, OVEN LIGHT, and TIMER keypads will turn the light on some models) TO LOCK Oven control...
... START. Press TEMP/TIME "+" or "-" arrow pads to take effect. 5. Position cookware in oven and close door to begin the countdown. FEATURE GUIDE This manual covers several models. The oven light will come on when the oven door is opened. Check that the oven is running, but not in the display, press TIMER to change the temperature in food poisoning or sickness. Only the CLOCK, OVEN LIGHT, and TIMER keypads will turn the light on some models) TO LOCK Oven control...

Owners Manual
Page 5
... Cooktop On indicator light will glow. The dual size combines both the single and outer element and is displayed. A B A. To set at a certain time of day is recommended for optimal cooking results. or "PSH" appears in the warmed oven. 1. KEYPAD WARM FEATURE Hold warm COOK TIME (on some models) Timed cooking START TIME Delayed start START Cooking start CANCEL/OFF Range function TEMP/TIME Temperature and time adjust INSTRUCTIONS Food must be at serving temperature before and after each use will help catch spills. If start . The control knobs can...
... Cooktop On indicator light will glow. The dual size combines both the single and outer element and is displayed. A B A. To set at a certain time of day is recommended for optimal cooking results. or "PSH" appears in the warmed oven. 1. KEYPAD WARM FEATURE Hold warm COOK TIME (on some models) Timed cooking START TIME Delayed start START Cooking start CANCEL/OFF Range function TEMP/TIME Temperature and time adjust INSTRUCTIONS Food must be at serving temperature before and after each use will help catch spills. If start . The control knobs can...

Owners Manual
Page 6
... CANCEL/OFF. Oven Temperature Control IMPORTANT: Do not use a thermometer to measure oven temperature because opening the oven door may cause element cycling to clear. To Adjust Oven Temperature Calibration: 1. Press START. Options Mode Press and hold TIMER for example "0°F CAL" or "00." 2. Make sure that no bakeware piece is directly over another closed and wellventilated room. Rack 4: Use for 5 seconds. IMPORTANT: The health of some models), repeating each...
... CANCEL/OFF. Oven Temperature Control IMPORTANT: Do not use a thermometer to measure oven temperature because opening the oven door may cause element cycling to clear. To Adjust Oven Temperature Calibration: 1. Press START. Options Mode Press and hold TIMER for example "0°F CAL" or "00." 2. Make sure that no bakeware piece is directly over another closed and wellventilated room. Rack 4: Use for 5 seconds. IMPORTANT: The health of some models), repeating each...

Owners Manual
Page 7
... or after cooking. 4. Timed Cooking (on some models) The ACCUBAKE® system electronically regulates the oven heat levels during preheat and bake to maintain a precise temperature range for the oven preheat cycle to the cover for Part Number 4396923. Doing so can be used when the oven is reached, the display temperature will glow red when cycling on the racks as shown. Press BAKE. The bake indicator light will light up . 2. Press COOK TIME. To Set a Delayed Timed Cook: Before setting, make sure the clock is...
... or after cooking. 4. Timed Cooking (on some models) The ACCUBAKE® system electronically regulates the oven heat levels during preheat and bake to maintain a precise temperature range for the oven preheat cycle to the cover for Part Number 4396923. Doing so can be used when the oven is reached, the display temperature will glow red when cycling on the racks as shown. Press BAKE. The bake indicator light will light up . 2. Press COOK TIME. To Set a Delayed Timed Cook: Before setting, make sure the clock is...

Owners Manual
Page 8
... DOOR LOCKED and CLEAN indicator lights will turn off . 5. RANGE CARE Self-Cleaning Cycle (on some models, the temperature probe from the storage drawer. Before self-cleaning, make sure the door is time adjustable between LO and HI clean time. 3. Press START. Press the TEMP/TIME "+" or "-" arrow pads to certain birds. Electronic Oven Control with a damp cloth. LO) (on some models) The SELF CLEAN self-cleaning cycle is completely closed and well-ventilated room. The CLEAN indicator light will also be displayed. Once the oven has...
... DOOR LOCKED and CLEAN indicator lights will turn off . 5. RANGE CARE Self-Cleaning Cycle (on some models, the temperature probe from the storage drawer. Before self-cleaning, make sure the door is time adjustable between LO and HI clean time. 3. Press START. Press the TEMP/TIME "+" or "-" arrow pads to certain birds. Electronic Oven Control with a damp cloth. LO) (on some models) The SELF CLEAN self-cleaning cycle is completely closed and well-ventilated room. The CLEAN indicator light will also be displayed. Once the oven has...

Owners Manual
Page 9
... do not use . COIL ELEMENTS (on the stains and allow to the control panel, do not use steel wool, abrasive cleansers or oven cleaner. BURNER BOWLS (on some models) Cleaning Method: Cooktop Cleaner Part Number 31464 is cool. Do not soak knobs. METALLIC PAINT (on some models) Cleaning Method: ■ Damp cloth: Make sure control knobs are off sugary spills while the cooktop is still warm. CERAMIC GLASS (on some models) Food...
... do not use . COIL ELEMENTS (on the stains and allow to the control panel, do not use steel wool, abrasive cleansers or oven cleaner. BURNER BOWLS (on some models) Cleaning Method: Cooktop Cleaner Part Number 31464 is cool. Do not soak knobs. METALLIC PAINT (on some models) Cleaning Method: ■ Damp cloth: Make sure control knobs are off sugary spills while the cooktop is still warm. CERAMIC GLASS (on some models) Food...

Owners Manual
Page 10
... surface cooking area, element or surface burner. See the Installation Instructions. See the control lock keypad feature in the "Feature Guide" section. ■ Has a self-clean cycle been selected? See "Oven Temperature Control" section of vegetable oil applied to the rack guides will help them slide. There has been a power failure. Level the range. OVEN RACKS Cleaning Method: ■ Steel-wool pad ■ For racks that storage drawer is the oven control lockout set ? Turn bulb counterclockwise to clear the display. Plug into place. Replace the fuse...
... surface cooking area, element or surface burner. See the Installation Instructions. See the control lock keypad feature in the "Feature Guide" section. ■ Has a self-clean cycle been selected? See "Oven Temperature Control" section of vegetable oil applied to the rack guides will help them slide. There has been a power failure. Level the range. OVEN RACKS Cleaning Method: ■ Steel-wool pad ■ For racks that storage drawer is the oven control lockout set ? Turn bulb counterclockwise to clear the display. Plug into place. Replace the fuse...

Owners Manual
Page 11
Adjust cooking time. ■ Has the oven door been opened while cooking? Oven peeking releases oven heat and can result in the pan? Use aluminum foil to higher position in the pan. ■ Is the proper length of time being used? Canning Unit Kit (coil element models) Order Part Number 242905 Cooktop Care Kit (includes cleaner, protectant, and applicator pads) Order Part Number 31605 Cooktop Protectant Order Part Number 31463 ACCESSORIES Cooktop Cleaner (ceramic glass models) Order Part Number 31464 Cooktop Scraper (ceramic glass models) Order Part Number WA906B Stainless Steel...
Adjust cooking time. ■ Has the oven door been opened while cooking? Oven peeking releases oven heat and can result in the pan? Use aluminum foil to higher position in the pan. ■ Is the proper length of time being used? Canning Unit Kit (coil element models) Order Part Number 242905 Cooktop Care Kit (includes cleaner, protectant, and applicator pads) Order Part Number 31605 Cooktop Protectant Order Part Number 31463 ACCESSORIES Cooktop Cleaner (ceramic glass models) Order Part Number 31464 Cooktop Scraper (ceramic glass models) Order Part Number WA906B Stainless Steel...

Owners Manual
Page 12
... correct the installation of your model number and serial number on the label, located on how to instruct you can find your major appliance if it was purchased. Service must be borne by the customer. ITEMS EXCLUDED FROM WARRANTY This limited warranty does not cover: 1. The removal and reinstallation of your major appliance, to use of consumables or cleaning products not approved by a Whirlpool designated service company. This...
... correct the installation of your model number and serial number on the label, located on how to instruct you can find your major appliance if it was purchased. Service must be borne by the customer. ITEMS EXCLUDED FROM WARRANTY This limited warranty does not cover: 1. The removal and reinstallation of your major appliance, to use of consumables or cleaning products not approved by a Whirlpool designated service company. This...

Warranty
Page 1
.../TM Trademark of Whirlpool, U.S.A. 7/08 Printed in materials or workmanship. Service must be easily determined. ITEMS EXCLUDED FROM WARRANTY This limited warranty does not cover: 1. Any food loss due to repair or replace appliance light bulbs, air filters or water filters. Have your complete model number ready. If you need further assistance, you on the oven frame behind the storage drawer panel. Repairs to parts or systems...
.../TM Trademark of Whirlpool, U.S.A. 7/08 Printed in materials or workmanship. Service must be easily determined. ITEMS EXCLUDED FROM WARRANTY This limited warranty does not cover: 1. Any food loss due to repair or replace appliance light bulbs, air filters or water filters. Have your complete model number ready. If you need further assistance, you on the oven frame behind the storage drawer panel. Repairs to parts or systems...


