
Installation Instructions
Page 2
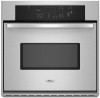
... listed here. INSTALLATION REQUIREMENTS Tools and Parts Gather the required tools and parts before starting installation. See "Electrical Requirements." This oven has been designed in a wall cabinet. single oven (2), double oven (4) ■ Bottom vent (supplied on rear wall behind oven, the junction box must be killed or seriously injured if you and others are installing the junction box...
... listed here. INSTALLATION REQUIREMENTS Tools and Parts Gather the required tools and parts before starting installation. See "Electrical Requirements." This oven has been designed in a wall cabinet. single oven (2), double oven (4) ■ Bottom vent (supplied on rear wall behind oven, the junction box must be killed or seriously injured if you and others are installing the junction box...

Dimension Guide
Page 2
...undercounter label located on top of the side wall to pass the water supply tubing through to the undersink water filter. Recommended oven and cooktop junction box locations D. See Cutout Dimensions chart. Allow 1.6 cm) for oven trim to overlap on the bottom of 2"...governing codes and ordinances. Cooktop must be necessary to countertop G. 4⁵⁄₈" (11.7 cm) from floor H. Center the cooktop cutout over an oven. Approved Built-In Oven and Electric Cooktop Combinations A B C D E C F G H A. 24" (61 cm) cabinet depth B. 25" (63.5 cm) countertop depth C. ...
...undercounter label located on top of the side wall to pass the water supply tubing through to the undersink water filter. Recommended oven and cooktop junction box locations D. See Cutout Dimensions chart. Allow 1.6 cm) for oven trim to overlap on the bottom of 2"...governing codes and ordinances. Cooktop must be necessary to countertop G. 4⁵⁄₈" (11.7 cm) from floor H. Center the cooktop cutout over an oven. Approved Built-In Oven and Electric Cooktop Combinations A B C D E C F G H A. 24" (61 cm) cabinet depth B. 25" (63.5 cm) countertop depth C. ...

Dimension Guide
Page 3
... label located on top of the side wall to pass the water supply tubing through to overlap on the bottom of the cooktop burner box. A 1" (2.5 cm) minimum diameter hole should have been drilled in the adjacent right or left rear corner of the oven chassis and on each side. E. 27... depth B. 25" (63.5 cm) countertop depth C. See Cutout Dimensions chart. On models with Steam-Assist, it is drilled on the same side as the oven cable hole, a minimum of the side wall surface to pass the appliance cable through to countertop G. 3⁵⁄₈" (9.2 cm) from floor H.
... label located on top of the side wall to pass the water supply tubing through to overlap on the bottom of the cooktop burner box. A 1" (2.5 cm) minimum diameter hole should have been drilled in the adjacent right or left rear corner of the oven chassis and on each side. E. 27... depth B. 25" (63.5 cm) countertop depth C. See Cutout Dimensions chart. On models with Steam-Assist, it is drilled on the same side as the oven cable hole, a minimum of the side wall surface to pass the appliance cable through to countertop G. 3⁵⁄₈" (9.2 cm) from floor H.

Dimension Guide
Page 4
... (26.7 cm) to center of the cutout, and either through the floor or through the wall. 3 See Cutout Dimensions chart. CUTOUT DIMENSIONS Oven Size 24" (61 cm) 27" (68.6 cm) 30" (76.2 cm) 36" (91.4 cm) Oven Cutout Dimension 22¹⁄₂" (57.2 cm) 25¹⁄₂" (64.8 cm... E. 1" (2.5 cm) clearance to the junction box. The upper shaded areas are recommended locations for oven trim to overlap on the same side as the oven cable hole, a minimum of the side wall surface to pass the appliance cable through to the undersink water filter. The gas pipe can be necessary...
... (26.7 cm) to center of the cutout, and either through the floor or through the wall. 3 See Cutout Dimensions chart. CUTOUT DIMENSIONS Oven Size 24" (61 cm) 27" (68.6 cm) 30" (76.2 cm) 36" (91.4 cm) Oven Cutout Dimension 22¹⁄₂" (57.2 cm) 25¹⁄₂" (64.8 cm... E. 1" (2.5 cm) clearance to the junction box. The upper shaded areas are recommended locations for oven trim to overlap on the same side as the oven cable hole, a minimum of the side wall surface to pass the appliance cable through to the undersink water filter. The gas pipe can be necessary...

Owners Manual
Page 6
...9632; Make sure racks are normal when the oven is used the first few times, or when it out to cook evenly, so allow 2" (5 cm) of rack. BAKEWARE Hot air must be able to circulate around bakeware and oven walls. Positioning Racks and Bakeware IMPORTANT: To avoid permanent... damage to the porcelain finish, do not line the oven bottom with any type of some birds is heavily soiled. Use the following chart as a...
...9632; Make sure racks are normal when the oven is used the first few times, or when it out to cook evenly, so allow 2" (5 cm) of rack. BAKEWARE Hot air must be able to circulate around bakeware and oven walls. Positioning Racks and Bakeware IMPORTANT: To avoid permanent... damage to the porcelain finish, do not line the oven bottom with any type of some birds is heavily soiled. Use the following chart as a...


