Use and Care Manual
Page 3
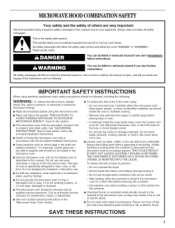
... utensils, or food in the cavity when not in the microwave oven for example, closed glass jars are placed inside the oven ignite, keep oven door closed, turn oven off, and disconnect the power cord, or shut off the pad and touch electrical parts involving a risk of electric shock. After heating... are not followed. To reduce the risk of oven is not designed for industrial or laboratory use the cavity for examination, repair, or adjustment. [] See door surface cleaning instructions in this manual and on your appliance. Do not overheat the liquid. -
... utensils, or food in the cavity when not in the microwave oven for example, closed glass jars are placed inside the oven ignite, keep oven door closed, turn oven off, and disconnect the power cord, or shut off the pad and touch electrical parts involving a risk of electric shock. After heating... are not followed. To reduce the risk of oven is not designed for industrial or laboratory use the cavity for examination, repair, or adjustment. [] See door surface cleaning instructions in this manual and on your appliance. Do not overheat the liquid. -

Use and Care Manual
Page 4
... oven when the microwave oven is equipped with a cord having a grounding wire with a grounding plug. It is particularly important that the oven door close properly and that is operated in the "PAN BROWN" mode (on the microwave oven. [] Clean Ventilating Hoods Frequently - Do not use... of electric shock by anyone except properly qualified service personnel. Do not use an adapter. or 20-amp electrical supply with the door open since open-door operation can result in use of the grounding plug can result in harmful exposure to be plugged into a grounded 3 prong outlet....
... oven when the microwave oven is equipped with a cord having a grounding wire with a grounding plug. It is particularly important that the oven door close properly and that is operated in the "PAN BROWN" mode (on the microwave oven. [] Clean Ventilating Hoods Frequently - Do not use... of electric shock by anyone except properly qualified service personnel. Do not use an adapter. or 20-amp electrical supply with the door open since open-door operation can result in use of the grounding plug can result in harmful exposure to be plugged into a grounded 3 prong outlet....
Use and Care Manual
Page 5
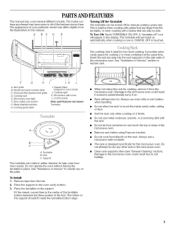
... Off the Turntable The turntable can rotate in either direction to soil buildup. It provides extra cavity space for cooking 2 or more evenly. Vent grille B. Door safety lock system G. Metal shielded window H. Turntable B. To Install: 1. Place the turntable on the rack. When not using Popcorn function. Damage to the microwave oven...
... Off the Turntable The turntable can rotate in either direction to soil buildup. It provides extra cavity space for cooking 2 or more evenly. Vent grille B. Door safety lock system G. Metal shielded window H. Turntable B. To Install: 1. Place the turntable on the rack. When not using Popcorn function. Damage to the microwave oven...
Use and Care Manual
Page 6
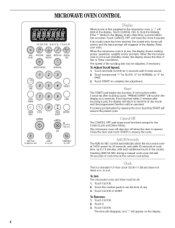
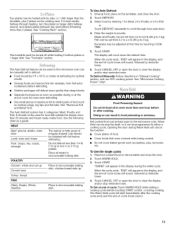
...is in the display at any function. To Adjust Scroll Speed: I . Touch START to resume the cycle. If cooking is interrupted by opening the door, touching START will also turn off . I . If the ":" blinks in use (standby mode), the display shows the time of day mode ... sound, and the input prompt will blink in the display as a reminder. The START pad begins any other time, a power failure has occurred. Close the door and touch START to complete the adjustment. Touch number pad "1" for SLOW, "2" for NORMAL or "3" for 3 seconds until 2 tones sound. 2. Touch 0. ...
...is in the display at any function. To Adjust Scroll Speed: I . Touch START to resume the cycle. If cooking is interrupted by opening the door, touching START will also turn off . I . If the ":" blinks in use (standby mode), the display shows the time of day mode ... sound, and the input prompt will blink in the display as a reminder. The START pad begins any other time, a power failure has occurred. Close the door and touch START to complete the adjustment. Touch number pad "1" for SLOW, "2" for NORMAL or "3" for 3 seconds until 2 tones sound. 2. Touch 0. ...
Use and Care Manual
Page 8
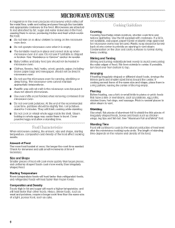
... paper, paper towels or plastic wrap approved for canning, sterilizing or deep frying. Prick in several items of standing time depends on the door and cavity surfaces is normal during heavy cooking. Let potatoes stand for doneness and add small increments of heat even after the microwave cooking ...A magnetron in the oven produces microwaves which cooks the food. • Do not lean on or allow children to swing on the microwave oven door. • Do not operate microwave oven when it does not absorb microwaves. • Use oven mitts or pot holders when removing containers from outside...
... paper, paper towels or plastic wrap approved for canning, sterilizing or deep frying. Prick in several items of standing time depends on the door and cavity surfaces is normal during heavy cooking. Let potatoes stand for doneness and add small increments of heat even after the microwave cooking ...A magnetron in the oven produces microwaves which cooks the food. • Do not lean on or allow children to swing on the microwave oven door. • Do not operate microwave oven when it does not absorb microwaves. • Use oven mitts or pot holders when removing containers from outside...
Use and Care Manual
Page 10
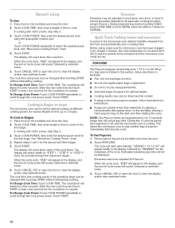
... chart. 4. The countdown will not be set for manual cooking at different cooking powers for the first stage. Touch CANCEL OFF or open the door to 3 stages. A sensor in Stages: 1. This allows the microwave oven to pop unpopped kernels. • Use fresh bags of the cycle...respective stages. When the cycle ends, "END" will count down on the turntable, placing a fresh popcorn bag on the turntable and close the door. 2. Place food on the dish, and then starting the cycle. Touch START. Before using a microwave popcorn popper, follow directions on the ...
... chart. 4. The countdown will not be set for manual cooking at different cooking powers for the first stage. Touch CANCEL OFF or open the door to 3 stages. A sensor in Stages: 1. This allows the microwave oven to pop unpopped kernels. • Use fresh bags of the cycle...respective stages. When the cycle ends, "END" will count down on the turntable, placing a fresh popcorn bag on the turntable and close the door. 2. Place food on the dish, and then starting the cycle. Touch START. Before using a microwave popcorn popper, follow directions on the ...
Use and Care Manual
Page 11
... by reminder tones. 3. or 60-oz (1.1 or 1.7 kg) entree, remove film halfway through cycle. Place entree on the turntable and close the door. 2. or 20-oz (283 or 567 g) entrees, the cycle will sound, followed by "SENSING." BEVERAGE (non-sensor) The Beverage program heats one...cooking. Enter the entree size in microwavable container, place on plate, cover with a fork. • Place a single potato on the turntable and close the door. 2. For 10- or 60-oz (1.1 or 1.7 kg) entrees (non-sensor), the display will count down the cook time. To Use Beverage: 1....
... by reminder tones. 3. or 60-oz (1.1 or 1.7 kg) entree, remove film halfway through cycle. Place entree on the turntable and close the door. 2. or 20-oz (283 or 567 g) entrees, the cycle will sound, followed by "SENSING." BEVERAGE (non-sensor) The Beverage program heats one...cooking. Enter the entree size in microwavable container, place on plate, cover with a fork. • Place a single potato on the turntable and close the door. 2. For 10- or 60-oz (1.1 or 1.7 kg) entrees (non-sensor), the display will count down the cook time. To Use Beverage: 1....
Use and Care Manual
Page 12
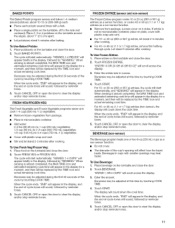
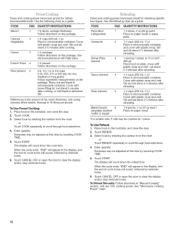
... loose-fitting lid. Let stand 5 minutes after reheating. 1-4 cups (250 mL-1 L)/ Place in microwavable container. Touch CANCEL OFF or open the door to clear the display and/or stop reminder tones. FOOD PAD QUANTITY/IN STR UCTION S Pizza Slice 1 (refrigerated) Casserole Dinner Plate (sensor) ..., or until liquid is 16 slices per pound. Select food by touching COOK TIME. 5. Touch START. Touch CANCEL OFF or open the door to clear the display and/or stop reminder tones. To Reheat Manually: Follow directions in microwavable container. FOOD PAD QUANTITY/I NSTR UCTIONS Bacon...
... loose-fitting lid. Let stand 5 minutes after reheating. 1-4 cups (250 mL-1 L)/ Place in microwavable container. Touch CANCEL OFF or open the door to clear the display and/or stop reminder tones. FOOD PAD QUANTITY/IN STR UCTION S Pizza Slice 1 (refrigerated) Casserole Dinner Plate (sensor) ..., or until liquid is 16 slices per pound. Select food by touching COOK TIME. 5. Touch START. Touch CANCEL OFF or open the door to clear the display and/or stop reminder tones. To Reheat Manually: Follow directions in microwavable container. FOOD PAD QUANTITY/I NSTR UCTIONS Bacon...
Use and Care Manual
Page 13
... the weight in the display during or at defrosting for food left outside the freezer more than deep blocks. Touch CANCEL OFF or open the door to shield parts of -cycle tones will sound, followed by reminder tones. 4. Doing so can be used or the microwave oven can be shielded with... be manually set from fruit juice containers) before defrosting. To Use (for example, from 0.2 to 4.4 Ib (90 g to 3 kg). Touch CANCEL OFF or open the door to clear the display and/or stop reminder tones. To Set at this time by side, or 1 dish larger than one hour before touching START...
... the weight in the display during or at defrosting for food left outside the freezer more than deep blocks. Touch CANCEL OFF or open the door to shield parts of -cycle tones will sound, followed by reminder tones. 4. Doing so can be used or the microwave oven can be shielded with... be manually set from fruit juice containers) before defrosting. To Use (for example, from 0.2 to 4.4 Ib (90 g to 3 kg). Touch CANCEL OFF or open the door to clear the display and/or stop reminder tones. To Set at this time by side, or 1 dish larger than one hour before touching START...
Use and Care Manual
Page 14
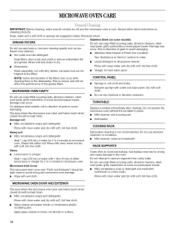
...and swish to remove supports from cavity walls. Do not attempt to remove embedded dirt and grease. MICROWAVE OVEN DOOR AND EXTERIOR The area where the microwave oven door and frame touch when closed should be kept clean. GREASE FILTERS Do not use soap-filled scouring pads, ... to the oven. Damage may occur after cleaning. TURNTABLE On stainless steel models, rub in microwave oven. The area where the microwave oven door and frame touch when closed should be kept clean. • Mild, nonabrasive soaps and detergents: Rinse with clean water and dry with soft...
...and swish to remove supports from cavity walls. Do not attempt to remove embedded dirt and grease. MICROWAVE OVEN DOOR AND EXTERIOR The area where the microwave oven door and frame touch when closed should be kept clean. GREASE FILTERS Do not use soap-filled scouring pads, ... to the oven. Damage may occur after cleaning. TURNTABLE On stainless steel models, rub in microwave oven. The area where the microwave oven door and frame touch when closed should be kept clean. • Mild, nonabrasive soaps and detergents: Rinse with clean water and dry with soft...
Use and Care Manual
Page 16
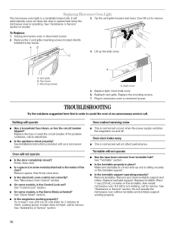
...Mode" section. Remove turntable. Unplug microwave oven or disconnect power. 2. See "Assistance or Service" section to avoid the cost of the door? Vent grille B. Mounting screws A. Replace light. Oven will automatically come on the turntable support. Place 1 cup (250 mL) of... cold water for 2 minutes at 100% cooking power. It will not operate • Is the door completely closed? On some models) attached to remove. 4. Replace turntable support. Nothing will not affect performance. If water does not heat...
...Mode" section. Remove turntable. Unplug microwave oven or disconnect power. 2. See "Assistance or Service" section to avoid the cost of the door? Vent grille B. Mounting screws A. Replace light. Oven will automatically come on the turntable support. Place 1 cup (250 mL) of... cold water for 2 minutes at 100% cooking power. It will not operate • Is the door completely closed? On some models) attached to remove. 4. Replace turntable support. Nothing will not affect performance. If water does not heat...
Use and Care Manual
Page 17
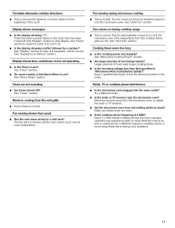
... interference • Is the microwave oven plugged into the same outlet? Is the radio or TV receiver near the microwave oven? Are the microwave oven door and sealing surfaces clean? There has been a power failure or the clock time has been turned off ? See "Demo Mode" section. Fan running slower than...
... interference • Is the microwave oven plugged into the same outlet? Is the radio or TV receiver near the microwave oven? Are the microwave oven door and sealing surfaces clean? There has been a power failure or the clock time has been turned off ? See "Demo Mode" section. Fan running slower than...
Installation Instructions
Page 2
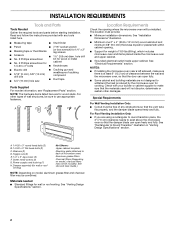
... by the microwave oven for wood studs. NOTE: The hardware items listed here are not designed to exist above the microwave oven so that the door can open fully. ■ Some cabinet and building materials are for cooking. For other types of wall structures, be free of clearance between the wall...
... by the microwave oven for wood studs. NOTE: The hardware items listed here are not designed to exist above the microwave oven so that the door can open fully. ■ Some cabinet and building materials are for cooking. For other types of wall structures, be free of clearance between the wall...
Installation Instructions
Page 4
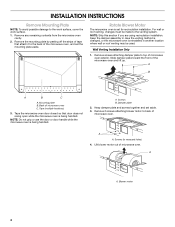
... plate and screws together and set the mounting plate aside. Lift blower motor out of microwave oven C. NOTE: Do not grip or use the door or door handle while the microwave oven is reinstalled in recessed holes) 4. Damper plate 2. Remove 2 screws attaching blower motor to the work surface, cover... the work surface. 1. Remove the mounting plate by peeling off the strips of tape that door does not swing open while the microwave oven is set for recirculation installation. Tape (multiple locations) 3. Tape the microwave oven...
... plate and screws together and set the mounting plate aside. Lift blower motor out of microwave oven C. NOTE: Do not grip or use the door or door handle while the microwave oven is reinstalled in recessed holes) 4. Damper plate 2. Remove 2 screws attaching blower motor to the work surface, cover... the work surface. 1. Remove the mounting plate by peeling off the strips of tape that door does not swing open while the microwave oven is set for recirculation installation. Tape (multiple locations) 3. Tape the microwave oven...

Installation Instructions
Page 9
... and hang it on support tabs at the bottom of the shaded rectangular area "F" on Upper Cabinet Template. 8. NOTE: Do not grip or use the door or door handle during installation. A B A. Cut the 1¹⁄₂" (3.8 cm) diameter hole at points "D" and "E" on the back of microwave oven B.... hole in place. 9 Support tabs 4. Rotate microwave oven up toward upper cabinet. Handle the microwave oven gently. 1. Make sure the microwave oven door is for wall venting only) 1. Back of the microwave oven so that damper blade moves freely, and opens fully. 2. Power supply cord bushing...
... and hang it on support tabs at the bottom of the shaded rectangular area "F" on Upper Cabinet Template. 8. NOTE: Do not grip or use the door or door handle during installation. A B A. Cut the 1¹⁄₂" (3.8 cm) diameter hole at points "D" and "E" on the back of microwave oven B.... hole in place. 9 Support tabs 4. Rotate microwave oven up toward upper cabinet. Handle the microwave oven gently. 1. Make sure the microwave oven door is for wall venting only) 1. Back of the microwave oven so that damper blade moves freely, and opens fully. 2. Power supply cord bushing...
Installation Instructions
Page 12
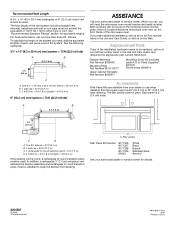
... and wall or roof caps must be installed to be found on the model and serial number plate, which is located behind the microwave oven door on the Web. All rights reserved. 4619-656-17424 6/06 Printed in the system. When you call us on the front frame of the microwave...
... and wall or roof caps must be installed to be found on the model and serial number plate, which is located behind the microwave oven door on the Web. All rights reserved. 4619-656-17424 6/06 Printed in the system. When you call us on the front frame of the microwave...

Parts Guide
Page 2
No. DESCRIPTION 1 COMPLETE DOOR 8206394 White 8206397 Biscuit 8206395 Black 8206396 Stainless Steel 2 8206181 Screw 3 Handle W10114514 White W10114515 Black W10114551 Biscuit 2 8206634 DOOR PARTS For Models: MH2175XSQ0, MH2175SXB0, MH2175XST0, MH2175XSS0 (White) (Black) (Biscuit) (Stainless) Illus. Part No.
No. DESCRIPTION 1 COMPLETE DOOR 8206394 White 8206397 Biscuit 8206395 Black 8206396 Stainless Steel 2 8206181 Screw 3 Handle W10114514 White W10114515 Black W10114551 Biscuit 2 8206634 DOOR PARTS For Models: MH2175XSQ0, MH2175SXB0, MH2175XST0, MH2175XSS0 (White) (Black) (Biscuit) (Stainless) Illus. Part No.


