Use and Care Manual
Page 2
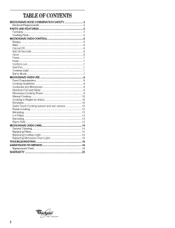
...3 Electrical Requirements 4 PARTS AND FEATURES 5 Turntable 5 Cooking Rack 5 MICROWAVE OVEN CONTROL 6 Display 6 Start 6 Cancel Off 6 Add 30 Seconds 6 Clock 6 Tones 7 Timer 7 Control Lock 7 Vent Fan 7 Cooktop Light 7 Demo Mode 7 MICROWAVE OVEN USE 8 Food Characteristics 8 Cooking Guidelines 8 Cookware and Dinnerware 9 Aluminum Foil and Metal 9 Microwave Cooking Power 9 Manual Cooking 10 Cooking in Stages (or steps 10 Doneness 10 Quick Touch Cooking (sensor and non-sensor 10 Preset Cooking 12 Reheating 12 2-4 Plates 13 Defrosting 13 Warm Hold 13 MICROWAVE OVEN CARE...
...3 Electrical Requirements 4 PARTS AND FEATURES 5 Turntable 5 Cooking Rack 5 MICROWAVE OVEN CONTROL 6 Display 6 Start 6 Cancel Off 6 Add 30 Seconds 6 Clock 6 Tones 7 Timer 7 Control Lock 7 Vent Fan 7 Cooktop Light 7 Demo Mode 7 MICROWAVE OVEN USE 8 Food Characteristics 8 Cooking Guidelines 8 Cookware and Dinnerware 9 Aluminum Foil and Metal 9 Microwave Cooking Power 9 Manual Cooking 10 Cooking in Stages (or steps 10 Doneness 10 Quick Touch Cooking (sensor and non-sensor 10 Preset Cooking 12 Reheating 12 2-4 Plates 13 Defrosting 13 Warm Hold 13 MICROWAVE OVEN CARE...
Use and Care Manual
Page 3
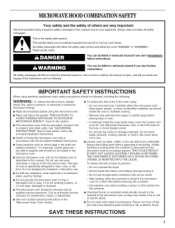
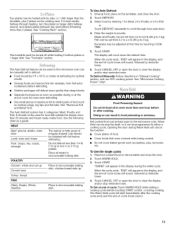
... adjustment. [] See door surface cleaning instructions in the microwave oven for a short time before and halfway through heating it has been damaged or dropped. [] The microwave oven should not be heated in the microwave oven. [] Use the microwave oven only for industrial or laboratory use as water, coffee, or tea are very important. After heating, allow the container to potential hazards that can burn off power at the fuse or circuit breaker panel...
... adjustment. [] See door surface cleaning instructions in the microwave oven for a short time before and halfway through heating it has been damaged or dropped. [] The microwave oven should not be heated in the microwave oven. [] Use the microwave oven only for industrial or laboratory use as water, coffee, or tea are very important. After heating, allow the container to potential hazards that can burn off power at the fuse or circuit breaker panel...

Use and Care Manual
Page 4
... latches (broken or loosened), (3) Door seals and sealing surfaces. (d) The oven should not be plugged into a grounded 3 prong outlet. Do not remove ground prong. Observe all cord connected appliances: The microwave oven must be adjusted or repaired by providing an escape wire for example, near a kitchen sink, in death, fire, or electrical shock. If the power supply cord is equipped with a cord having a grounding wire with the door open since open-door operation...
... latches (broken or loosened), (3) Door seals and sealing surfaces. (d) The oven should not be plugged into a grounded 3 prong outlet. Do not remove ground prong. Observe all cord connected appliances: The microwave oven must be adjusted or repaired by providing an escape wire for example, near a kitchen sink, in death, fire, or electrical shock. If the power supply cord is equipped with a cord having a grounding wire with the door open since open-door operation...
Use and Care Manual
Page 5
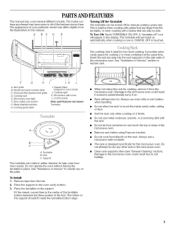
... "General Cleaning" section). This is ideal for cooking 2 or more evenly. Microwave inlet cover L. Place the support on the rack. Rack will appear in oven cavity) J. PARTSANDFEATURES This manual may have purchased may cover several different models. Microwave oven light F. Grease filters (shipped in the display. Turntable B. Damage to use metal cookware, utensils, or a browning dish with 2 plates that are larger than the turntable, or when cooking with the rack. F G HI JK L A. Charcoal filter (behind vent...
... "General Cleaning" section). This is ideal for cooking 2 or more evenly. Microwave inlet cover L. Place the support on the rack. Rack will appear in oven cavity) J. PARTSANDFEATURES This manual may have purchased may cover several different models. Microwave oven light F. Grease filters (shipped in the display. Turntable B. Damage to use metal cookware, utensils, or a browning dish with 2 plates that are larger than the turntable, or when cooking with the rack. F G HI JK L A. Charcoal filter (behind vent...
Use and Care Manual
Page 6
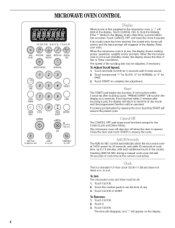
... during a manual cook cycle will scroll in the display. VENTFAN Hi'Med.Lo.Off LIGHT Hi.Lo.Off TURNTABLE On'Off The ADD 30 SEC control automatically starts the microwave oven at the current cook power. Touch 0. 3. MICROWAVEOVENCONTROL SENSOR QUICK TOUCH ADD POPCORN BAKED FRESHVEG FROZEN 30 SEC POTATO VE6 FROZENENTREE BEVERAGE cook © COOK POWER ©© WARM HOLD CLOCK sIAR7 RENEAT © COOK @© TIMER DEFROST Set/Off OFF...
... during a manual cook cycle will scroll in the display. VENTFAN Hi'Med.Lo.Off LIGHT Hi.Lo.Off TURNTABLE On'Off The ADD 30 SEC control automatically starts the microwave oven at the current cook power. Touch 0. 3. MICROWAVEOVENCONTROL SENSOR QUICK TOUCH ADD POPCORN BAKED FRESHVEG FROZEN 30 SEC POTATO VE6 FROZENENTREE BEVERAGE cook © COOK POWER ©© WARM HOLD CLOCK sIAR7 RENEAT © COOK @© TIMER DEFROST Set/Off OFF...
Use and Care Manual
Page 7
... hold number pad "2" to turn tones back on. Repeat to prevent unintended use the microwave oven. To protect the microwave oven, if the temperature from the range or cooktop below the microwave oven gets too hot, the vent fan will automatically turn off and remove the DEMO icon from display. The vent fan is locked, only the Vent Fan and Light pads will sound, followed by reminder tones. Touch TIMER SET/OFE The TIMER icon will...
... hold number pad "2" to turn tones back on. Repeat to prevent unintended use the microwave oven. To protect the microwave oven, if the temperature from the range or cooktop below the microwave oven gets too hot, the vent fan will automatically turn off and remove the DEMO icon from display. The vent fan is locked, only the Vent Fan and Light pads will sound, followed by reminder tones. Touch TIMER SET/OFE The TIMER icon will...
Use and Care Manual
Page 8
... cook or reheat whole eggs inside the shell. Steam buildup in microwave oven. • Do not use . Condensation on the microwave oven door. • Do not operate microwave oven when it does not absorb microwaves. • Use oven mitts or pot holders when removing containers from microwave oven. • Do not overcook potatoes. Prick in a ring pattern, leaving the center of a light, porous food, such as meat and potatoes, require a longer cook time...
... cook or reheat whole eggs inside the shell. Steam buildup in microwave oven. • Do not use . Condensation on the microwave oven door. • Do not operate microwave oven when it does not absorb microwaves. • Use oven mitts or pot holders when removing containers from microwave oven. • Do not overcook potatoes. Prick in a ring pattern, leaving the center of a light, porous food, such as meat and potatoes, require a longer cook time...

Use and Care Manual
Page 9
... a general guide for microwave oven use the turntable. • Do not allow aluminum foil or metal to touch the inside cavity walls, ceiling or floor. • Always use . Paper: Towels, Dinnerware, Napkins Use nonrecycled and those approved by the manufacturer for the suggested cooking power of meat, ground meat, poultry pieces and fish fillets. Always use cookware or dinnerware if it . 2. Cooking and heating foods that need a cook power lower...
... a general guide for microwave oven use the turntable. • Do not allow aluminum foil or metal to touch the inside cavity walls, ceiling or floor. • Always use . Paper: Towels, Dinnerware, Napkins Use nonrecycled and those approved by the manufacturer for the suggested cooking power of meat, ground meat, poultry pieces and fish fillets. Always use cookware or dinnerware if it . 2. Cooking and heating foods that need a cook power lower...
Use and Care Manual
Page 10
.... • Cooking results may be changed after touching START without interrupting cooking. To Change Cook Time: Touch COOK TIME. Touch START. The display will count down on the turntable, placing a fresh popcorn bag on the turntable and close the door. 2. The cook time and cooking power of the container and the microwave oven cavity are programmed to clear the display and/or stop reminder tones. Before using the appropriate number pad or Touch COOK POWER repeatedly...
.... • Cooking results may be changed after touching START without interrupting cooking. To Change Cook Time: Touch COOK TIME. Touch START. The display will count down on the turntable, placing a fresh popcorn bag on the turntable and close the door. 2. The cook time and cooking power of the container and the microwave oven cavity are programmed to clear the display and/or stop reminder tones. Before using the appropriate number pad or Touch COOK POWER repeatedly...
Use and Care Manual
Page 13
... a guide. To Use Auto Defrost: 1. Hot cooked food can be manually set from fruit juice containers) before touching START control, or during cooking. The Warm Hold cycle will cancel the function. • Cover plates of food such as pastries, pies, turnovers, etc. Two plates may be turned off while heating 2 bottom plates or 1 larger dish. Unwrap foods and remove lids (for single cycle): 1. Shallow packages will appear in oven...
... a guide. To Use Auto Defrost: 1. Hot cooked food can be manually set from fruit juice containers) before touching START control, or during cooking. The Warm Hold cycle will cancel the function. • Cover plates of food such as pastries, pies, turnovers, etc. Two plates may be turned off while heating 2 bottom plates or 1 larger dish. Unwrap foods and remove lids (for single cycle): 1. Shallow packages will appear in oven...
Use and Care Manual
Page 14
...-free cloth. Do not use chemical or abrasive cleansers. TURNTABLE On stainless steel models, rub in microwave oven. GREASE FILTERS Do not use abrasive RACK SUPPORTS Odors • Lemon juice or vinegar: Clean often to 5 minutes in direction of either lemon juice or vinegar for 2 to avoid soil buildup. This is normal, and will soften soil. MICROWAVE OVEN DOOR AND EXTERIOR The area where the microwave oven door...
...-free cloth. Do not use chemical or abrasive cleansers. TURNTABLE On stainless steel models, rub in microwave oven. GREASE FILTERS Do not use abrasive RACK SUPPORTS Odors • Lemon juice or vinegar: Clean often to 5 minutes in direction of either lemon juice or vinegar for 2 to avoid soil buildup. This is normal, and will soften soil. MICROWAVE OVEN DOOR AND EXTERIOR The area where the microwave oven door...
Use and Care Manual
Page 15
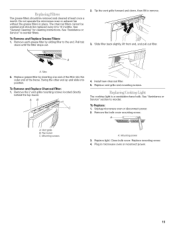
See "General Cleaning" for cleaning instructions. Remove the 2 vent grille mounting screws located directly behind the top louver. The cooktop light is a candelabra base bulb. See "Assistance or Service" section to reorder filters. To Remove and Replace Grease Filters: 1. Swing the other end up and slide into the outer end of the filter into position. Top louver C. Mounting screw 3. See "Assistance or Service" to reorder. Remove each grease filter by inserting one end...
See "General Cleaning" for cleaning instructions. Remove the 2 vent grille mounting screws located directly behind the top louver. The cooktop light is a candelabra base bulb. See "Assistance or Service" section to reorder filters. To Remove and Replace Grease Filters: 1. Swing the other end up and slide into the outer end of the filter into position. Top louver C. Mounting screw 3. See "Assistance or Service" to reorder. Remove each grease filter by inserting one end...
Use and Care Manual
Page 16
... C. Reattach vent grille. Replace the fuse or reset the circuit breaker. If the problem continues, call . Is a spacer (on some models) attached to the inside of water on when the door is opened and when the microwave oven is operating. Is the electronic oven control set ? Make sure turntable is correct side up the bulb cover. Is the turntable support operating properly? Place 1 cup (250 mL) of the door? It will operate Has a household fuse blown...
... C. Reattach vent grille. Replace the fuse or reset the circuit breaker. If the problem continues, call . Is a spacer (on some models) attached to the inside of water on when the door is opened and when the microwave oven is operating. Is the electronic oven control set ? Make sure turntable is correct side up the bulb cover. Is the turntable support operating properly? Place 1 cup (250 mL) of the door? It will operate Has a household fuse blown...
Use and Care Manual
Page 17
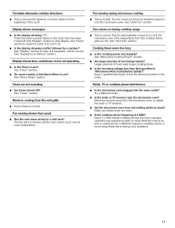
... the microwave oven? Turntable alternates rotation directions • This is normal. See "Clock" section to reset the clock or to turn it reappears, call for service. See "Demo Mode" section. Fan comes on during oven operation. 17 Cooking times seem too long • Is the cooking power set properly? Radio, TV or cordless phone interference • Is the microwave oven plugged into the same outlet? Make sure these items during cooktop usage...
... the microwave oven? Turntable alternates rotation directions • This is normal. See "Clock" section to reset the clock or to turn it reappears, call for service. See "Demo Mode" section. Fan comes on during oven operation. 17 Cooking times seem too long • Is the cooking power set properly? Radio, TV or cordless phone interference • Is the microwave oven plugged into the same outlet? Make sure these items during cooktop usage...
Use and Care Manual
Page 18
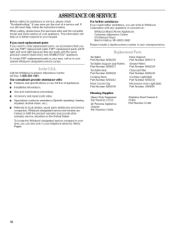
...assistance with: • Features and specifications on our full line of a service call us to better respond to your appliance. Turntable Part Number 8206226 Turntable Support and Rollers Part Number 8206227 Turntable Hub Part Number 8206228 Cooking Rack Part Number 8205042 Rack Corner Clip Part Number 8205039 Rack Support Part Number 8206118 Grease Filters Part Number 8206229 Charcoal Filter Part Number 8206230 Cooktop Light Bulb Part Number 8206232 Microwave Oven Light Bulb Part Number 4393681 Cleaning Supplies Heavy Duty Degreaser Part Number 31552 All-Purpose Appliance Cleaner...
...assistance with: • Features and specifications on our full line of a service call us to better respond to your appliance. Turntable Part Number 8206226 Turntable Support and Rollers Part Number 8206227 Turntable Hub Part Number 8206228 Cooking Rack Part Number 8205042 Rack Corner Clip Part Number 8205039 Rack Support Part Number 8206118 Grease Filters Part Number 8206229 Charcoal Filter Part Number 8206230 Cooktop Light Bulb Part Number 8206232 Microwave Oven Light Bulb Part Number 4393681 Cleaning Supplies Heavy Duty Degreaser Part Number 31552 All-Purpose Appliance Cleaner...

Use and Care Manual
Page 20
... with published installation instructions. 11. Repairs to parts or systems resulting from the date of the Use & Care Guide. Replacement parts or repair labor costs when the major appliance is not installed in accordance with the product, Whirlpool Corporation or Whirlpool Canada LP (hereafter "Whirlpool") will need service, first see the "Troubleshooting" section of purchase, when this book and your authorized Whirlpool dealer to repair or replace appliance light bulbs, air filters or water filters. Contact your...
... with published installation instructions. 11. Repairs to parts or systems resulting from the date of the Use & Care Guide. Replacement parts or repair labor costs when the major appliance is not installed in accordance with the product, Whirlpool Corporation or Whirlpool Canada LP (hereafter "Whirlpool") will need service, first see the "Troubleshooting" section of purchase, when this book and your authorized Whirlpool dealer to repair or replace appliance light bulbs, air filters or water filters. Contact your...
Installation Instructions
Page 1
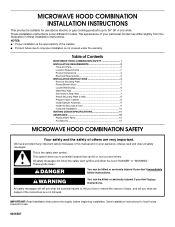
... Assembly 9 Install the Microwave Oven 9 Complete Installation 10 VENTING DESIGN SPECIFICATIONS 11 ASSISTANCE 12 Replacement Parts 12 Accessories 12 MICROWAVE HOOD COMBINATION SAFETY Your safety and the safety of others . All safety messages will follow the safety alert symbol and either the word "DANGER" or "WARNING." Table of Contents MICROWAVE HOOD COMBINATION SAFETY 1 INSTALLATION REQUIREMENTS 2 Tools and Parts 2 Location Requirements 2 Product Dimensions 3 Electrical Requirements 3 INSTALLATION INSTRUCTIONS 4 Remove Mounting Plate 4 Rotate Blower Motor 4 Locate Wall Stud...
... Assembly 9 Install the Microwave Oven 9 Complete Installation 10 VENTING DESIGN SPECIFICATIONS 11 ASSISTANCE 12 Replacement Parts 12 Accessories 12 MICROWAVE HOOD COMBINATION SAFETY Your safety and the safety of others . All safety messages will follow the safety alert symbol and either the word "DANGER" or "WARNING." Table of Contents MICROWAVE HOOD COMBINATION SAFETY 1 INSTALLATION REQUIREMENTS 2 Tools and Parts 2 Location Requirements 2 Product Dimensions 3 Electrical Requirements 3 INSTALLATION INSTRUCTIONS 4 Remove Mounting Plate 4 Rotate Blower Motor 4 Locate Wall Stud...
Installation Instructions
Page 2
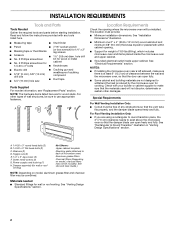
... opening . ■ Support for wall or roof venting. Toggle nuts (2) E. 1/4" x 2" lag screws (2) F. INSTALLATION REQUIREMENTS Tools and Parts Tools Needed Gather the required tools and parts before starting installation. For Roof Venting Installation Only: ■ If you are for wall or roof venting) Not Shown: Upper cabinet template Mounting plate (attached to exist above the microwave oven so that the materials used will be installed. For other damages. Check with any obstructions so that the door...
... opening . ■ Support for wall or roof venting. Toggle nuts (2) E. 1/4" x 2" lag screws (2) F. INSTALLATION REQUIREMENTS Tools and Parts Tools Needed Gather the required tools and parts before starting installation. For Roof Venting Installation Only: ■ If you are for wall or roof venting) Not Shown: Upper cabinet template Mounting plate (attached to exist above the microwave oven so that the materials used will be installed. For other damages. Check with any obstructions so that the door...
Installation Instructions
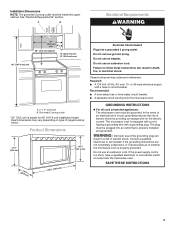
Page 3
... in death, fire, or electrical shock. or 20-amp electrical supply with a grounding plug. Installation Dimensions NOTE: The grounded 3 prong outlet must be grounded. See "Electrical Requirements" section. Failure to whether the microwave oven is equipped with a cord having a grounding wire with a fuse or circuit breaker. Recommended: ■ A time-delay fuse or time-delay circuit breaker. ■ A separate circuit serving only this microwave oven. Exact dimensions may vary depending on type of electric shock. A B Electrical Requirements WARNING 30" (76...
... in death, fire, or electrical shock. or 20-amp electrical supply with a grounding plug. Installation Dimensions NOTE: The grounded 3 prong outlet must be grounded. See "Electrical Requirements" section. Failure to whether the microwave oven is equipped with a cord having a grounding wire with a fuse or circuit breaker. Recommended: ■ A time-delay fuse or time-delay circuit breaker. ■ A separate circuit serving only this microwave oven. Exact dimensions may vary depending on type of electric shock. A B Electrical Requirements WARNING 30" (76...
Installation Instructions
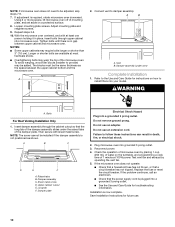
Page 10
... adjusted, skip steps 7-9. 7. Connect vent to follow these instructions can result in place, insert bolts through the cabinet cutout so that a circuit breaker has not tripped. Refer to the Use and Care Guide for instructions on a protected surface. 8. Bolts For Roof Venting Installation Only 1. A B C D E F A. Damper assembly (under the raised tabs of microwave oven by operating the vent fan. 5. Do not use an adapter. Check the operation of the damper plate. If the problem...
... adjusted, skip steps 7-9. 7. Connect vent to follow these instructions can result in place, insert bolts through the cabinet cutout so that a circuit breaker has not tripped. Refer to the Use and Care Guide for instructions on a protected surface. 8. Bolts For Roof Venting Installation Only 1. A B C D E F A. Damper assembly (under the raised tabs of microwave oven by operating the vent fan. 5. Do not use an adapter. Check the operation of the damper plate. If the problem...


