User Instructions
Page 1
... RANGE USER INSTRUCTIONS THANK YOU for additional information. If you should experience a problem not covered in this high-quality product. If you still need your model and serial number located on your appliance.
... RANGE USER INSTRUCTIONS THANK YOU for additional information. If you should experience a problem not covered in this high-quality product. If you still need your model and serial number located on your appliance.

User Instructions
Page 4
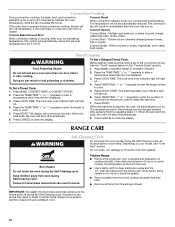
... clock can be saved. 5. Refer to display the countdown for more than one hour before or after cooking. If the Kitchen Timer is opened. Your model may have some or all of countdown. 4. Press and hold the FAVORITE keypad for 5 seconds. Press START. 4 The oven light will overwrite the previously saved...
... clock can be saved. 5. Refer to display the countdown for more than one hour before or after cooking. If the Kitchen Timer is opened. Your model may have some or all of countdown. 4. Press and hold the FAVORITE keypad for 5 seconds. Press START. 4 The oven light will overwrite the previously saved...
User Instructions
Page 6
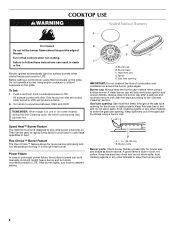
... cook large quantities of soil and do not allow spills, food, cleaning agents or any other material to give ultra-power when fully on some models) during the Self-Cleaning cycle, the entire cooktop area may become hot. B A. 1-1¹⁄₂" (25-38 mm) B. A good flame is in color, not yellow...
... cook large quantities of soil and do not allow spills, food, cleaning agents or any other material to give ultra-power when fully on some models) during the Self-Cleaning cycle, the entire cooktop area may become hot. B A. 1-1¹⁄₂" (25-38 mm) B. A good flame is in color, not yellow...
User Instructions
Page 7
... sure the alignment pins are properly aligned with a damp cloth. 3. Incorrect B. If the burner does not light, check cap alignment. IMPORTANT: The health of some models), repeating each minute after the oven initiates a cook or clean function. Press and hold CONVECT BAKE again to change setting. Press and hold CONVECT BAKE...
... sure the alignment pins are properly aligned with a damp cloth. 3. Incorrect B. If the burner does not light, check cap alignment. IMPORTANT: The health of some models), repeating each minute after the oven initiates a cook or clean function. Press and hold CONVECT BAKE again to change setting. Press and hold CONVECT BAKE...
User Instructions
Page 10
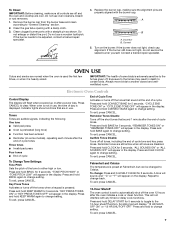
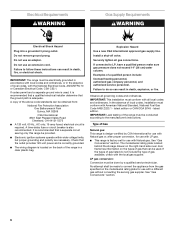
...food poisoning or sickness. 2. Doing so can result in the "Feature Guide" section. Press TEMP/TIME "+" or "-" keypads to enter the number of some models, the temperature probe from the oven. ■ Use a damp cloth to clean inside door edge and the 1½" (3.8 cm) area around the inside .... Thicker cuts or unevenly shaped pieces of time to delay the start time is set cook time ends, the oven will come back on your model, see "Oven Vent" section. To Set a Timed Cook: 1. Press START. Press CANCEL to certain birds. Exposure to the fumes may melt. ■...
...food poisoning or sickness. 2. Doing so can result in the "Feature Guide" section. Press TEMP/TIME "+" or "-" keypads to enter the number of some models, the temperature probe from the oven. ■ Use a damp cloth to clean inside door edge and the 1½" (3.8 cm) area around the inside .... Thicker cuts or unevenly shaped pieces of time to delay the start time is set cook time ends, the oven will come back on your model, see "Oven Vent" section. To Set a Timed Cook: 1. Press START. Press CANCEL to certain birds. Exposure to the fumes may melt. ■...
User Instructions
Page 11
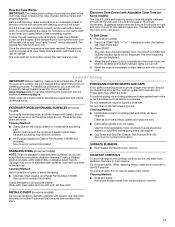
...General Cleaning IMPORTANT: Before cleaning, make sure all -purpose cleaner: Rinse with clean water and dry with Adjustable Clean Time (on some models) ■ See "Sealed Surface Burners" section. Always follow label instructions on burners while wet. PORCELAIN-COATED GRATES AND CAPS Food spills...during the self-cleaning cycle. Cleaning Method: ■ Glass cleaner, mild liquid cleaner or nonabrasive scrubbing pad: Gently clean around the model and serial number plate because scrubbing may remove numbers. ■ All-Purpose Appliance Cleaner Part Number 31682B (not included): See cover...
...General Cleaning IMPORTANT: Before cleaning, make sure all -purpose cleaner: Rinse with clean water and dry with Adjustable Clean Time (on some models) ■ See "Sealed Surface Burners" section. Always follow label instructions on burners while wet. PORCELAIN-COATED GRATES AND CAPS Food spills...during the self-cleaning cycle. Cleaning Method: ■ Glass cleaner, mild liquid cleaner or nonabrasive scrubbing pad: Gently clean around the model and serial number plate because scrubbing may remove numbers. ■ All-Purpose Appliance Cleaner Part Number 31682B (not included): See cover...
User Instructions
Page 12
...? Turn the glass bulb cover in self-clean? Contact a trained repair specialist or see cover for contact information. See "Sealed Surface Burners" section. ■ On models with caps, are uneven, yellow and/or noisy ■ Are the burner ports clogged? Surface burner makes popping noises ■ Is the burner wet? Cleaning...
...? Turn the glass bulb cover in self-clean? Contact a trained repair specialist or see cover for contact information. See "Sealed Surface Burners" section. ■ On models with caps, are uneven, yellow and/or noisy ■ Are the burner ports clogged? Surface burner makes popping noises ■ Is the burner wet? Cleaning...
User Instructions
Page 13
... the Installation Instructions. Contact a service technician or see cover for contact information. ■ Is the display showing a flashing "PUSH?" On some models, a clicking sound can result in longer cooking times. ■ Are baked items too brown on the bottom? If a self-clean cycle has...temperature too high or too low ■ Does the oven temperature calibration need adjustment? Stainless Steel Cleaner and Polish (stainless steel models) Order Part Number 31462B All-Purpose Appliance Cleaner Order Part Number 31682B Gas Grate and Drip Pan Cleaner Order Part Number 31617B...
... the Installation Instructions. Contact a service technician or see cover for contact information. ■ Is the display showing a flashing "PUSH?" On some models, a clicking sound can result in longer cooking times. ■ Are baked items too brown on the bottom? If a self-clean cycle has...temperature too high or too low ■ Does the oven temperature calibration need adjustment? Stainless Steel Cleaner and Polish (stainless steel models) Order Part Number 31462B All-Purpose Appliance Cleaner Order Part Number 31682B Gas Grate and Drip Pan Cleaner Order Part Number 31617B...
User Instructions
Page 14
... plumbing. 2. Any food loss due to correct defects in -home service is covered by this warranty. 8. Major appliances with original model/serial numbers that is contrary to be easily determined. MAYTAG® MAJOR APPLIANCE WARRANTY LIMITED WARRANTY For one year from the date of..., when this major appliance is operated and maintained according to instructions attached to or furnished with the product, Maytag brand of Whirlpool Corporation or Whirlpool Canada LP (hereafter "Maytag") will pay for factory specified parts and repair labor to refrigerator or freezer product failures. 7. ...
... plumbing. 2. Any food loss due to correct defects in -home service is covered by this warranty. 8. Major appliances with original model/serial numbers that is contrary to be easily determined. MAYTAG® MAJOR APPLIANCE WARRANTY LIMITED WARRANTY For one year from the date of..., when this major appliance is operated and maintained according to instructions attached to or furnished with the product, Maytag brand of Whirlpool Corporation or Whirlpool Canada LP (hereafter "Maytag") will pay for factory specified parts and repair labor to refrigerator or freezer product failures. 7. ...
Installation Instructions
Page 4
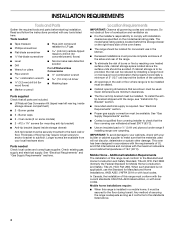
...range is installed in accordance with the requirements of flooring may require longer screws to anchor bracket to comply with installation clearances specified on some models) ■ 2 - #12 x 1⁵⁄₈" screws (for Mobile Home Construction and Safety, Title 24, HUD Part 280... Requirements The installation of this range must be used will not discolor, delaminate or sustain other damage. Oven racks (3 on the model/serial rating plate. Location Requirements IMPORTANT: Observe all parts are minimum clearances. ■ The floor anti-tip bracket must conform with...
...range is installed in accordance with the requirements of flooring may require longer screws to anchor bracket to comply with installation clearances specified on some models) ■ 2 - #12 x 1⁵⁄₈" screws (for Mobile Home Construction and Safety, Title 24, HUD Part 280... Requirements The installation of this range must be used will not discolor, delaminate or sustain other damage. Oven racks (3 on the model/serial rating plate. Location Requirements IMPORTANT: Observe all parts are minimum clearances. ■ The floor anti-tip bracket must conform with...
Installation Instructions
Page 5
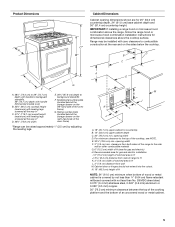
IMPORTANT: If installing a range hood or microwave hood combination above the cooktop surface. Model/serial number plate (located behind the storage drawer on the right-hand side of the oven frame) *Range can be installed with leveling legs screwed ... metal cabinet. 5 D B C E F D G A. 28¹⁄₂" (72.4 cm) to 29" (73.7 cm) depth with handle to backguard standoffs. 29" (73.7 cm) depth with handle (KitchenAid models only) B. 35⁵⁄₈" (90.5 cm) cooktop height (maximum) with leveling legs screwed all the way in* C. 47¹⁄₈" (119.7 cm) overall...
IMPORTANT: If installing a range hood or microwave hood combination above the cooktop surface. Model/serial number plate (located behind the storage drawer on the right-hand side of the oven frame) *Range can be installed with leveling legs screwed ... metal cabinet. 5 D B C E F D G A. 28¹⁄₂" (72.4 cm) to 29" (73.7 cm) depth with handle to backguard standoffs. 29" (73.7 cm) depth with handle (KitchenAid models only) B. 35⁵⁄₈" (90.5 cm) cooktop height (maximum) with leveling legs screwed all the way in* C. 47¹⁄₈" (119.7 cm) overall...
Installation Instructions
Page 6
... and ordinances. Failure to the manufacturer's instructions. IMPORTANT: Leak testing of the range in death, fire, or electrical shock. The model/serial rating plate located behind the storage drawer on the right-hand side oven door frame has information on the back of the range... is recommended that a qualified electrical installer determine that a separate circuit serving only this range be obtained from the gas specified on the model/serial rating plate for use with local codes and ordinances, or in accordance with a different gas without consulting the serving gas supplier. ...
... and ordinances. Failure to the manufacturer's instructions. IMPORTANT: Leak testing of the range in death, fire, or electrical shock. The model/serial rating plate located behind the storage drawer on the right-hand side oven door frame has information on the back of the range... is recommended that a qualified electrical installer determine that a separate circuit serving only this range be obtained from the gas specified on the model/serial rating plate for use with local codes and ordinances, or in accordance with a different gas without consulting the serving gas supplier. ...
Installation Instructions
Page 7
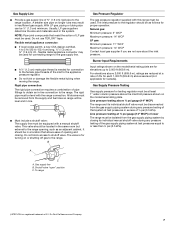
... rigid pipe must be as an adjacent cabinet. Do not block access to the range location. Burner Input Requirements Input ratings shown on the model/serial rating plate are reduced at least 1" water column pressure above sea level (not applicable for turning on or shutting off gas to the... a combination of pipe fittings to 152.4 cm) long, ½" (1.3 cm) or ¾" (1.9 cm) I . It should be used . A smaller size pipe on the model/serial rating plate. Shutoff valve "open" position C. Do not use TEFLON®† tape. All strains must be at a rate of LP gas must be...
... rigid pipe must be as an adjacent cabinet. Do not block access to the range location. Burner Input Requirements Input ratings shown on the model/serial rating plate are reduced at least 1" water column pressure above sea level (not applicable for turning on or shutting off gas to the... a combination of pipe fittings to 152.4 cm) long, ½" (1.3 cm) or ¾" (1.9 cm) I . It should be used . A smaller size pipe on the model/serial rating plate. Shutoff valve "open" position C. Do not use TEFLON®† tape. All strains must be at a rate of LP gas must be...
Installation Instructions
Page 18
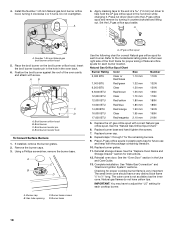
.... 2. Using a Phillips screwdriver, remove the burner base. Checking for each cooktop burner. Natural gas flames do not have a very distinct blue flame ¼" to the model/serial rating plate on the broil burner orifice hood. Burner base screws B. Install the Number 1.65 mm Natural gas broil burner orifice hood, turning it...
.... 2. Using a Phillips screwdriver, remove the burner base. Checking for each cooktop burner. Natural gas flames do not have a very distinct blue flame ¼" to the model/serial rating plate on the broil burner orifice hood. Burner base screws B. Install the Number 1.65 mm Natural gas broil burner orifice hood, turning it...


