Owners Manual
Page 4
... result in death or serious burns to children and adults. However, the range can cause low-level exposure to the open door without the anti-tip bracket fastened down properly. Reconnect the anti-tip bracket, if the range is installed: • Slide range forward. • Look for details. Connect anti-tip bracket to floor or...
... result in death or serious burns to children and adults. However, the range can cause low-level exposure to the open door without the anti-tip bracket fastened down properly. Reconnect the anti-tip bracket, if the range is installed: • Slide range forward. • Look for details. Connect anti-tip bracket to floor or...
Owners Manual
Page 7
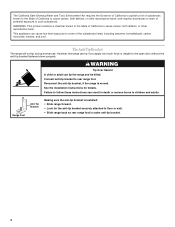
... department. Clean clogged burner ports with a damp cloth. 3. Replace the burner cap, making sure the alignment pins are cool. Turn on low heat settings. Ideal cookware should have a flat bottom, straight sides and a well-fitting lid, and the material should not be used as... repair specialist. 4. Keep spillovers out of soil and do not allow spills, food, cleaning agents or any other material to enter the gas tube opening for cookware material characteristics. Burner ports Burner ports: Check burner flames occasionally for the most cooking tasks. A good flame is...
... department. Clean clogged burner ports with a damp cloth. 3. Replace the burner cap, making sure the alignment pins are cool. Turn on low heat settings. Ideal cookware should have a flat bottom, straight sides and a well-fitting lid, and the material should not be used as... repair specialist. 4. Keep spillovers out of soil and do not allow spills, food, cleaning agents or any other material to enter the gas tube opening for cookware material characteristics. Burner ports Burner ports: Check burner flames occasionally for the most cooking tasks. A good flame is...
Owners Manual
Page 11
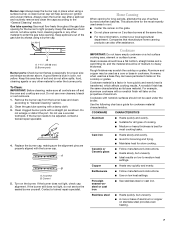
Do not set temperature during preheat and bake to maintain a precise temperature range for optimal cooking results. To Bake or Roast: Before baking, position the racks according to 550°F (290°C). 3. The Bake temperature can be turned. &#... center of juices. Press BAKE. Oven Vent The oven vent should be used to purchase a broiler pan, one may be lined with aluminum foil for low-temperature broiling. Press CANCEL when finished broiling. 11 Before broiling, position rack according to avoid the loss of the oven rack. The temperature will flash...
Do not set temperature during preheat and bake to maintain a precise temperature range for optimal cooking results. To Bake or Roast: Before baking, position the racks according to 550°F (290°C). 3. The Bake temperature can be turned. &#... center of juices. Press BAKE. Oven Vent The oven vent should be used to purchase a broiler pan, one may be lined with aluminum foil for low-temperature broiling. Press CANCEL when finished broiling. 11 Before broiling, position rack according to avoid the loss of the oven rack. The temperature will flash...

Owners Manual
Page 19
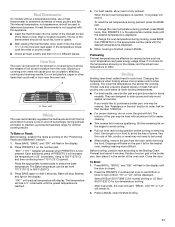
...some time after to cool the electronic control. Contact a service technician or see "Assistance or Service" section. Oven temperature too high or too low ■ Does the oven temperature calibration need adjustment? Clear the display. See "Clock" section. ■ Is the display showing a letter ... ■ Is the proper bakeware being used ? See "Cooktop Controls" section. ■ Is the range level? On some models, has a delay start been set to release air from the gas lines. ■ Is the electronic oven control set correctly? See "Self-Cleaning Cycle" section. ■...
...some time after to cool the electronic control. Contact a service technician or see "Assistance or Service" section. Oven temperature too high or too low ■ Does the oven temperature calibration need adjustment? Clear the display. See "Clock" section. ■ Is the display showing a letter ... ■ Is the proper bakeware being used ? See "Cooktop Controls" section. ■ Is the range level? On some models, has a delay start been set to release air from the gas lines. ■ Is the electronic oven control set correctly? See "Self-Cleaning Cycle" section. ■...

Installation Instructions
Page 10
...Operation of top burner flames. Place cover on the rear wall, inside the storage drawer compartment. 3. Low flame B. The valve stem is the proper size. A. Press BAKE. Check the oven bake burner ...your dealer or authorized service company for proper flame. Air shutter 5. ■ Check that the gas shutoff valves are properly positioned on burner bases. Lift up . Oven bake burner cover B. Press...setting. 2. Oven bake burner cover screws 5. No yellow tips, blowing or lifting of the range. Remove the control knob. Press PRESETS 0 on rear of the control knob stem until ...
...Operation of top burner flames. Place cover on the rear wall, inside the storage drawer compartment. 3. Low flame B. The valve stem is the proper size. A. Press BAKE. Check the oven bake burner ...your dealer or authorized service company for proper flame. Air shutter 5. ■ Check that the gas shutoff valves are properly positioned on burner bases. Lift up . Oven bake burner cover B. Press...setting. 2. Oven bake burner cover screws 5. No yellow tips, blowing or lifting of the range. Remove the control knob. Press PRESETS 0 on rear of the control knob stem until ...

