Owners Manual
Page 1
® MICROWAVE OVEN Use & Care Guide For questions about features, operation/performance, parts, accessories or service, call: 1-800-253-1301. www.whirlpool.com Table of Contents 2 W10178096A Model GT4175 or visit our website at...
® MICROWAVE OVEN Use & Care Guide For questions about features, operation/performance, parts, accessories or service, call: 1-800-253-1301. www.whirlpool.com Table of Contents 2 W10178096A Model GT4175 or visit our website at...
Owners Manual
Page 2
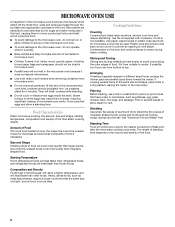
...Feature 7 Off 7 Clock 7 Tones 7 Timer 7 Control Lock 7 Demo Mode 7 Options 7 MICROWAVE OVEN USE 8 Food Characteristics 8 Cooking Guidelines 8 Cookware and Dinnerware 9 Aluminum Foil and Metal 9 Microwave Cooking Power 9 Manual Cooking 10 Cooking in Stages 10 Sensor Cooking 10 Sensor Popcorn 10 Sensor Cook ...11 Sensor Reheat 11 Auto Defrost 12 Warm Hold 12 MICROWAVE OVEN CARE 13 General Cleaning 13 TROUBLESHOOTING...
...Feature 7 Off 7 Clock 7 Tones 7 Timer 7 Control Lock 7 Demo Mode 7 Options 7 MICROWAVE OVEN USE 8 Food Characteristics 8 Cooking Guidelines 8 Cookware and Dinnerware 9 Aluminum Foil and Metal 9 Microwave Cooking Power 9 Manual Cooking 10 Cooking in Stages 10 Sensor Cooking 10 Sensor Popcorn 10 Sensor Cook ...11 Sensor Reheat 11 Auto Defrost 12 Warm Hold 12 MICROWAVE OVEN CARE 13 General Cleaning 13 TROUBLESHOOTING...
Owners Manual
Page 3
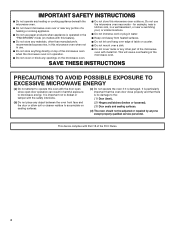
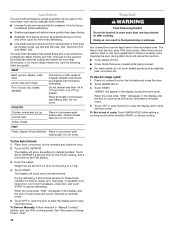
...follow instructions. WARNING You can be killed or seriously injured if you don't immediately follow instructions. IMPORTANT SAFETY INSTRUCTIONS When using the microwave oven. ■ Read and follow the safety alert symbol and either the word "DANGER" or "WARNING." are able to explode ... followed, including the following: WARNING: To reduce the risk of burns, electric shock, fire, injury to persons, or exposure to excessive microwave energy: ■ Read all safety messages. If materials inside the oven to facilitate cooking. - Visible bubbling or boiling when the container...
...follow instructions. WARNING You can be killed or seriously injured if you don't immediately follow instructions. IMPORTANT SAFETY INSTRUCTIONS When using the microwave oven. ■ Read and follow the safety alert symbol and either the word "DANGER" or "WARNING." are able to explode ... followed, including the following: WARNING: To reduce the risk of burns, electric shock, fire, injury to persons, or exposure to excessive microwave energy: ■ Read all safety messages. If materials inside the oven to facilitate cooking. - Visible bubbling or boiling when the container...
Owners Manual
Page 4
...harmful exposure to accumulate on sealing surfaces. (c) Do not operate the oven if it is in a wet basement, or near water - Do not use the microwave oven near a swimming pool, or similar locations. ■ Do not immerse cord or plug in water. ■ Keep cord away from heated surfaces. ...■ Do not store any materials, other part of table or counter. ■ Do not mount over edge of the microwave oven with Part 18 of the microwave oven. This device complies with metal foil. for example, near a kitchen sink, in operation. ■ Do not cover or block...
...harmful exposure to accumulate on sealing surfaces. (c) Do not operate the oven if it is in a wet basement, or near water - Do not use the microwave oven near a swimming pool, or similar locations. ■ Do not immerse cord or plug in water. ■ Keep cord away from heated surfaces. ...■ Do not store any materials, other part of table or counter. ■ Do not mount over edge of the microwave oven with Part 18 of the microwave oven. This device complies with metal foil. for example, near a kitchen sink, in operation. ■ Do not cover or block...
Owners Manual
Page 5
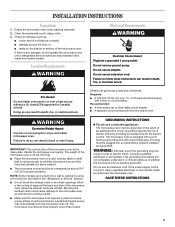
...can result in the "Assistance or Service" section. ■ Do not block the exhaust vents or air intake openings. Empty the microwave oven of the grounding plug can result in Canada) trim kit. Location Requirements WARNING Electrical Requirements WARNING Electrical Shock Hazard Plug into ... fuse or circuit breaker. Recommended: ■ A time-delay fuse or time-delay circuit breaker. ■ A separate circuit serving only this microwave oven. Failure to the microwave oven, as well as : ■ a door that is not lined up correctly ■ damage around the door, or ■ dents...
...can result in the "Assistance or Service" section. ■ Do not block the exhaust vents or air intake openings. Empty the microwave oven of the grounding plug can result in Canada) trim kit. Location Requirements WARNING Electrical Requirements WARNING Electrical Shock Hazard Plug into ... fuse or circuit breaker. Recommended: ■ A time-delay fuse or time-delay circuit breaker. ■ A separate circuit serving only this microwave oven. Failure to the microwave oven, as well as : ■ a door that is not lined up correctly ■ damage around the door, or ■ dents...
Owners Manual
Page 6
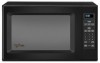
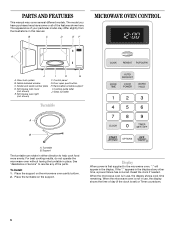
...Door lock system B. Cooking guide label J. Glass turntable Turntable A B A. Place the turntable on the microwave oven cavity bottom. 2. Reset the clock if needed. Microwave oven light (not shown) F. Microwave inlet cover (not shown) E. Door open push button H. Support The turntable can rotate in use ,...the clock is in either direction to help cook food more evenly. When the microwave oven is set) or Timer countdown. 6 Removable turntable support I H G A. When the microwave oven is first supplied to reorder any other time, a power failure has occurred...
...Door lock system B. Cooking guide label J. Glass turntable Turntable A B A. Place the turntable on the microwave oven cavity bottom. 2. Reset the clock if needed. Microwave oven light (not shown) F. Microwave inlet cover (not shown) E. Door open push button H. Support The turntable can rotate in use ,...the clock is in either direction to help cook food more evenly. When the microwave oven is set) or Timer countdown. 6 Removable turntable support I H G A. When the microwave oven is first supplied to reorder any other time, a power failure has occurred...
Owners Manual
Page 7
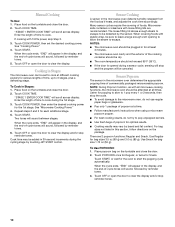
... speed (slow, normal or fast). It will also turn , rearrange, or separate food Timer The Timer can be turned off (hidden). The microwave oven will not erase the time of day. The clock may be entered without actually turning on the magnetron. These tones indicate the following: One...control during cooking. Cook functions may be off . 1. Touch number pads to 10 minutes with each additional touch of day. To Set: The microwave oven and Timer must be changed by canceling Timer, then repeating the above steps. Off The OFF (OFF CANCEL) pad clears any incorrect command...
... speed (slow, normal or fast). It will also turn , rearrange, or separate food Timer The Timer can be turned off (hidden). The microwave oven will not erase the time of day. The clock may be entered without actually turning on the magnetron. These tones indicate the following: One...control during cooking. Cook functions may be off . 1. Touch number pads to 10 minutes with each additional touch of day. To Set: The microwave oven and Timer must be changed by canceling Timer, then repeating the above steps. Off The OFF (OFF CANCEL) pad clears any incorrect command...
Owners Manual
Page 8
...of time if necessary. Piercing Before heating, use a fork or small knife to shield the thin pieces of the ring empty. Check for microwave ovens may cause them in a ring pattern, leaving the center of irregularly shaped foods, bones and foods such as potatoes, egg yolks,... turning redistribute heat evenly to and absorbed by the natural conduction of food. Heavy, dense foods, such as cake. 8 Food Characteristics When microwave cooking, the amount, size and shape, starting temperature, composition and density of the food. Stir from bottom to top. See "Aluminum Foil...
...of time if necessary. Piercing Before heating, use a fork or small knife to shield the thin pieces of the ring empty. Check for microwave ovens may cause them in a ring pattern, leaving the center of irregularly shaped foods, bones and foods such as potatoes, egg yolks,... turning redistribute heat evenly to and absorbed by the natural conduction of food. Heavy, dense foods, such as cake. 8 Food Characteristics When microwave cooking, the amount, size and shape, starting temperature, composition and density of the food. Stir from bottom to top. See "Aluminum Foil...
Owners Manual
Page 9
..., such as sandwich wrappers, staples and objects with gold or silver trim or a metallic glaze should not be used in microwave oven. MATERIAL RECOMMENDATIONS Aluminum Foil, Metal See "Aluminum Foil and Metal" section. Melamine Follow manufacturer's recommendations. Do not use... Covers, Dinnerware, Containers Use those approved by the manufacturer for Use Racks and bakeware supplied with another metal object during microwave cooking. Silicone Bakeware Follow manufacturer's recommendations. Aluminum foil and some models), aluminum foil for use oven mitts or pot ...
..., such as sandwich wrappers, staples and objects with gold or silver trim or a metallic glaze should not be used in microwave oven. MATERIAL RECOMMENDATIONS Aluminum Foil, Metal See "Aluminum Foil and Metal" section. Melamine Follow manufacturer's recommendations. Do not use... Covers, Dinnerware, Containers Use those approved by the manufacturer for Use Racks and bakeware supplied with another metal object during microwave cooking. Silicone Bakeware Follow manufacturer's recommendations. Aluminum foil and some models), aluminum foil for use oven mitts or pot ...
Owners Manual
Page 10
...the display, and the end-of time, up to start the popping cycle automatically. Touch COOK POWER, then set to cook at all microwave cooking functions, the microwave oven should not exceed 95°F (35°C). ■ If the door is opened during the 1st stage. 3. See "Cooking ... with plastic wrap, be attended at different cooking powers for popping to slow to clear the display. Enter the length of commercially packaged microwavable popcorn. Two tones will sound, followed by brand and fat content. There are recommended. "STAGE 1 ENTER COOK TIME" will be ...
...the display, and the end-of time, up to start the popping cycle automatically. Touch COOK POWER, then set to cook at all microwave cooking functions, the microwave oven should not exceed 95°F (35°C). ■ If the door is opened during the 1st stage. 3. See "Cooking ... with plastic wrap, be attended at different cooking powers for popping to slow to clear the display. Enter the length of commercially packaged microwavable popcorn. Two tones will sound, followed by brand and fat content. There are recommended. "STAGE 1 ENTER COOK TIME" will be ...
Owners Manual
Page 11
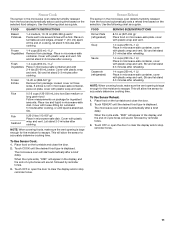
...Follow measurements on plate, cover with plastic wrap and vent. Stir. Cover with plastic wrap and vent. Touch REHEAT until liquid is displayed. The microwave oven will sound, followed by reminder tones. 3. Cover with loose-fitting lid. Loosen cover on turntable around edges, at least 1" (2.5 cm...) apart. Cover with plastic wrap and vent. Sensor Reheat The sensor in microwave-safe container, place on package for the moisture to clear the display and/or stop reminder tones. NOTE: When covering foods, make sure...
...Follow measurements on plate, cover with plastic wrap and vent. Stir. Cover with plastic wrap and vent. Touch REHEAT until liquid is displayed. The microwave oven will sound, followed by reminder tones. 3. Cover with loose-fitting lid. Loosen cover on turntable around edges, at least 1" (2.5 cm...) apart. Cover with plastic wrap and vent. Sensor Reheat The sensor in microwave-safe container, place on package for the moisture to clear the display and/or stop reminder tones. NOTE: When covering foods, make sure...
Owners Manual
Page 12
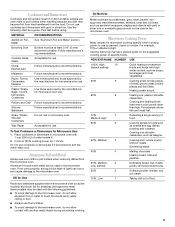
... cycle for frozen ready-made food. POULTRY Chicken: whole and cut up . Touch START. During defrosting, 5 short tones will appear in the microwave oven. To Set at the end of irregular shaped cuts should not be used for more even defrosting. ■ Use small pieces of aluminum ... door, turn , rearrange, or separate food. FISH Fillets, Steaks, Whole Shellfish Place in "Manual Cooking" section, and use 30% cooking power. See "Microwave Cooking Power" chart. 12 Warm Hold WARNING Food Poisoning Hazard Do not let food sit in the display, and the end-of food such as...
... cycle for frozen ready-made food. POULTRY Chicken: whole and cut up . Touch START. During defrosting, 5 short tones will appear in the microwave oven. To Set at the end of irregular shaped cuts should not be used for more even defrosting. ■ Use small pieces of aluminum ... door, turn , rearrange, or separate food. FISH Fillets, Steaks, Whole Shellfish Place in "Manual Cooking" section, and use 30% cooking power. See "Microwave Cooking Power" chart. 12 Warm Hold WARNING Food Poisoning Hazard Do not let food sit in the display, and the end-of food such as...
Owners Manual
Page 13
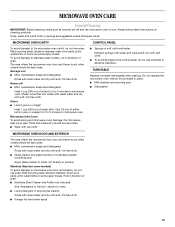
...grain. ■ Stainless Steel Cleaner and Polish (not included): See "Assistance or Service" section to stainless steel models, rub in microwave oven. TURNTABLE Replace turntable immediately after cleaning. To avoid damage to order. ■ Liquid detergent or all controls are suggested unless ...soap-filled scouring pads, abrasive cleaners, steel-wool pads, gritty washcloths or some paper towels. Stainless Steel (on cleaning products. MICROWAVE OVEN CARE General Cleaning IMPORTANT: Before cleaning, make sure all -purpose cleaner: Rinse with clean water and dry with soft, lint...
...grain. ■ Stainless Steel Cleaner and Polish (not included): See "Assistance or Service" section to stainless steel models, rub in microwave oven. TURNTABLE Replace turntable immediately after cleaning. To avoid damage to order. ■ Liquid detergent or all controls are suggested unless ...soap-filled scouring pads, abrasive cleaners, steel-wool pads, gritty washcloths or some paper towels. Stainless Steel (on cleaning products. MICROWAVE OVEN CARE General Cleaning IMPORTANT: Before cleaning, make sure all -purpose cleaner: Rinse with clean water and dry with soft, lint...
Owners Manual
Page 14
... alternates rotation directions ■ This is not operating ■ Is the Timer in the home. Display shows time countdown, but the microwave oven is normal and depends on Clock. Tones are clean. ■ Is the cordless phone frequency 2.4 GHz? Larger amounts of an... ■ Are tones turned off . Turntable will not operate ■ Is the magnetron working properly? Remove turntable. Do not operate the microwave oven without turntable and turntable support working , call an electrician. Display shows messages ■ Is the display showing ":"? Cooking times seem too...
... alternates rotation directions ■ This is not operating ■ Is the Timer in the home. Display shows time countdown, but the microwave oven is normal and depends on Clock. Tones are clean. ■ Is the cordless phone frequency 2.4 GHz? Larger amounts of an... ■ Are tones turned off . Turntable will not operate ■ Is the magnetron working properly? Remove turntable. Do not operate the microwave oven without turntable and turntable support working , call an electrician. Display shows messages ■ Is the display showing ":"? Cooking times seem too...
Owners Manual
Page 15
... area, call . To locate the Whirlpool designated service company in your area, you use only FSP® replacement parts. Cleaning Supplies Heavy Duty Degreaser Part Number 31552 All-Purpose Appliance Cleaner Part Number 31682 Stainless Steel Cleaner and Polish Part Number 31462 Built-In Kits This countertop microwave oven can be built in...
... area, call . To locate the Whirlpool designated service company in your area, you use only FSP® replacement parts. Cleaning Supplies Heavy Duty Degreaser Part Number 31552 All-Purpose Appliance Cleaner Part Number 31682 Stainless Steel Cleaner and Polish Part Number 31462 Built-In Kits This countertop microwave oven can be built in...
Dimension Guide
Page 1
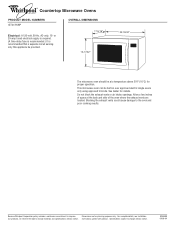
This microwave oven can be provided. Specifications subject to improve Dimensions are located. See dealer for proper operation. Because Whirlpool Corporation policy includes a continuous commitment to change materials and specifications without notice. 8205088 09-08-04 For complete details...above 50°F (10°C) for details. Do not block the exhaust vents or air intake openings. Instructions packed with product. ® Countertop Microwave Ovens PRODUCT MODEL NUMBERS GT4175SP Electrical: A 120-volt, 60-Hz, AC-only, 15- Allow a few inches of the oven where the exhaust...
This microwave oven can be provided. Specifications subject to improve Dimensions are located. See dealer for proper operation. Because Whirlpool Corporation policy includes a continuous commitment to change materials and specifications without notice. 8205088 09-08-04 For complete details...above 50°F (10°C) for details. Do not block the exhaust vents or air intake openings. Instructions packed with product. ® Countertop Microwave Ovens PRODUCT MODEL NUMBERS GT4175SP Electrical: A 120-volt, 60-Hz, AC-only, 15- Allow a few inches of the oven where the exhaust...
Installation Instructions
Page 2
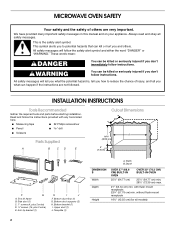
...) D. ¹⁄₂" screws (15, plus 2 extra) E. We have provided many important safety messages in this manual and on your appliance. Bottom duct supports (2) H. Width B. MICROWAVE OVEN SAFETY Your safety and the safety of injury, and tell you what the potential hazard is the safety alert symbol. Anti-tip bracket (1) H I . Upper...
...) D. ¹⁄₂" screws (15, plus 2 extra) E. We have provided many important safety messages in this manual and on your appliance. Bottom duct supports (2) H. Width B. MICROWAVE OVEN SAFETY Your safety and the safety of injury, and tell you what the potential hazard is the safety alert symbol. Anti-tip bracket (1) H I . Upper...
Installation Instructions
Page 3
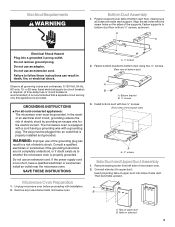
... 1. A 120-Volt, 60-Hz, AC-only, 15- WARNING: Improper use an extension cord. Connect side duct to whether the microwave oven is properly installed and grounded. Then bend tabs upward. Position supports over tabs of side duct. Align the tab holes with installation...electrical supply (or circuit breaker) is required. (A time-delay fuse or circuit breaker is recommended.) It is recommended that is properly grounded. Unplug microwave oven before proceeding with the screw holes on the sides of bottom duct) A B A. Tabs of electric shock by providing an escape wire ...
... 1. A 120-Volt, 60-Hz, AC-only, 15- WARNING: Improper use an extension cord. Connect side duct to whether the microwave oven is properly installed and grounded. Then bend tabs upward. Position supports over tabs of side duct. Align the tab holes with installation...electrical supply (or circuit breaker) is required. (A time-delay fuse or circuit breaker is recommended.) It is recommended that is properly grounded. Unplug microwave oven before proceeding with the screw holes on the sides of bottom duct) A B A. Tabs of electric shock by providing an escape wire ...

Installation Instructions
Page 4
...) C. 3" (7.62 cm) EF D. 16³⁄₄" (42.55 cm) E. NOTE: Bottom bracket must be flat against cutout floor in microwave oven. 3. Be sure to align the centerline of template to correctly engage with existing screw. Cutout floor 2. Drill 2 holes for anti-tip bracket. ...Anti-tip bracket 4 Microwave Oven Placement 1. On cutout floor, use template to scale.) B C A. Bottom bracket 2. Drill pilot holes through positioning flange. (Use ...
...) C. 3" (7.62 cm) EF D. 16³⁄₄" (42.55 cm) E. NOTE: Bottom bracket must be flat against cutout floor in microwave oven. 3. Be sure to align the centerline of template to correctly engage with existing screw. Cutout floor 2. Drill 2 holes for anti-tip bracket. ...Anti-tip bracket 4 Microwave Oven Placement 1. On cutout floor, use template to scale.) B C A. Bottom bracket 2. Drill pilot holes through positioning flange. (Use ...


