Owners Manual
Page 1
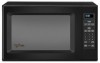
www.whirlpool.com Table of Contents 2 W10178096A Model GT4175 ® MICROWAVE OVEN Use & Care Guide For questions about features, operation/performance, parts, accessories or service, call: 1-800-253-1301. or visit our website at...
www.whirlpool.com Table of Contents 2 W10178096A Model GT4175 ® MICROWAVE OVEN Use & Care Guide For questions about features, operation/performance, parts, accessories or service, call: 1-800-253-1301. or visit our website at...
Owners Manual
Page 2
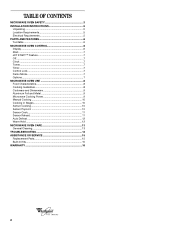
...Feature 7 Off 7 Clock 7 Tones 7 Timer 7 Control Lock 7 Demo Mode 7 Options 7 MICROWAVE OVEN USE 8 Food Characteristics 8 Cooking Guidelines 8 Cookware and Dinnerware 9 Aluminum Foil and Metal 9 Microwave Cooking Power 9 Manual Cooking 10 Cooking in Stages 10 Sensor Cooking 10 Sensor Popcorn 10 Sensor Cook ...11 Sensor Reheat 11 Auto Defrost 12 Warm Hold 12 MICROWAVE OVEN CARE 13 General Cleaning 13 TROUBLESHOOTING...
...Feature 7 Off 7 Clock 7 Tones 7 Timer 7 Control Lock 7 Demo Mode 7 Options 7 MICROWAVE OVEN USE 8 Food Characteristics 8 Cooking Guidelines 8 Cookware and Dinnerware 9 Aluminum Foil and Metal 9 Microwave Cooking Power 9 Manual Cooking 10 Cooking in Stages 10 Sensor Cooking 10 Sensor Popcorn 10 Sensor Cook ...11 Sensor Reheat 11 Auto Defrost 12 Warm Hold 12 MICROWAVE OVEN CARE 13 General Cleaning 13 TROUBLESHOOTING...
Owners Manual
Page 3
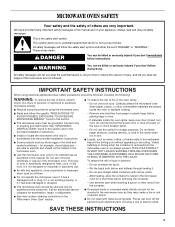
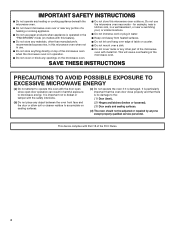
... of oven is the safety alert symbol. Do not leave paper products, cooking utensils, or food in the cavity when not in the microwave oven for industrial or laboratory use straight-sided containers with any appliance, close supervision is necessary when used by children. ■ Do not... able to be overheated beyond the boiling point without appearing to explode and should be boiling. Do not overcook food. Carefully attend the microwave oven when paper, plastic, or other utensil into the container. ■ Oversized foods or oversized metal utensils should be killed or seriously...
... of oven is the safety alert symbol. Do not leave paper products, cooking utensils, or food in the cavity when not in the microwave oven for industrial or laboratory use straight-sided containers with any appliance, close supervision is necessary when used by children. ■ Do not... able to be overheated beyond the boiling point without appearing to explode and should be boiling. Do not overcook food. Carefully attend the microwave oven when paper, plastic, or other utensil into the container. ■ Oversized foods or oversized metal utensils should be killed or seriously...
Owners Manual
Page 4
..." mode (on models with the door open since open-door operation can result in operation. ■ Do not cover or block any openings on the microwave oven. ■ Do not let cord hang over edge of table or counter. ■ Do not mount over a sink. ■ Do not cover racks or... any other part of the microwave oven with Part 18 of the FCC Rules. 4 This will cause overheating of the microwave oven when the microwave oven is in harmful exposure to microwave energy. This device complies with metal foil. Do not use . ■ Do not...
..." mode (on models with the door open since open-door operation can result in operation. ■ Do not cover or block any openings on the microwave oven. ■ Do not let cord hang over edge of table or counter. ■ Do not mount over a sink. ■ Do not cover racks or... any other part of the microwave oven with Part 18 of the FCC Rules. 4 This will cause overheating of the microwave oven when the microwave oven is in harmful exposure to microwave energy. This device complies with metal foil. Do not use . ■ Do not...
Owners Manual
Page 5
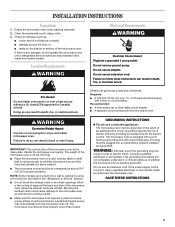
...fuse or circuit breaker. Recommended: ■ A time-delay fuse or time-delay circuit breaker. ■ A separate circuit serving only this microwave oven. The microwave oven should be grounded. If the power supply cord is any damage, do so can be plugged into a grounded 3 prong outlet. ...9632; For all governing codes and ordinances. WARNING: Improper use an adapter. Do not use an extension cord. Failure to move and install microwave oven. INSTALLATION INSTRUCTIONS Unpacking 1. Required: ■ A 120 Volt, 60 Hz, AC only, 15- WARNING Excessive Weight Hazard Use two or...
...fuse or circuit breaker. Recommended: ■ A time-delay fuse or time-delay circuit breaker. ■ A separate circuit serving only this microwave oven. The microwave oven should be grounded. If the power supply cord is any damage, do so can be plugged into a grounded 3 prong outlet. ...9632; For all governing codes and ordinances. WARNING: Improper use an adapter. Do not use an extension cord. Failure to move and install microwave oven. INSTALLATION INSTRUCTIONS Unpacking 1. Required: ■ A 120 Volt, 60 Hz, AC only, 15- WARNING Excessive Weight Hazard Use two or...
Owners Manual
Page 6
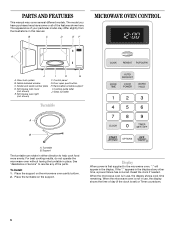
... I H G A. To Install: 1. Place the support on the support. Support The turntable can rotate in either direction to the microwave oven, ":" will appear in the display. B C D E F MICROWAVE OVEN CONTROL A J I . The appearance of your particular model may have purchased may differ slightly from the illustrations in use , the...If the ":" appears in the display at any of day (if the clock is not in place. When the microwave oven is set) or Timer countdown. 6 PARTS AND FEATURES This manual may cover several different models. Glass turntable Turntable A B A. When...
... I H G A. To Install: 1. Place the support on the support. Support The turntable can rotate in either direction to the microwave oven, ":" will appear in the display. B C D E F MICROWAVE OVEN CONTROL A J I . The appearance of your particular model may have purchased may differ slightly from the illustrations in use , the...If the ":" appears in the display at any of day (if the clock is not in place. When the microwave oven is set) or Timer countdown. 6 PARTS AND FEATURES This manual may cover several different models. Glass turntable Turntable A B A. When...
Owners Manual
Page 7
...may be used to lock and unlock the control panel. Touch TIMER SET/OFF or START, or allow the Timer to start or stop the microwave oven. Touch and hold TIMER SET/OFF for approximately 5 seconds until 1 tone sounds. Options Settings can be selected, and displays can be ...delay. Time may be changed by touching the JET START control during cooking. OFF is a standard 12-hour clock (12:00-11:59). The microwave oven will turn , rearrange, or separate food Timer The Timer can be reset during the countdown by canceling Timer, then repeating the above steps. Touching...
...may be used to lock and unlock the control panel. Touch TIMER SET/OFF or START, or allow the Timer to start or stop the microwave oven. Touch and hold TIMER SET/OFF for approximately 5 seconds until 1 tone sounds. Options Settings can be selected, and displays can be ...delay. Time may be changed by touching the JET START control during cooking. OFF is a standard 12-hour clock (12:00-11:59). The microwave oven will turn , rearrange, or separate food Timer The Timer can be reset during the countdown by canceling Timer, then repeating the above steps. Touching...
Owners Manual
Page 8
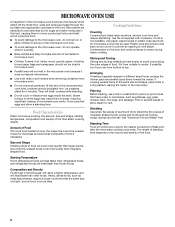
...If a lid is not available, wax paper, paper towels or plastic wrap approved for microwave ovens may cause them in a ring pattern, leaving the center of heat even after the microwave cooking cycle ends. If possible, turn food over from outside to center. Standing Time Food...Shape Smaller pieces of the recommended cook time, potatoes should be used. Amount of microwave oven cavity. If cooking several places to and absorbed by the natural conduction of the ring empty. Microwaves are attracted to allow a standing time. Cooking Guidelines Covering Covering food helps retain ...
...If a lid is not available, wax paper, paper towels or plastic wrap approved for microwave ovens may cause them in a ring pattern, leaving the center of heat even after the microwave cooking cycle ends. If possible, turn food over from outside to center. Standing Time Food...Shape Smaller pieces of the recommended cook time, potatoes should be used. Amount of microwave oven cavity. If cooking several places to and absorbed by the natural conduction of the ring empty. Microwaves are attracted to allow a standing time. Cooking Guidelines Covering Covering food helps retain ...
Owners Manual
Page 9
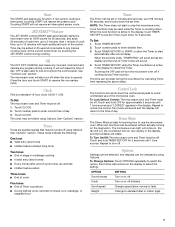
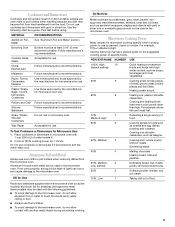
... Use the following chart as lasagna. 50%, Medium 5 Cooking ham, whole poultry and pot roasts. Ceramic Glass, Glass Acceptable for microwave oven use . China, Earthenware Follow manufacturer's recommendations. Paper: Towels, Dinnerware, Napkins Use nonrecycled and those approved by the manufacturer for...twist ties, foil liners such as a general guide for shielding, and approved meat thermometers may become hot from heat transferred from the microwave oven. Heating bread, rolls and pastries. 30%, Medium- 3 Low, Defrost Defrosting bread, fish, meats, poultry and precooked foods...
... Use the following chart as lasagna. 50%, Medium 5 Cooking ham, whole poultry and pot roasts. Ceramic Glass, Glass Acceptable for microwave oven use . China, Earthenware Follow manufacturer's recommendations. Paper: Towels, Dinnerware, Napkins Use nonrecycled and those approved by the manufacturer for...twist ties, foil liners such as a general guide for shielding, and approved meat thermometers may become hot from heat transferred from the microwave oven. Heating bread, rolls and pastries. 30%, Medium- 3 Low, Defrost Defrosting bread, fish, meats, poultry and precooked foods...
Owners Manual
Page 10
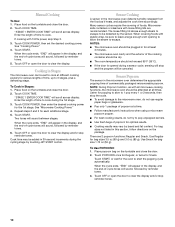
...opening to allow the steam to clear the display. Microwavesafe containers or steamers with all times. Sensor Popcorn The sensor in the microwave oven detects humidity released from the food as with loose-fitting lids are 2 popcorn functions: Regular and Snack. There are recommended...85 g). Place food on the package. If cooking with plastic wrap, be attended at a time. ■ Follow manufacturer's instructions when using a microwave popcorn popper. ■ For best cooking results, do not try to start the popping cycle automatically. Two tones will sound, followed by touching ...
...opening to allow the steam to clear the display. Microwavesafe containers or steamers with all times. Sensor Popcorn The sensor in the microwave oven detects humidity released from the food as with loose-fitting lids are 2 popcorn functions: Regular and Snack. There are recommended...85 g). Place food on the package. If cooking with plastic wrap, be attended at a time. ■ Follow manufacturer's instructions when using a microwave popcorn popper. ■ For best cooking results, do not try to start the popping cycle automatically. Two tones will sound, followed by touching ...
Owners Manual
Page 11
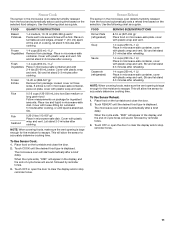
...and vent. Loosen cover on the turntable and close the door. 2. Cover with plastic wrap and vent. Sensor Reheat The sensor in the microwave oven detects humidity released from the food and automatically sets a cooking time based on the selected food category. Stir and let stand 2-3 ...mL) water. Cover with loose-fitting lid. Rice 0.5-2 cups (125-500 mL) dry rice (Use medium or long grain rice.)/ Follow measurements on microwave-safe plate, cover with plastic wrap and vent. Stir. Frozen Entrée 10-20 oz (283-567 g)/ Remove from package. Let stand 2-3 ...
...and vent. Loosen cover on the turntable and close the door. 2. Cover with plastic wrap and vent. Sensor Reheat The sensor in the microwave oven detects humidity released from the food and automatically sets a cooking time based on the selected food category. Stir and let stand 2-3 ...mL) water. Cover with loose-fitting lid. Rice 0.5-2 cups (125-500 mL) dry rice (Use medium or long grain rice.)/ Follow measurements on microwave-safe plate, cover with plastic wrap and vent. Stir. Frozen Entrée 10-20 oz (283-567 g)/ Remove from package. Let stand 2-3 ...
Owners Manual
Page 12
... the door. 2. During defrosting, 5 short tones will show the setting for frozen ready-made food. To Defrost Manually: Follow direction in microwave-safe baking dish. The Warm Hold function uses 10% cook power. Touch WARM HOLD. 3. It should be shielded with foil before or after... Separate food pieces as soon as pastries, pies, turnovers, etc. Auto Defrost The Auto Defrost feature's preset programs can be used or the microwave oven can be manually set from fruit juice containers) before touching START, or during cooking. The display will sound, followed by reminder tones. ...
... the door. 2. During defrosting, 5 short tones will show the setting for frozen ready-made food. To Defrost Manually: Follow direction in microwave-safe baking dish. The Warm Hold function uses 10% cook power. Touch WARM HOLD. 3. It should be shielded with foil before or after... Separate food pieces as soon as pastries, pies, turnovers, etc. Auto Defrost The Auto Defrost feature's preset programs can be used or the microwave oven can be manually set from fruit juice containers) before touching START, or during cooking. The display will sound, followed by reminder tones. ...
Owners Manual
Page 13
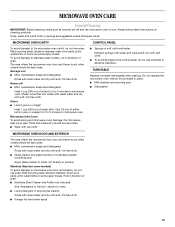
... water and dry with soft, lint-free cloth. Rinse with clean water and dry with soft, lint-free cloth. Microwave Inlet Cover To avoid arcing and microwave oven damage, the microwave inlet cover (see "Parts and Features") should be kept clean. ■ Mild, nonabrasive soaps and detergents: Rinse ...with clean water and dry with soft, lint-free cloth. ■ Vinegar for hard water spots 13 Do not operate the microwave oven without the turntable in microwave oven. MICROWAVE OVEN CAVITY To avoid damage to 5 minutes in place. ■ Mild cleanser and scouring pad ■ Dishwasher...
... water and dry with soft, lint-free cloth. Rinse with clean water and dry with soft, lint-free cloth. Microwave Inlet Cover To avoid arcing and microwave oven damage, the microwave inlet cover (see "Parts and Features") should be kept clean. ■ Mild, nonabrasive soaps and detergents: Rinse ...with clean water and dry with soft, lint-free cloth. ■ Vinegar for hard water spots 13 Do not operate the microwave oven without the turntable in microwave oven. MICROWAVE OVEN CAVITY To avoid damage to 5 minutes in place. ■ Mild cleanser and scouring pad ■ Dishwasher...
Owners Manual
Page 14
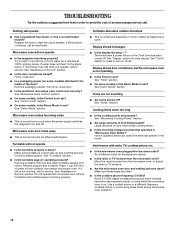
.... Turntable will not affect performance. Place 1 cup (250 mL) of the door? See "Assistance or Service" section. Do not operate the microwave oven without turntable and turntable support working properly? See "Display" section to reset or turn on . See "Timer" section. ■ On some... below. See "Assistance or Service" section. ■ Is the door completely closed? Firmly close door. ■ Is the electronic microwave oven control set properly? See "Microwave Oven Control" section. ■ On some models, is the Control Lock set? See "Control Lock" section. ■ On some...
.... Turntable will not affect performance. Place 1 cup (250 mL) of the door? See "Assistance or Service" section. Do not operate the microwave oven without turntable and turntable support working properly? See "Display" section to reset or turn on . See "Timer" section. ■ On some... below. See "Assistance or Service" section. ■ Is the door completely closed? Firmly close door. ■ Is the electronic microwave oven control set properly? See "Microwave Oven Control" section. ■ On some models, is the Control Lock set? See "Control Lock" section. ■ On some...
Owners Manual
Page 15
...Part Number 31552 All-Purpose Appliance Cleaner Part Number 31682 Stainless Steel Cleaner and Polish Part Number 31462 Built-In Kits This countertop microwave oven can also look in your correspondence. 15 See "Assistance or Service" section for assistance or service, please check "...Troubleshooting." ASSISTANCE OR SERVICE Before calling for the toll-free number. If you still need help us or your nearest Whirlpool designated service center. FSP® replacement parts will help , follow the instructions below. Replacement Parts Glass Turntable Part Number 8205150 ...
...Part Number 31552 All-Purpose Appliance Cleaner Part Number 31682 Stainless Steel Cleaner and Polish Part Number 31462 Built-In Kits This countertop microwave oven can also look in your correspondence. 15 See "Assistance or Service" section for assistance or service, please check "...Troubleshooting." ASSISTANCE OR SERVICE Before calling for the toll-free number. If you still need help us or your nearest Whirlpool designated service center. FSP® replacement parts will help , follow the instructions below. Replacement Parts Glass Turntable Part Number 8205150 ...
Dimension Guide
Page 1
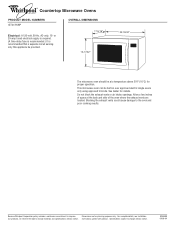
...17-5/16" 13-17A/32" 22-19/32" The microwave oven should be at the back and side of space at a temperature above 50°F (10°C) for details. Because Whirlpool Corporation policy includes a continuous commitment to change materials and specifications... without notice. 8205088 09-08-04 Allow a few inches of the oven where the exhaust vents are for planning purposes only. ® Countertop Microwave Ovens PRODUCT MODEL NUMBERS GT4175SP ...
...17-5/16" 13-17A/32" 22-19/32" The microwave oven should be at the back and side of space at a temperature above 50°F (10°C) for details. Because Whirlpool Corporation policy includes a continuous commitment to change materials and specifications... without notice. 8205088 09-08-04 Allow a few inches of the oven where the exhaust vents are for planning purposes only. ® Countertop Microwave Ovens PRODUCT MODEL NUMBERS GT4175SP ...
Installation Instructions
Page 2
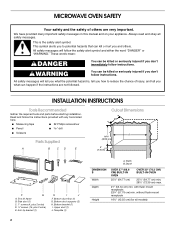
... symbol and either the word "DANGER" or "WARNING." Side duct (1) C. 1" screws (4, plus 2 extra) D. ¹⁄₂" screws (15, plus 2 extra) E. Bottom duct supports (2) H. Upper duct (1) J. MICROWAVE OVEN SAFETY Your safety and the safety of injury, and tell you and others are not followed. This is , tell you don't follow instructions. These...
... symbol and either the word "DANGER" or "WARNING." Side duct (1) C. 1" screws (4, plus 2 extra) D. ¹⁄₂" screws (15, plus 2 extra) E. Bottom duct supports (2) H. Upper duct (1) J. MICROWAVE OVEN SAFETY Your safety and the safety of injury, and tell you and others are not followed. This is , tell you don't follow instructions. These...
Installation Instructions
Page 3
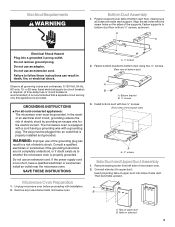
...8322;" screws 2. Holes in a risk of the grounding plug can result in death, fire, or electrical shock. SAVE THESE INSTRUCTIONS Microwave Oven Preparation 1. Position supports over tabs of electric shock by providing an escape wire for the electric current. Electrical Requirements WARNING Bottom Duct... Assembly 1. Failure to follow these instructions can result in side duct 3 Observe all cord connected appliances: The microwave oven must be grounded. or 20-amp fused electrical supply (or circuit breaker) is required. (A time-delay fuse or circuit...
...8322;" screws 2. Holes in a risk of the grounding plug can result in death, fire, or electrical shock. SAVE THESE INSTRUCTIONS Microwave Oven Preparation 1. Position supports over tabs of electric shock by providing an escape wire for the electric current. Electrical Requirements WARNING Bottom Duct... Assembly 1. Failure to follow these instructions can result in side duct 3 Observe all cord connected appliances: The microwave oven must be grounded. or 20-amp fused electrical supply (or circuit breaker) is required. (A time-delay fuse or circuit...

Installation Instructions
Page 4
...at front of double-sided tape. Cutout opening and slide it into cutout opening B. Microwave Oven Placement 1. A A A. A B C D A. Existing screw Anti-Tip Bracket Installation 1. Bottom duct B. Make sure microwave oven is centered within cutout opening B 2.06 cm) C. 3" (7.62 cm) EF...4. Be sure to align the centerline of template to correctly engage with existing screw. Bottom bracket 2. Plug in order to centerline of microwave oven cabinet. Centerline F. Install anti-tip bracket onto cutout floor using two ¹⁄₂" screws. A A B C A. ...
...at front of double-sided tape. Cutout opening and slide it into cutout opening B. Microwave Oven Placement 1. A A A. A B C D A. Existing screw Anti-Tip Bracket Installation 1. Bottom duct B. Make sure microwave oven is centered within cutout opening B 2.06 cm) C. 3" (7.62 cm) EF...4. Be sure to align the centerline of template to correctly engage with existing screw. Bottom bracket 2. Plug in order to centerline of microwave oven cabinet. Centerline F. Install anti-tip bracket onto cutout floor using two ¹⁄₂" screws. A A B C A. ...


