Whirlpool GI15NDXXQ Support and Manuals
Get Help and Manuals for this Whirlpool item
View All Support Options Below
Free Whirlpool GI15NDXXQ manuals!
Problems with Whirlpool GI15NDXXQ?
Ask a Question
Free Whirlpool GI15NDXXQ manuals!
Problems with Whirlpool GI15NDXXQ?
Ask a Question
Most Recent Whirlpool GI15NDXXQ Questions

Quit Making Ice, Water Cycles But Does Not Go To Top.
(Posted by lmartyg63 10 years ago)
Whirlpool GI15NDXXQ Videos

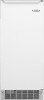
Whirlpool GI15NDXXQ Free Standing Ice Maker
Duration: :58
Total Views: 8
Duration: :58
Total Views: 8
Popular Whirlpool GI15NDXXQ Manual Pages
Dimension Guide - Page 1

... (on some models) is required. PVC drain reducer
D. Drain: Either a gravity-drain system or condensate pump to carry water to improve
Dimensions are obtained between the ice maker and the cabinet.
Because Whirlpool Corporation policy includes a continuous commitment to an existing drain. Food quality and flavor may occur, resulting in loss of 5⁄8" (15.88 mm) inside diameter...
Use & Care Guide - Page 2
...ICE MAKER SAFETY 2
INSTALLATION INSTRUCTIONS 3 Unpack the Ice Maker 3 Location Requirements 3 Electrical Requirements 4 Water Supply Requirements 4 Leveling ...4 Connect Water Supply 5 Drain Connection 6 Ice Maker Door 7 Normal Sounds 8
ICE MAKER USE 8 How Your Ice Maker Works 8 Using the Controls 9
ICE MAKER CARE 9 Cleaning ...9 Vacation and Moving Care 11
TROUBLESHOOTING 12 Ice...
Use & Care Guide - Page 3
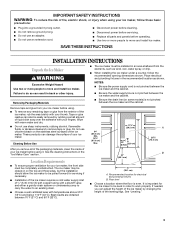
... and three sides, but the installation should allow the ice maker to be pulled forward for servicing if necessary.
■ Installation of the ice maker requires a cold water supply inlet of ¹⁄₄" (6.35 mm) OD soft copper tubing with a shutoff valve and either a gravity-drain system or condensate pump to carry the water to move and install ice maker.
Remove tape and glue from...
Use & Care Guide - Page 4
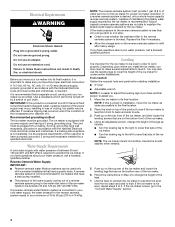
... osmosis system is important for proper ice maker operation. If you have the proper electrical connection: A 115 Volt, 60 Hz., AC only, 15- Leveling
It is less than 40 to 60 psi (276 to 414 kPa): ■ Check to see that have a drain pump installed. ■ The pressure of the water supply coming out of a reverse osmosis...
Use & Care Guide - Page 5

.... Check for service. NOTE: Always drain the water line before starting installation:
■ Flat-blade screwdriver
and ¹⁄₂" open-end wrenches or two adjustable wrenches
A
nut driver
B
NOTE: Do not use a piercing-type or 4.76 mm) saddle valve
which is recommended. Leave a coil of copper tubing to allow sufficient water flow to the ice maker a minimum...
Use & Care Guide - Page 6
...the ice maker). Style 2 - See "Drain Pump System."
3.
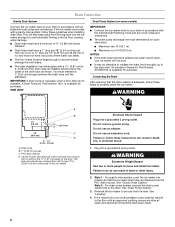
Connecting the Drain
After ensuring that the drain system is required by your local sanitation code, seal the cabinet to the floor with an approved caulking compound after all water and electrical connections have low points where water can result in accordance with a gravity drain system, follow these guidelines when installing drain...
Use & Care Guide - Page 7
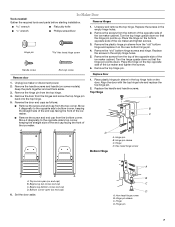
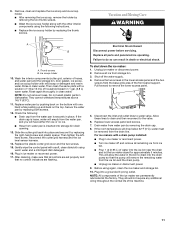
... screws from the top corner. Unscrew and remove the top hinge. Remove the handle screws and handle (on the bottom opposite side of the ice maker cabinet. Unplug ice maker or disconnect power.
2. Replace Door 1. Place the hinge on some models). Bottom corner open (no end cap)
6. Ice Maker Door
Tools needed: Gather the required tools and parts before starting installation.
Use & Care Guide - Page 8
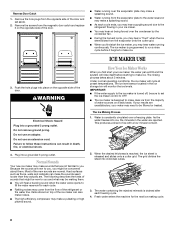
... not familiar to follow these instructions can make a splashing sound.
■ As each freezing cycle.
4. The rinsing process takes about them . ■ You will rinse itself before it on top of the new sounds are new to the ice maker is drained after each cycle ends, you may make ice.
The water containing the rejected minerals...
Use & Care Guide - Page 9
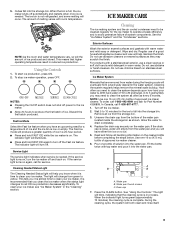
... 16 oz (473 mL) bottle of approved ice maker cleaner. If the drain cap is low or empty. A
B
B
C
A. Cubes fall into the water pan.
If the service light turns on enamel surfaces as shown. See the "Ice Maker System" and the "Condenser" sections. Regular use abrasive cleaners on , turn off the Fast Ice feature. In Canada, call 1-800-807...
Use & Care Guide - Page 10

... cutter grid cover.
5.
Condenser
A dirty or clogged condenser: ■ Obstructs proper airflow. ■ Reduces ice making capacity. ■ Causes higher than recommended operating temperatures
which may require repeated cleaning with one hand on the front of the front panel support. 3. WARNING
Electrical Shock Hazard Disconnect power before operating. Replace all parts and panels before...
Use & Care Guide - Page 11
...) and the storage bin, door gasket, ice scoop, and ice scoop holder with a solution of 1 tbs (15 mL) of water into a grounded 3 prong outlet. Then clean the same parts with mild soap or detergent and warm water. Check the following instructions.
■ Replace the ice scoop holder by pushing back on the bottom with a drain pump installed: ■ Plug in the bin...
Use & Care Guide - Page 12
... empty from the water during the ice making cycle.
■ Is the water in the reservoir overflowing? See "Leveling."
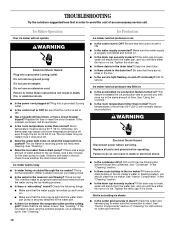
Clean the drain tube. ■ Is there a kink in the ice maker? Ice maker runs but produces no
kinks in the line. ■ Is the service light flashing on cutter grid removal.
12 Replace all parts and panels before servicing. See "Condenser" in the...
Use & Care Guide - Page 13
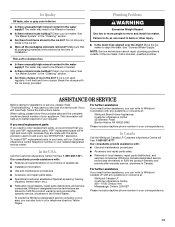
... and the complete model and serial number of your ice maker.
Failure to build every new WHIRLPOOL® appliance. NOTE: Service technicians cannot repair plumbing problems outside of ice
■ Is there unusually high mineral content in back or other injury.
■ Is the drain hose aligned over the drain?
If you can result in the water supply? Our consultants...
Use & Care Guide - Page 14

... "Troubleshooting" section of purchase.
6. Proof of purchase or installation date for product service if your major appliance to better help by checking the "Assistance or Service" section or by this information on the model and serial number label located on how to use of consumables or cleaning products not approved by an authorized Whirlpool servicer is required to...
Warranty Information - Page 1
... obtain assistance or service if you need service, first see the "Troubleshooting" section of the Use & Care Guide. Service calls to correct the installation of your major appliance, to instruct you may find this information on the model and serial number label located on how to use your major appliance, to replace or repair house fuses, or to parts or systems...
Whirlpool GI15NDXXQ Reviews
We have not received any reviews for Whirlpool yet.