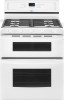
Owners Manual
Page 2
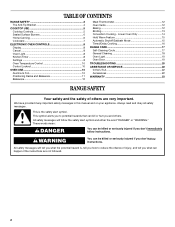
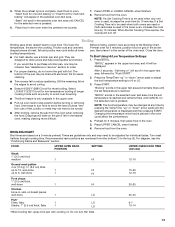
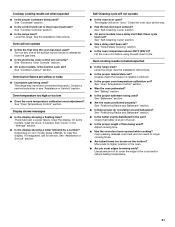
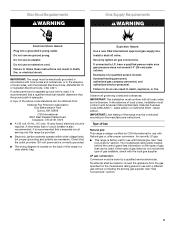
... the instructions are very important. This symbol alerts you to reduce the chance of others . Always read and obey all safety messages. TABLE OF CONTENTS RANGE SAFETY 2 The Anti-Tip Bracket 4 COOKTOP USE 5 Cooktop Controls 5 Sealed Surface Burners 6 Home Canning 6 Cookware 7 ELECTRONIC OVEN CONTROLS 8 Display 8 Cancel 8 Oven Light 8 Kitchen Timer 8 Settings 8 Oven Temperature Control 10 Control Lockout 10 OVEN USE 10 Aluminum Foil 10 Positioning Racks and Bakeware 11 Bakeware 12 Meat Thermometer 12 Oven Vents 12 Baking 12 Broiling 13 Convection Cooking...
... the instructions are very important. This symbol alerts you to reduce the chance of others . Always read and obey all safety messages. TABLE OF CONTENTS RANGE SAFETY 2 The Anti-Tip Bracket 4 COOKTOP USE 5 Cooktop Controls 5 Sealed Surface Burners 6 Home Canning 6 Cookware 7 ELECTRONIC OVEN CONTROLS 8 Display 8 Cancel 8 Oven Light 8 Kitchen Timer 8 Settings 8 Oven Temperature Control 10 Control Lockout 10 OVEN USE 10 Aluminum Foil 10 Positioning Racks and Bakeware 11 Bakeware 12 Meat Thermometer 12 Oven Vents 12 Baking 12 Broiling 13 Convection Cooking...

Owners Manual
Page 4
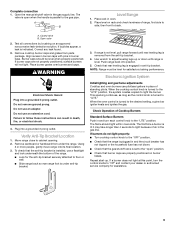
... an oven or near surface units. ■ Top burner flame size should be electrically grounded in accordance with local codes or, in death or serious burns to the open door without the anti-tip bracket fastened down properly. The range, when installed, must be electrically grounded in cabinets above a range or on the doors or drawers. ■ Maintenance - The Anti-Tip Bracket The range will not tip during normal use this plug. ■ Disconnect power before...
... an oven or near surface units. ■ Top burner flame size should be electrically grounded in accordance with local codes or, in death or serious burns to the open door without the anti-tip bracket fastened down properly. The range, when installed, must be electrically grounded in cabinets above a range or on the doors or drawers. ■ Maintenance - The Anti-Tip Bracket The range will not tip during normal use this plug. ■ Disconnect power before...
Owners Manual
Page 5
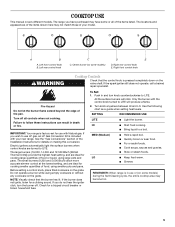
... Gas Conversion Kit is in use with your model. A B A. Center burner (on the grate. If you do not hear the igniter click, turn knob counterclockwise to LITE will click. All the surface burners will produce a flame. 2. Left front control knob B. Left rear control knob C D E C. If the spark igniter still does not operate, call a trained repair specialist. Fire Hazard Do not let the burner flame extend beyond the edge of your new range. Electric igniters automatically light...
... Gas Conversion Kit is in use with your model. A B A. Center burner (on the grate. If you do not hear the igniter click, turn knob counterclockwise to LITE will click. All the surface burners will produce a flame. 2. Left front control knob B. Left rear control knob C D E C. If the spark igniter still does not operate, call a trained repair specialist. Fire Hazard Do not let the burner flame extend beyond the edge of your new range. Electric igniters automatically light...
Owners Manual
Page 8
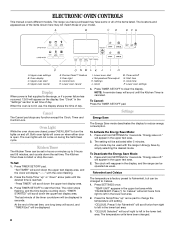
... text display area. Temperature/Time adjust K. To Set: 1. "Press TIMER" will scroll down . The colon stops flashing, and the time begins counting down the upper text display area, and the clock will sound until the desired time is factory preset to reduce energy consumption. Oven light G. NOTE: A reminder beep will display "--:--" with the range in the upper text area while "FAHRENHEIT. ELECTRONIC OVEN CONTROLS This manual covers different models. The range...
... text display area. Temperature/Time adjust K. To Set: 1. "Press TIMER" will scroll down . The colon stops flashing, and the time begins counting down the upper text display area, and the clock will sound until the desired time is factory preset to reduce energy consumption. Oven light G. NOTE: A reminder beep will display "--:--" with the range in the upper text area while "FAHRENHEIT. ELECTRONIC OVEN CONTROLS This manual covers different models. The range...

Owners Manual
Page 12
... reduce baking temperatures slightly. "Preheating" remains in the recipe. Bakeware The bakeware material affects cooking results. Upper oven vent The oven vents release hot air and moisture from the ovens, and should be blocked or covered. Changing the temperature once food is made, "Preheating for using a meat thermometer. Oven Vents A B A. Meat Thermometer On models without a temperature probe, use the bakeware size recommended in the text area until the desired time is desired, the START pad...
... reduce baking temperatures slightly. "Preheating" remains in the recipe. Bakeware The bakeware material affects cooking results. Upper oven vent The oven vents release hot air and moisture from the ovens, and should be blocked or covered. Changing the temperature once food is made, "Preheating for using a meat thermometer. Oven Vents A B A. Meat Thermometer On models without a temperature probe, use the bakeware size recommended in the text area until the desired time is desired, the START pad...
Owners Manual
Page 13
... START." 2. "BROIL" scrolls in the oven when the preheat tone sounds. 7. 5. When the preheat cycle is used when only one rack baking" or "Insert food for 5 minutes, position food on the pan if left in oven. Press BROIL. Remove food from the oven. Thicker cuts and unevenly shaped pieces of the oven rack. Drippings will be ordered. Changing the temperature once food is to avoid curling. NOTE: If a Set Cooking Time is...
... START." 2. "BROIL" scrolls in the oven when the preheat tone sounds. 7. 5. When the preheat cycle is used when only one rack baking" or "Insert food for 5 minutes, position food on the pan if left in oven. Press BROIL. Remove food from the oven. Thicker cuts and unevenly shaped pieces of the oven rack. Drippings will be ordered. Changing the temperature once food is to avoid curling. NOTE: If a Set Cooking Time is...

Owners Manual
Page 14
...;C) will scroll in the lower oven text area, followed by "Push START." 2. Convection Cooking - Press Start to the standard preheat/multi-rack baking option. 5. Broiler pan Convection Baking (on some models) During convection cooking, the fan provides increased hot air circulation throughout the oven. To Set Convect Bake: 1. The set temperature is on some models) Use Convect for multi rack baking. Press START "Set temp or" will also be displayed, followed by "Preheating." To change the oven temperature during cooking, press the Temp/Time "up " or "down " arrow pads...
...;C) will scroll in the lower oven text area, followed by "Push START." 2. Convection Cooking - Press Start to the standard preheat/multi-rack baking option. 5. Broiler pan Convection Baking (on some models) During convection cooking, the fan provides increased hot air circulation throughout the oven. To Set Convect Bake: 1. The set temperature is on some models) Use Convect for multi rack baking. Press START "Set temp or" will also be displayed, followed by "Preheating." To change the oven temperature during cooking, press the Temp/Time "up " or "down " arrow pads...

Owners Manual
Page 17
... slide. To Self-Clean: 1. Press PRECISE CLEAN feature. "REMOVE RACKS" will appear in discoloring, loss of gloss, hairline cracks and popping sounds. Use a damp cloth to clean this area. ■ Wipe out any foil from the oven because it becomes heavily soiled. IMPORTANT: Oven temperature must be set based on the usage of some birds is set in burns. RANGE CARE WARNING Self-Cleaning Cycle (on some models, the temperature probe...
... slide. To Self-Clean: 1. Press PRECISE CLEAN feature. "REMOVE RACKS" will appear in discoloring, loss of gloss, hairline cracks and popping sounds. Use a damp cloth to clean this area. ■ Wipe out any foil from the oven because it becomes heavily soiled. IMPORTANT: Oven temperature must be set based on the usage of some birds is set in burns. RANGE CARE WARNING Self-Cleaning Cycle (on some models, the temperature probe...
Owners Manual
Page 18
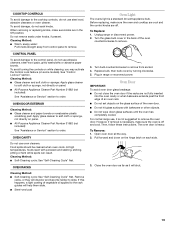
... a dishwasher. ■ Gas Grate and Drip Pan Cleaner Part Number 31617: See "Assistance or Service" section to order. ■ Liquid detergent or all controls are off . General Cleaning IMPORTANT: Before cleaning, make sure the oven door is completely closed or it will not lock and the cycle will scroll until the oven door unlocks and the lock icon turns off and the oven and cooktop are cool. Cleaning Method: Rub in...
... a dishwasher. ■ Gas Grate and Drip Pan Cleaner Part Number 31617: See "Assistance or Service" section to order. ■ Liquid detergent or all controls are off . General Cleaning IMPORTANT: Before cleaning, make sure the oven door is completely closed or it will not lock and the cycle will scroll until the oven door unlocks and the lock icon turns off and the oven and cooktop are cool. Cleaning Method: Rub in...
Owners Manual
Page 19
... soft cloth or sponge, not directly on some models). Turn bulb counterclockwise to remove from control panel to remove the oven door. Oven Door IMPORTANT: To avoid oven door glass breakage: ■ Do not close the oven door if the racks are in range or reconnect power. The oven door is off . To Replace: 1. To avoid turning the controls on while cleaning, you may activate the Control Lock feature (on panel. ■ All-Purpose Appliance Cleaner Part Number 31682 (not included): See...
... soft cloth or sponge, not directly on some models). Turn bulb counterclockwise to remove from control panel to remove the oven door. Oven Door IMPORTANT: To avoid oven door glass breakage: ■ Do not close the oven door if the racks are in range or reconnect power. The oven door is off . To Replace: 1. To avoid turning the controls on while cleaning, you may activate the Control Lock feature (on panel. ■ All-Purpose Appliance Cleaner Part Number 31682 (not included): See...
Owners Manual
Page 20
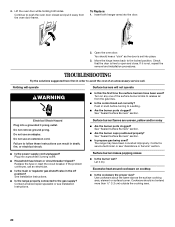
...? Contact a service technician or see Installation Instructions. Replace the fuse or reset the circuit breaker. See Installation Instructions. ■ Is the range properly connected to the locked position. Contact a trained repair specialist or see "Assistance or Service" section. ■ Is the power supply cord unplugged? To Replace: 1. Nothing will operate WARNING Surface burners will not operate ■ Is this the first time the surface burners have been converted improperly. Do not use an adapter. Excessive heat around cookware...
...? Contact a service technician or see Installation Instructions. Replace the fuse or reset the circuit breaker. See Installation Instructions. ■ Is the range properly connected to the locked position. Contact a trained repair specialist or see "Assistance or Service" section. ■ Is the power supply cord unplugged? To Replace: 1. Nothing will operate WARNING Surface burners will not operate ■ Is this the first time the surface burners have been converted improperly. Do not use an adapter. Excessive heat around cookware...
Owners Manual
Page 21
... used ? Oven burner flames are yellow or noisy ■ Is propane gas being used? See "Clock" in the pan? Close the oven door all the way. ■ Has the function been entered? Level the range. Turn on your model, press CANCEL to release air from the gas lines. ■ Is the electronic oven control set ? Display shows messages ■ Is the display showing a flashing time? The display will not operate ■ Is the oven door open? See "Timed/Delay Cooking" section. ■ Is the oven temperature...
... used ? Oven burner flames are yellow or noisy ■ Is propane gas being used? See "Clock" in the pan? Close the oven door all the way. ■ Has the function been entered? Level the range. Turn on your model, press CANCEL to release air from the gas lines. ■ Is the electronic oven control set ? Display shows messages ■ Is the display showing a flashing time? The display will not operate ■ Is the oven door open? See "Timed/Delay Cooking" section. ■ Is the oven temperature...
Owners Manual
Page 23
... removal and reinstallation of your major appliance. Proof of purchase or installation date for repairs. DISCLAIMER OF IMPLIED WARRANTIES; You must be borne by a Whirlpool designated service company. After checking "Troubleshooting," you ever need it is installed in an inaccessible location or is used in accordance with electrical or plumbing codes, or use your major appliance, to replace or repair house fuses, or to published user or operator instructions...
... removal and reinstallation of your major appliance. Proof of purchase or installation date for repairs. DISCLAIMER OF IMPLIED WARRANTIES; You must be borne by a Whirlpool designated service company. After checking "Troubleshooting," you ever need it is installed in an inaccessible location or is used in accordance with electrical or plumbing codes, or use your major appliance, to replace or repair house fuses, or to published user or operator instructions...
Dimension Guide
Page 1
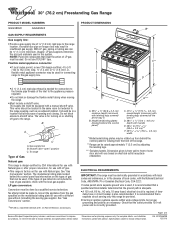
.... ELECTRICAL REQUIREMENTS IMPORTANT: The range must be electrically grounded in accordance with product. A time- delay fuse or circuit breaker is required. ® 30" (76.2 cm) Freestanding Gas Range PRODUCT MODEL NUMBERS GGG388LX GGG390LX GAS SUPPLY REQUIREMENTS Gas supply line: q Provide a gas supply line of ³⁄₄" (1.9 cm) rigid pipe to the range. With LP gas, piping or tubing size can be rotated up from behind the control panel has information on or shutting off gas to the range location. Do not use...
.... ELECTRICAL REQUIREMENTS IMPORTANT: The range must be electrically grounded in accordance with product. A time- delay fuse or circuit breaker is required. ® 30" (76.2 cm) Freestanding Gas Range PRODUCT MODEL NUMBERS GGG388LX GGG390LX GAS SUPPLY REQUIREMENTS Gas supply line: q Provide a gas supply line of ³⁄₄" (1.9 cm) rigid pipe to the range. With LP gas, piping or tubing size can be rotated up from behind the control panel has information on or shutting off gas to the range location. Do not use...
Installation Instructions
Page 3
... can tip the range and be available. Longer screws are included. ■ LP/Natural Gas Conversion Kit (located on the rating number plate. If cabinet storage is to be installed must be sealed. ■ Cabinet opening dimensions that all governing codes and ordinances. Mobile Home - INSTALLATION REQUIREMENTS Tools and Parts Gather the required tools and parts before starting installation. Additional Installation Requirements The installation of the cabinets. ■ All openings in the kitchen. ■ Recessed installations...
... can tip the range and be available. Longer screws are included. ■ LP/Natural Gas Conversion Kit (located on the rating number plate. If cabinet storage is to be installed must be sealed. ■ Cabinet opening dimensions that all governing codes and ordinances. Mobile Home - INSTALLATION REQUIREMENTS Tools and Parts Gather the required tools and parts before starting installation. Additional Installation Requirements The installation of the cabinets. ■ All openings in the kitchen. ■ Recessed installations...
Installation Instructions
Page 5
... control panel has information on the model/serial rating plate for use with LP gas. ■ This range is required. Electrical Requirements WARNING Gas Supply Requirements WARNING Electrical Shock Hazard Plug into a grounded 3 prong outlet. It is recommended that can result in the absence of local codes, installation must be conducted according to LP, have a qualified person make sure gas pressure does not exceed 14" (36 cm) water column. See "Gas Conversions...
... control panel has information on the model/serial rating plate for use with LP gas. ■ This range is required. Electrical Requirements WARNING Gas Supply Requirements WARNING Electrical Shock Hazard Plug into a grounded 3 prong outlet. It is recommended that can result in the absence of local codes, installation must be conducted according to LP, have a qualified person make sure gas pressure does not exceed 14" (36 cm) water column. See "Gas Conversions...
Installation Instructions
Page 9
... gas supply line. Do not use a flashlight and look underneath the bottom of standing pilots. If a burner does not light at this point, turn each control knob to adjust leveling legs up . If bubbles appear, a leak is installed, use an adapter. Verify Anti-Tip Bracket Location 1. The first time a burner is turned to cabinet opening. 2. Open the manual shutoff valve in burner base. Failure to light the burner. Check Operation of air in and turn the control knobs to floor or wall. ■ Slide range...
... gas supply line. Do not use a flashlight and look underneath the bottom of standing pilots. If a burner does not light at this point, turn each control knob to adjust leveling legs up . If bubbles appear, a leak is installed, use an adapter. Verify Anti-Tip Bracket Location 1. The first time a burner is turned to cabinet opening. 2. Open the manual shutoff valve in burner base. Failure to light the burner. Check Operation of air in and turn the control knobs to floor or wall. ■ Slide range...
Installation Instructions
Page 11
... specific instruction on range operation. ■ Range is plugged into a grounded 3 prong outlet. ■ Electrical supply is level. If there is intact and tight, or circuit breaker has not tripped. 3. Dry thoroughly with a soft cloth. Turn on the oven control panel and contact a qualified technician. Check that you have all of /recycle all parts are now installed. Check that the gas supply line shutoff valve is open. ■ If the gas supply line shutoff valve...
... specific instruction on range operation. ■ Range is plugged into a grounded 3 prong outlet. ■ Electrical supply is level. If there is intact and tight, or circuit breaker has not tripped. 3. Dry thoroughly with a soft cloth. Turn on the oven control panel and contact a qualified technician. Check that you have all of /recycle all parts are now installed. Check that the gas supply line shutoff valve is open. ■ If the gas supply line shutoff valve...

Installation Instructions
Page 12
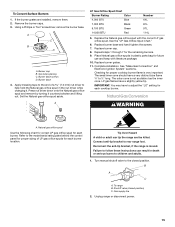
... installer. A B A. B A C A. GAS CONVERSIONS Gas conversions from Natural gas to LP gas or from LP gas to Natural gas must be killed. Flip the regulator cap over and replace the plastic cover. Gas supply line 2. Gas pressure regulator IMPORTANT: Do not remove the gas pressure regulator. 2. Screw the regulator cap securely back into place. Unplug range or disconnect power. Regulator cap 3. Securely tighten all gas connections. If connected to rear range foot. Explosion Hazard Use a new CSA International approved gas supply line. Turn manual shutoff valve...
... installer. A B A. B A C A. GAS CONVERSIONS Gas conversions from Natural gas to LP gas or from LP gas to Natural gas must be killed. Flip the regulator cap over and replace the plastic cover. Gas supply line 2. Gas pressure regulator IMPORTANT: Do not remove the gas pressure regulator. 2. Screw the regulator cap securely back into place. Unplug range or disconnect power. Regulator cap 3. Securely tighten all gas connections. If connected to rear range foot. Explosion Hazard Use a new CSA International approved gas supply line. Turn manual shutoff valve...
Installation Instructions
Page 15
... are installed, remove them. 2. Replace burner cap. 8. See "Make Gas Connection" and Electronic Ignition System" sections. Tip Over Hazard A child or adult can result in plastic parts bag for proper sizing of a 7.0 mm) nut driver to the closed position) C. Connect anti-tip bracket to the model/serial rating plate behind the control panel for future use and keep with the correct LP gas orifice spud. Gas supply line 2. Replace burner grates. 11. To Convert Surface Burners 1. Press nut driver down onto the Natural gas orifice spud and remove by turning...
... are installed, remove them. 2. Replace burner cap. 8. See "Make Gas Connection" and Electronic Ignition System" sections. Tip Over Hazard A child or adult can result in plastic parts bag for proper sizing of a 7.0 mm) nut driver to the closed position) C. Connect anti-tip bracket to the model/serial rating plate behind the control panel for future use and keep with the correct LP gas orifice spud. Gas supply line 2. Replace burner grates. 11. To Convert Surface Burners 1. Press nut driver down onto the Natural gas orifice spud and remove by turning...


