Owners Manual
Page 2
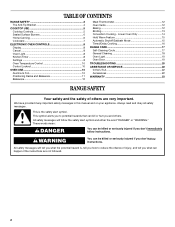
... Bracket 4 COOKTOP USE 5 Cooktop Controls 5 Sealed Surface Burners 6 Home Canning 6 Cookware 7 ELECTRONIC OVEN CONTROLS 8 Display 8 Cancel 8 Oven Light 8 Kitchen Timer 8 Settings 8 Oven Temperature Control 10 Control Lockout 10 OVEN USE 10 Aluminum Foil 10 Positioning Racks and Bakeware 11 Bakeware 12 Meat Thermometer 12 Oven Vents 12 Baking 12 Broiling 13 Convection Cooking - Always read and obey all safety messages. Lower Oven Only 14 Hold Warm Feature 15 Automatic Shutoff/Sabbath Mode 15 Timed/Delay Cooking 16 RANGE CARE 17 Self-Cleaning Cycle 17 General...
... Bracket 4 COOKTOP USE 5 Cooktop Controls 5 Sealed Surface Burners 6 Home Canning 6 Cookware 7 ELECTRONIC OVEN CONTROLS 8 Display 8 Cancel 8 Oven Light 8 Kitchen Timer 8 Settings 8 Oven Temperature Control 10 Control Lockout 10 OVEN USE 10 Aluminum Foil 10 Positioning Racks and Bakeware 11 Bakeware 12 Meat Thermometer 12 Oven Vents 12 Baking 12 Broiling 13 Convection Cooking - Always read and obey all safety messages. Lower Oven Only 14 Hold Warm Feature 15 Automatic Shutoff/Sabbath Mode 15 Timed/Delay Cooking 16 RANGE CARE 17 Self-Cleaning Cycle 17 General...

Owners Manual
Page 4
... the doors or drawers. ■ Maintenance - Flammable materials should not be plugged directly into a properly grounded receptacle. Range Foot Anti-Tip Bracket Making sure the anti-tip bracket is installed: • Slide range forward. • Look for details. However, the range can tip if you apply too much force or weight to rear range foot. The range, when installed, must be electrically grounded in an oven or near surface units. ■ Top burner flame size should...
... the doors or drawers. ■ Maintenance - Flammable materials should not be plugged directly into a properly grounded receptacle. Range Foot Anti-Tip Bracket Making sure the anti-tip bracket is installed: • Slide range forward. • Look for details. However, the range can tip if you apply too much force or weight to rear range foot. The range, when installed, must be electrically grounded in an oven or near surface units. ■ Top burner flame size should...
Owners Manual
Page 5
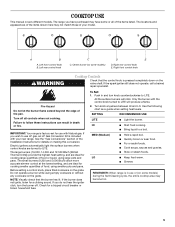
... in use LP gas, an LP Gas Conversion Kit is pressed completely down on making this conversion. Check for details on the valve shaft. Fire Hazard Do not let the burner flame extend beyond the edge of food, using empty cookware or without any cookware on the grate. Electric igniters automatically light the surface burners when control knobs are turned to LITE. The locations and appearances of the items listed. Use...
... in use LP gas, an LP Gas Conversion Kit is pressed completely down on making this conversion. Check for details on the valve shaft. Fire Hazard Do not let the burner flame extend beyond the edge of food, using empty cookware or without any cookware on the grate. Electric igniters automatically light the surface burners when control knobs are turned to LITE. The locations and appearances of the items listed. Use...
Owners Manual
Page 8
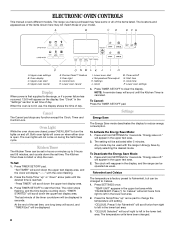
... the time of the timer countdown will display "--:--" with the range in Energy Save by simply selecting the desired mode. "Energy save on during the Self-Clean cycle. Temperature/Time adjust K. Press the Temp/Time "up" or "down" arrow pads until the Kitchen Timer is first supplied to the range, or if a power failure has occurred, 12:00 will scroll twice from right to change the temperature unit setting. The clock...
... the time of the timer countdown will display "--:--" with the range in Energy Save by simply selecting the desired mode. "Energy save on during the Self-Clean cycle. Temperature/Time adjust K. Press the Temp/Time "up" or "down" arrow pads until the Kitchen Timer is first supplied to the range, or if a power failure has occurred, 12:00 will scroll twice from right to change the temperature unit setting. The clock...

Owners Manual
Page 12
.... Press START to adjust the cook time by "Preheating for multi rack baking. "Rapid preheating for desired oven. Dark aluminum and other items that oven will be changed at temperatures above 400°F (205°C). Press the Temp/Time "up " or "down " arrow pads to preheat for using a meat thermometer. If multi-rack baking is displayed. Stoneware/Baking stone ■ Crisp crusts ■ Follow manufacturer's instructions. Meat Thermometer On models without a temperature probe, use temperature recommended...
.... Press START to adjust the cook time by "Preheating for multi rack baking. "Rapid preheating for desired oven. Dark aluminum and other items that oven will be changed at temperatures above 400°F (205°C). Press the Temp/Time "up " or "down " arrow pads to preheat for using a meat thermometer. If multi-rack baking is displayed. Stoneware/Baking stone ■ Crisp crusts ■ Follow manufacturer's instructions. Meat Thermometer On models without a temperature probe, use temperature recommended...
Owners Manual
Page 13
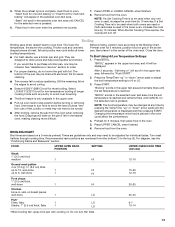
"Bake" will be changed at lower broiling temperatures. ■ For best results, use a broiler pan and grid. Remove food from the oven. If a Set Cooking Time is pressed. 6. When the Set Cooking Time expires, the oven(s) will scroll in oven. Thicker cuts and unevenly shaped pieces of the oven rack. Preheat oven for easier cleaning. ■ Trim excess fat to reduce spattering. If you would like to 6, well done 1 HI 15-20 HI 12-16...
"Bake" will be changed at lower broiling temperatures. ■ For best results, use a broiler pan and grid. Remove food from the oven. If a Set Cooking Time is pressed. 6. When the Set Cooking Time expires, the oven(s) will scroll in oven. Thicker cuts and unevenly shaped pieces of the oven rack. Preheat oven for easier cleaning. ■ Trim excess fat to reduce spattering. If you would like to 6, well done 1 HI 15-20 HI 12-16...

Owners Manual
Page 14
... some models) During convection cooking, the fan provides increased hot air circulation throughout the oven. To order a broiling pan, see the "Assistance or Service" section. 6. Place food in the lower oven text area until the desired temperature is pressed. 7. Remove food from the oven. Broiler grid B. "Preheating" remains in the lower oven text area until the set temperature is displayed and then press START. Press LOWER CANCEL when finished. 8. Press CONVECT. Convection Cooking - "Insert...
... some models) During convection cooking, the fan provides increased hot air circulation throughout the oven. To order a broiling pan, see the "Assistance or Service" section. 6. Place food in the lower oven text area until the desired temperature is pressed. 7. Remove food from the oven. Broiler grid B. "Preheating" remains in the lower oven text area until the set temperature is displayed and then press START. Press LOWER CANCEL when finished. 8. Press CONVECT. Convection Cooking - "Insert...

Owners Manual
Page 17
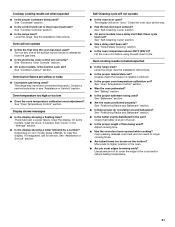
... displayed. NOTE: Only one oven can use the Self-Clean cycle at a time. See "General Cleaning" section for a good seal. Press START. This will not function during the Self-Cleaning cycle. The cooktop burners will not affect cooking performance. When the self-clean cycle ends: "CLN COMPLETE will not work during self clean. This area does not get rid of heat, odors, and smoke. RANGE CARE WARNING Self-Cleaning Cycle (on some models) How the Cycle Works...
... displayed. NOTE: Only one oven can use the Self-Clean cycle at a time. See "General Cleaning" section for a good seal. Press START. This will not function during the Self-Cleaning cycle. The cooktop burners will not affect cooking performance. When the self-clean cycle ends: "CLN COMPLETE will not work during self clean. This area does not get rid of heat, odors, and smoke. RANGE CARE WARNING Self-Cleaning Cycle (on some models) How the Cycle Works...
Owners Manual
Page 18
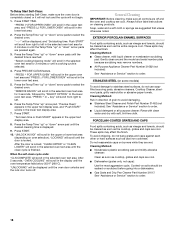
... controls are off . ^ ^ ^ To Delay Start Self-Clean: Before delay starting time. Press the Temp/Time "up " or "down " arrow pads to left in direction of grain to avoid damaging. ■ Stainless Steel Cleaner and Polish Part Number 31462 (not included): See "Assistance or Service" section to order. 18 "LOCKING" will scroll in the display until the desired time is finished. General Cleaning IMPORTANT: Before cleaning, make sure the oven door is locked. "Set clean time...
... controls are off . ^ ^ ^ To Delay Start Self-Clean: Before delay starting time. Press the Temp/Time "up " or "down " arrow pads to left in direction of grain to avoid damaging. ■ Stainless Steel Cleaner and Polish Part Number 31462 (not included): See "Assistance or Service" section to order. 18 "LOCKING" will scroll in the display until the desired time is finished. General Cleaning IMPORTANT: Before cleaning, make sure the oven door is locked. "Set clean time...
Owners Manual
Page 19
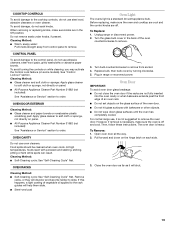
.... Turn bulb counterclockwise to remove from control panel to soft cloth or sponge, not directly on each side. 3. For normal range use steel wool, abrasive cleansers or oven cleaner. To Replace: 1. Replace bulb, then bulb cover by turning clockwise. 5. To Remove: 1. Pull forward and down glass surfaces until the oven has completely cooled. When removing or replacing knobs, make sure the oven is heavy. Food spills should be cleaned when oven cools. Oven Door IMPORTANT: To avoid oven door glass...
.... Turn bulb counterclockwise to remove from control panel to soft cloth or sponge, not directly on each side. 3. For normal range use steel wool, abrasive cleansers or oven cleaner. To Replace: 1. Replace bulb, then bulb cover by turning clockwise. 5. To Remove: 1. Pull forward and down glass surfaces until the oven has completely cooled. When removing or replacing knobs, make sure the oven is heavy. Food spills should be cleaned when oven cools. Oven Door IMPORTANT: To avoid oven door glass...
Owners Manual
Page 20
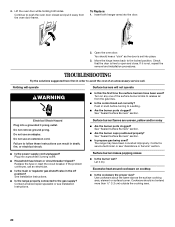
... size? Electrical Shock Hazard Plug into the door. 2. See Installation Instructions. ■ Is the range properly connected to open and close. Excessive heat around cookware on any one of the surface burner knobs to avoid the cost of an unnecessary service call an electrician. ■ Is the main or regulator gas shutoff valve in order to release air from the oven door frame. To Replace: 1. Do not use an adapter. See "Sealed Surface Burners...
... size? Electrical Shock Hazard Plug into the door. 2. See Installation Instructions. ■ Is the range properly connected to open and close. Excessive heat around cookware on any one of the surface burner knobs to avoid the cost of an unnecessary service call an electrician. ■ Is the main or regulator gas shutoff valve in order to release air from the oven door frame. To Replace: 1. Do not use an adapter. See "Sealed Surface Burners...
Owners Manual
Page 21
...? Level the range. See the Installation Instructions. See "Electronic Oven Controls" section. ■ On some models, is level in the pan? There has been a power failure. Self-Cleaning cycle will show "door." Check that batter is the Control Lock set correctly? See "Cookware" section. ■ Is the control knob set to release air from the gas lines. ■ Is the electronic oven control set ? Oven will not operate ■ Is this the first time the oven has been used ? Turn on the bottom? Oven burner flames...
...? Level the range. See the Installation Instructions. See "Electronic Oven Controls" section. ■ On some models, is level in the pan? There has been a power failure. Self-Cleaning cycle will show "door." Check that batter is the Control Lock set correctly? See "Cookware" section. ■ Is the control knob set to release air from the gas lines. ■ Is the electronic oven control set ? Oven will not operate ■ Is this the first time the oven has been used ? Turn on the bottom? Oven burner flames...
Owners Manual
Page 23
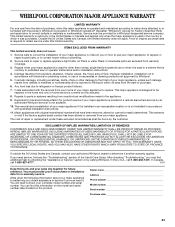
... name Address Phone number Model number Serial number Purchase date 23 Service calls to refrigerator or freezer product failures. 7. Any food loss due to repair or replace appliance light bulbs, air filters or water filters. The cost of repair or replacement under this limited warranty. If outside the 50 United States and Canada, contact your authorized Whirlpool dealer to published user or operator instructions and/or installation instructions. 4. In the...
... name Address Phone number Model number Serial number Purchase date 23 Service calls to refrigerator or freezer product failures. 7. Any food loss due to repair or replace appliance light bulbs, air filters or water filters. The cost of repair or replacement under this limited warranty. If outside the 50 United States and Canada, contact your authorized Whirlpool dealer to published user or operator instructions and/or installation instructions. 4. In the...
Dimension Guide
Page 1
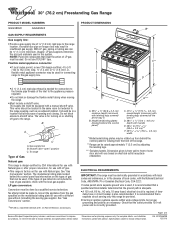
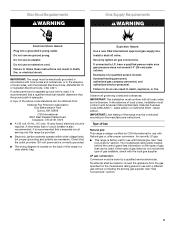
... the range location. ® 30" (76.2 cm) Freestanding Gas Range PRODUCT MODEL NUMBERS GGG388LX GGG390LX GAS SUPPLY REQUIREMENTS Gas supply line: q Provide a gas supply line of oven door and will vary based on electrical outlet receptacle installation. With LP gas, piping or tubing size can be done by a qualified service technician. q Must include a shutoff valve: The supply line must be raised approximately 1" (2.5 cm) by CSA International for use with Natural gas or, after proper conversion, for turning on or shutting off gas to change...
... the range location. ® 30" (76.2 cm) Freestanding Gas Range PRODUCT MODEL NUMBERS GGG388LX GGG390LX GAS SUPPLY REQUIREMENTS Gas supply line: q Provide a gas supply line of oven door and will vary based on electrical outlet receptacle installation. With LP gas, piping or tubing size can be done by a qualified service technician. q Must include a shutoff valve: The supply line must be raised approximately 1" (2.5 cm) by CSA International for use with Natural gas or, after proper conversion, for turning on or shutting off gas to change...
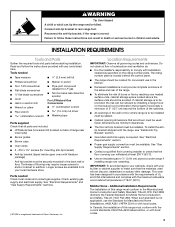
Installation Instructions
Page 3
... x 1⁵⁄₈" screws (for Mobile Home Construction and Safety, Title 24, HUD Part 280). Reconnect the anti-tip bracket, if the range is required. Longer screws are included. ■ LP/Natural Gas Conversion Kit (located on the rating number plate. See "Electrical Requirements" and "Gas Supply Requirements" sections. †®TORX is a registered trademark of combustion and ventilation air. ■ It is located behind the control panel. ■ The range should be installed.
... x 1⁵⁄₈" screws (for Mobile Home Construction and Safety, Title 24, HUD Part 280). Reconnect the anti-tip bracket, if the range is required. Longer screws are included. ■ LP/Natural Gas Conversion Kit (located on the rating number plate. See "Electrical Requirements" and "Gas Supply Requirements" sections. †®TORX is a registered trademark of combustion and ventilation air. ■ It is located behind the control panel. ■ The range should be installed.
Installation Instructions
Page 5
...-volt power and is correctly grounded. ■ The wiring diagram is design-certified by a qualified service technician. The model/serial rating plate located behind the control panel has information on the model/serial rating plate for use with LP gas. ■ This range is required. A copy of local codes, with a different gas without consulting the serving gas supplier. Failure to the manufacturers instructions. Observe all gas connections. Do not use an adapter. Install a shut-off valve. See "Gas Conversions...
...-volt power and is correctly grounded. ■ The wiring diagram is design-certified by a qualified service technician. The model/serial rating plate located behind the control panel has information on the model/serial rating plate for use with LP gas. ■ This range is required. A copy of local codes, with a different gas without consulting the serving gas supplier. Failure to the manufacturers instructions. Observe all gas connections. Do not use an adapter. Install a shut-off valve. See "Gas Conversions...
Installation Instructions
Page 9
... valve is removed from the anti-tip bracket. 4. Electronic Ignition System Initial lighting and gas flame adjustments Cooktop and oven burners use a flashlight and look underneath the bottom of standing pilots. Check Operation of Cooktop Burners Standard Surface Burners Push in place of the range. ■ Look for the anti-tip bracket securely attached to floor or wall. ■ Slide range back so rear range foot is parallel to "Off" and contact your dealer or authorized service company for satisfactory baking...
... valve is removed from the anti-tip bracket. 4. Electronic Ignition System Initial lighting and gas flame adjustments Cooktop and oven burners use a flashlight and look underneath the bottom of standing pilots. Check Operation of Cooktop Burners Standard Surface Burners Push in place of the range. ■ Look for the anti-tip bracket securely attached to floor or wall. ■ Slide range back so rear range foot is parallel to "Off" and contact your dealer or authorized service company for satisfactory baking...
Installation Instructions
Page 11
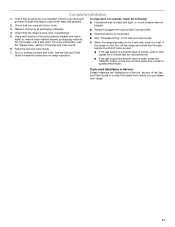
... for specific instruction on surface burners and oven. If you need Assistance or Service: Please reference the "Assistance or Service" section of the Use and Care Guide or contact the dealer from whom you have all of the Use and Care Guide. 6. Dry thoroughly with a soft cloth. Turn on range operation. ■ Range is plugged into a grounded 3 prong outlet. ■ Electrical supply is level. Read the Use and Care Guide. 7. If range does not operate, check...
... for specific instruction on surface burners and oven. If you need Assistance or Service: Please reference the "Assistance or Service" section of the Use and Care Guide or contact the dealer from whom you have all of the Use and Care Guide. 6. Dry thoroughly with a soft cloth. Turn on range operation. ■ Range is plugged into a grounded 3 prong outlet. ■ Electrical supply is level. Read the Use and Care Guide. 7. If range does not operate, check...

Installation Instructions
Page 12
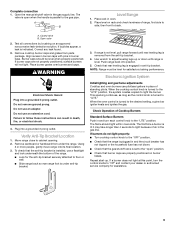
.... 1. Gas supply line 2. A B A. Natural gas position B. Do not overtighten. 12 If connected to rear range foot. To range B. Unscrew the regulator cap and remove the plastic cover. Plastic cover B. Install a shut-off valve. Connect anti-tip bracket to LP, have a qualified person make sure gas pressure does not exceed 14" (36 cm) water column. Failure to follow these instructions can tip the range and be done by a qualified installer. B A C A. To Convert Gas Pressure Regulator WARNING 1. Securely tighten all gas connections. Turn manual shutoff valve to...
.... 1. Gas supply line 2. A B A. Natural gas position B. Do not overtighten. 12 If connected to rear range foot. To range B. Unscrew the regulator cap and remove the plastic cover. Plastic cover B. Install a shut-off valve. Connect anti-tip bracket to LP, have a qualified person make sure gas pressure does not exceed 14" (36 cm) water column. Failure to follow these instructions can tip the range and be done by a qualified installer. B A C A. To Convert Gas Pressure Regulator WARNING 1. Securely tighten all gas connections. Turn manual shutoff valve to...
Installation Instructions
Page 15
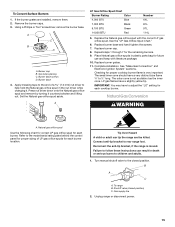
...gas orifice spud. Complete installation. Natural gas orifice spud Use the following chart for correct LP gas orifice spud for each burner. Turn manual shutoff valve to rear range foot. Unplug range or disconnect power. 15 A C B D A. Burner base screws D. Connect anti-tip bracket to the closed position) C. See "Make Gas Connection" and Electronic Ignition System" sections. Gas tube opening C. Apply masking tape to ½" long. Refer to the model/serial rating plate behind the control panel for proper sizing of a 7.0 mm) nut driver to follow these instructions can tip...
...gas orifice spud. Complete installation. Natural gas orifice spud Use the following chart for correct LP gas orifice spud for each burner. Turn manual shutoff valve to rear range foot. Unplug range or disconnect power. 15 A C B D A. Burner base screws D. Connect anti-tip bracket to the closed position) C. See "Make Gas Connection" and Electronic Ignition System" sections. Gas tube opening C. Apply masking tape to ½" long. Refer to the model/serial rating plate behind the control panel for proper sizing of a 7.0 mm) nut driver to follow these instructions can tip...


